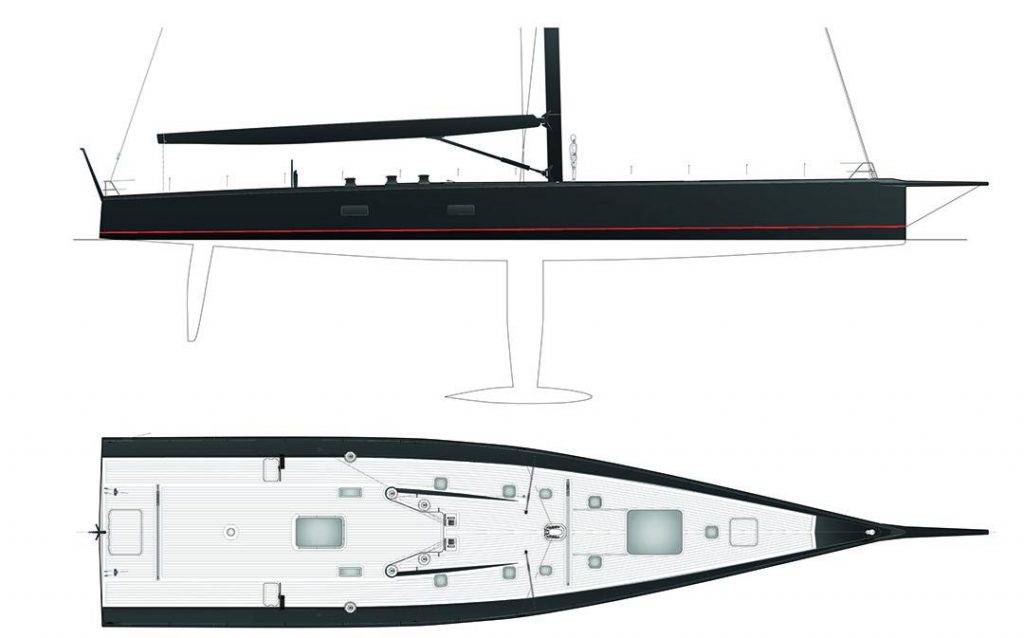
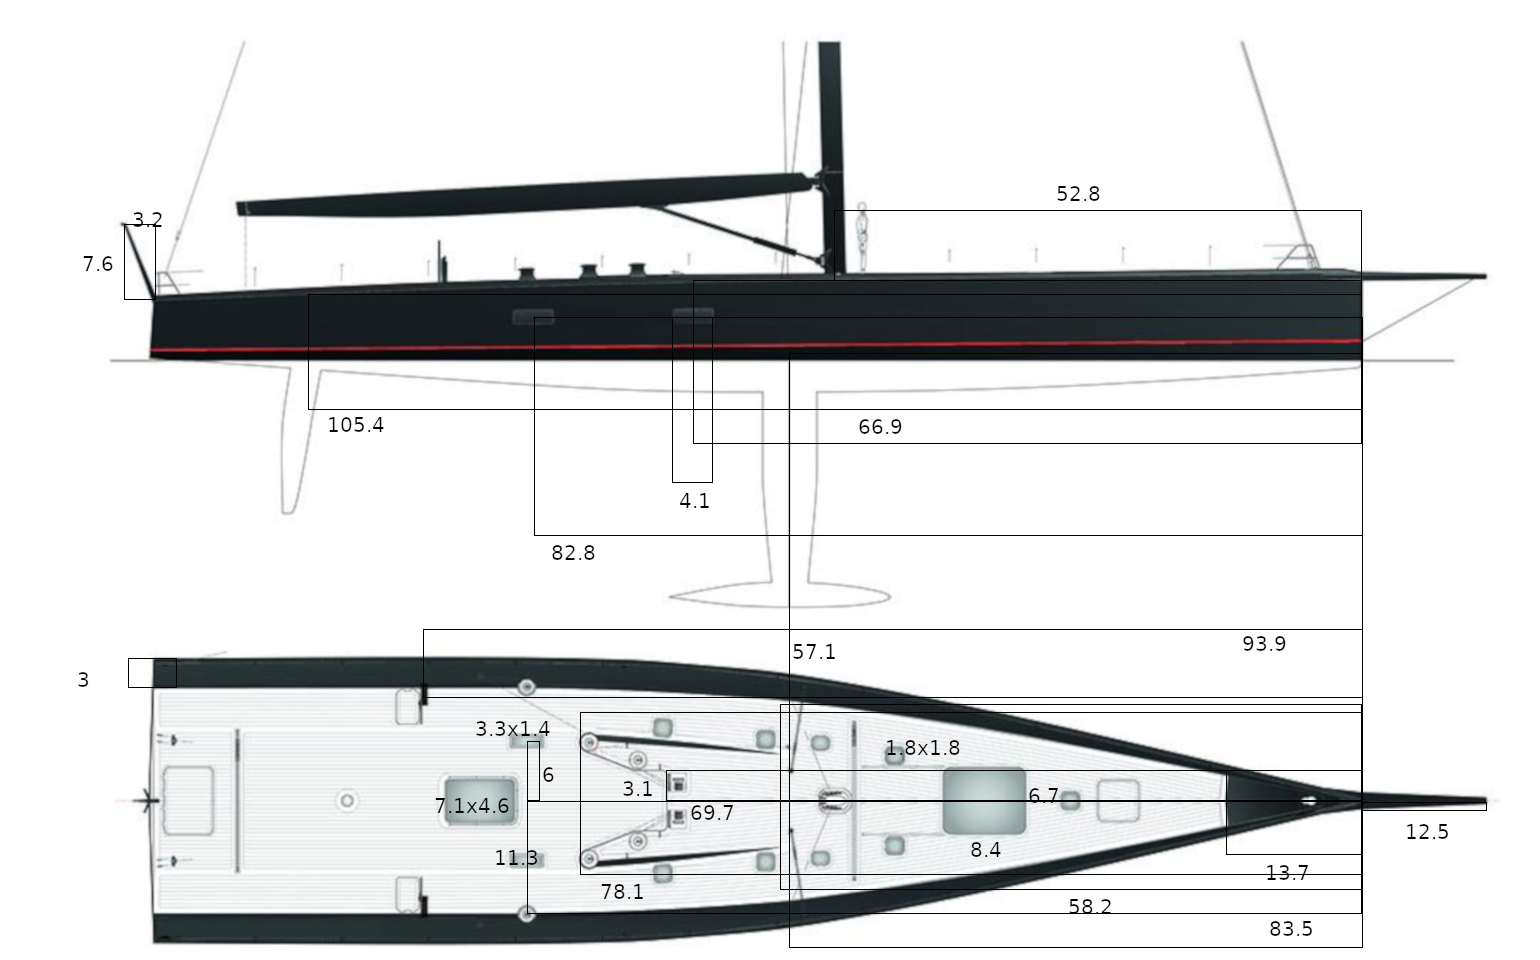
This project aims to create a 1:25 Wally 100 Tango model: LOA=1219mm, beam=288mm
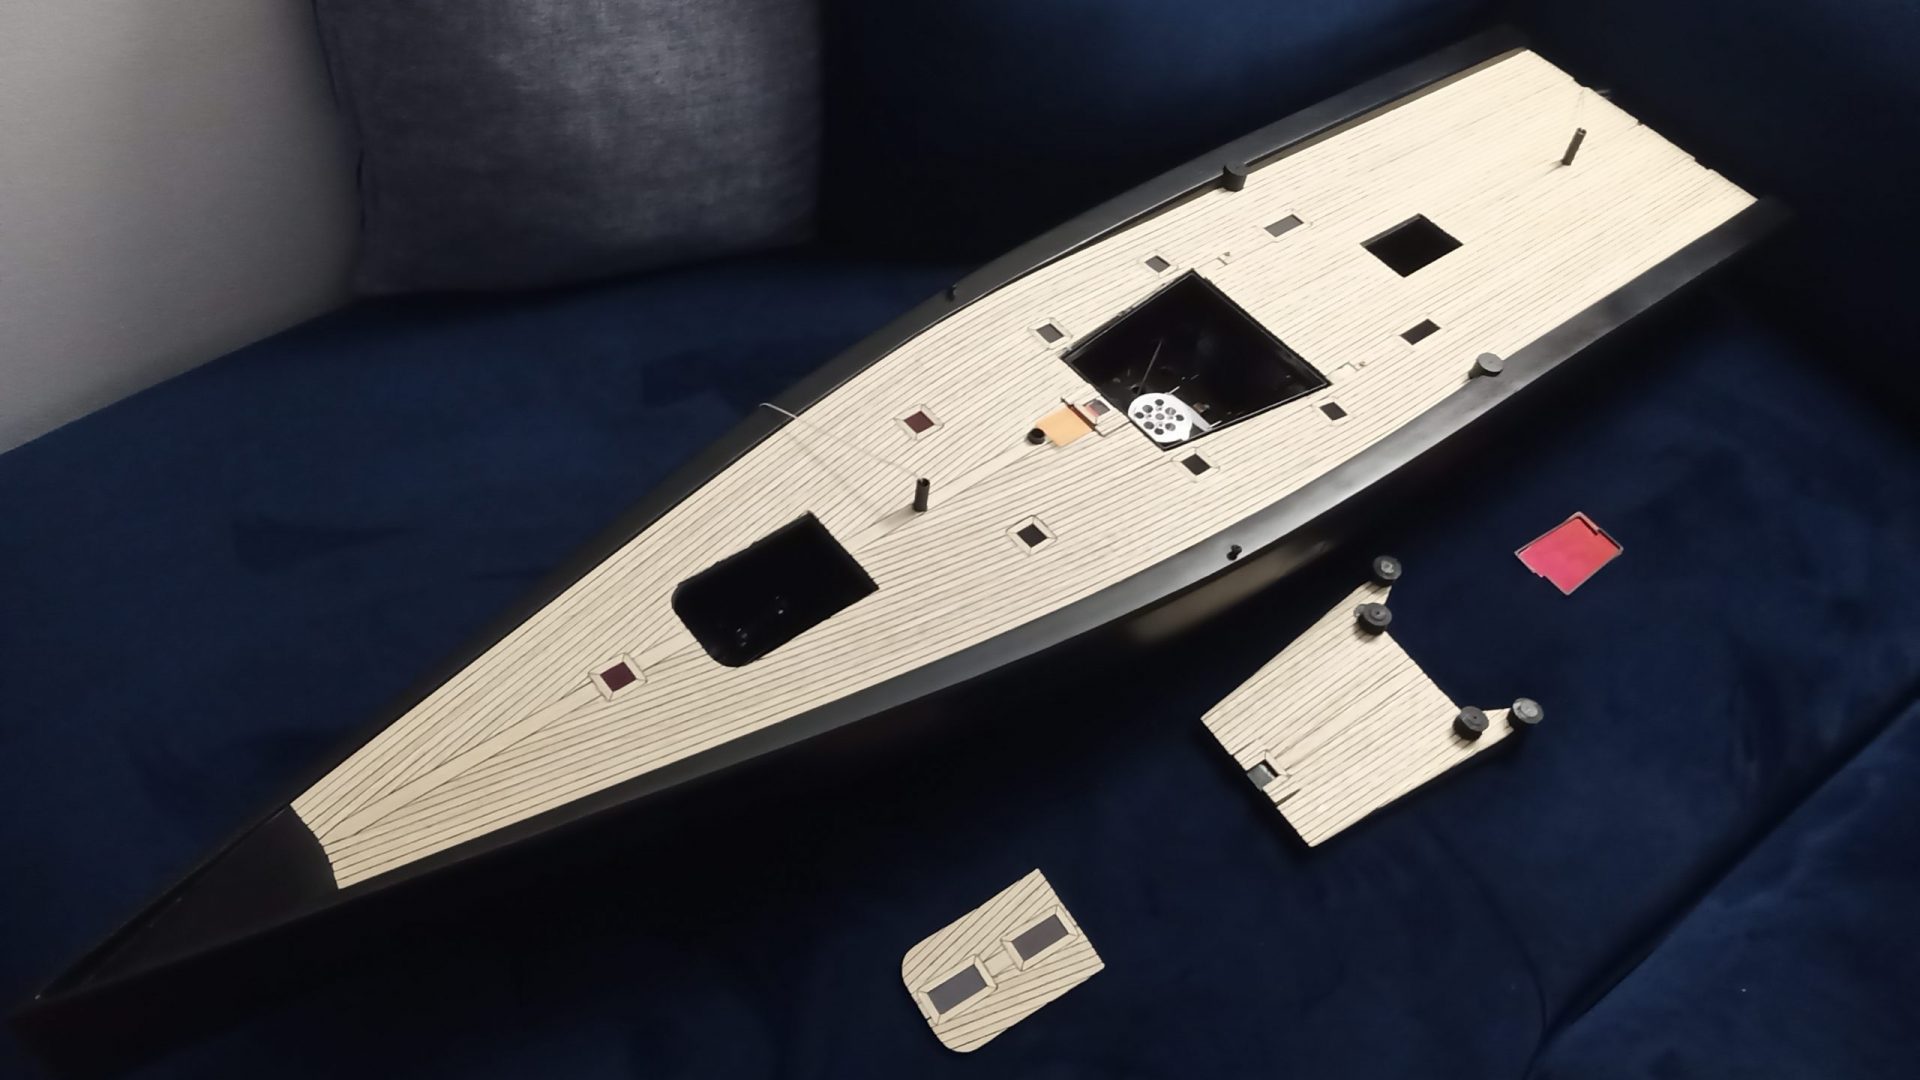
After 13 months, the result:
- Design
- Shaping
- Hull
- Hull border
- Rudder and fin
- Servo plate
- Mast and boom
- Pulley and belt
- Deck fitting
- Bulb
- Hull paint
- Deck planking
- Sails
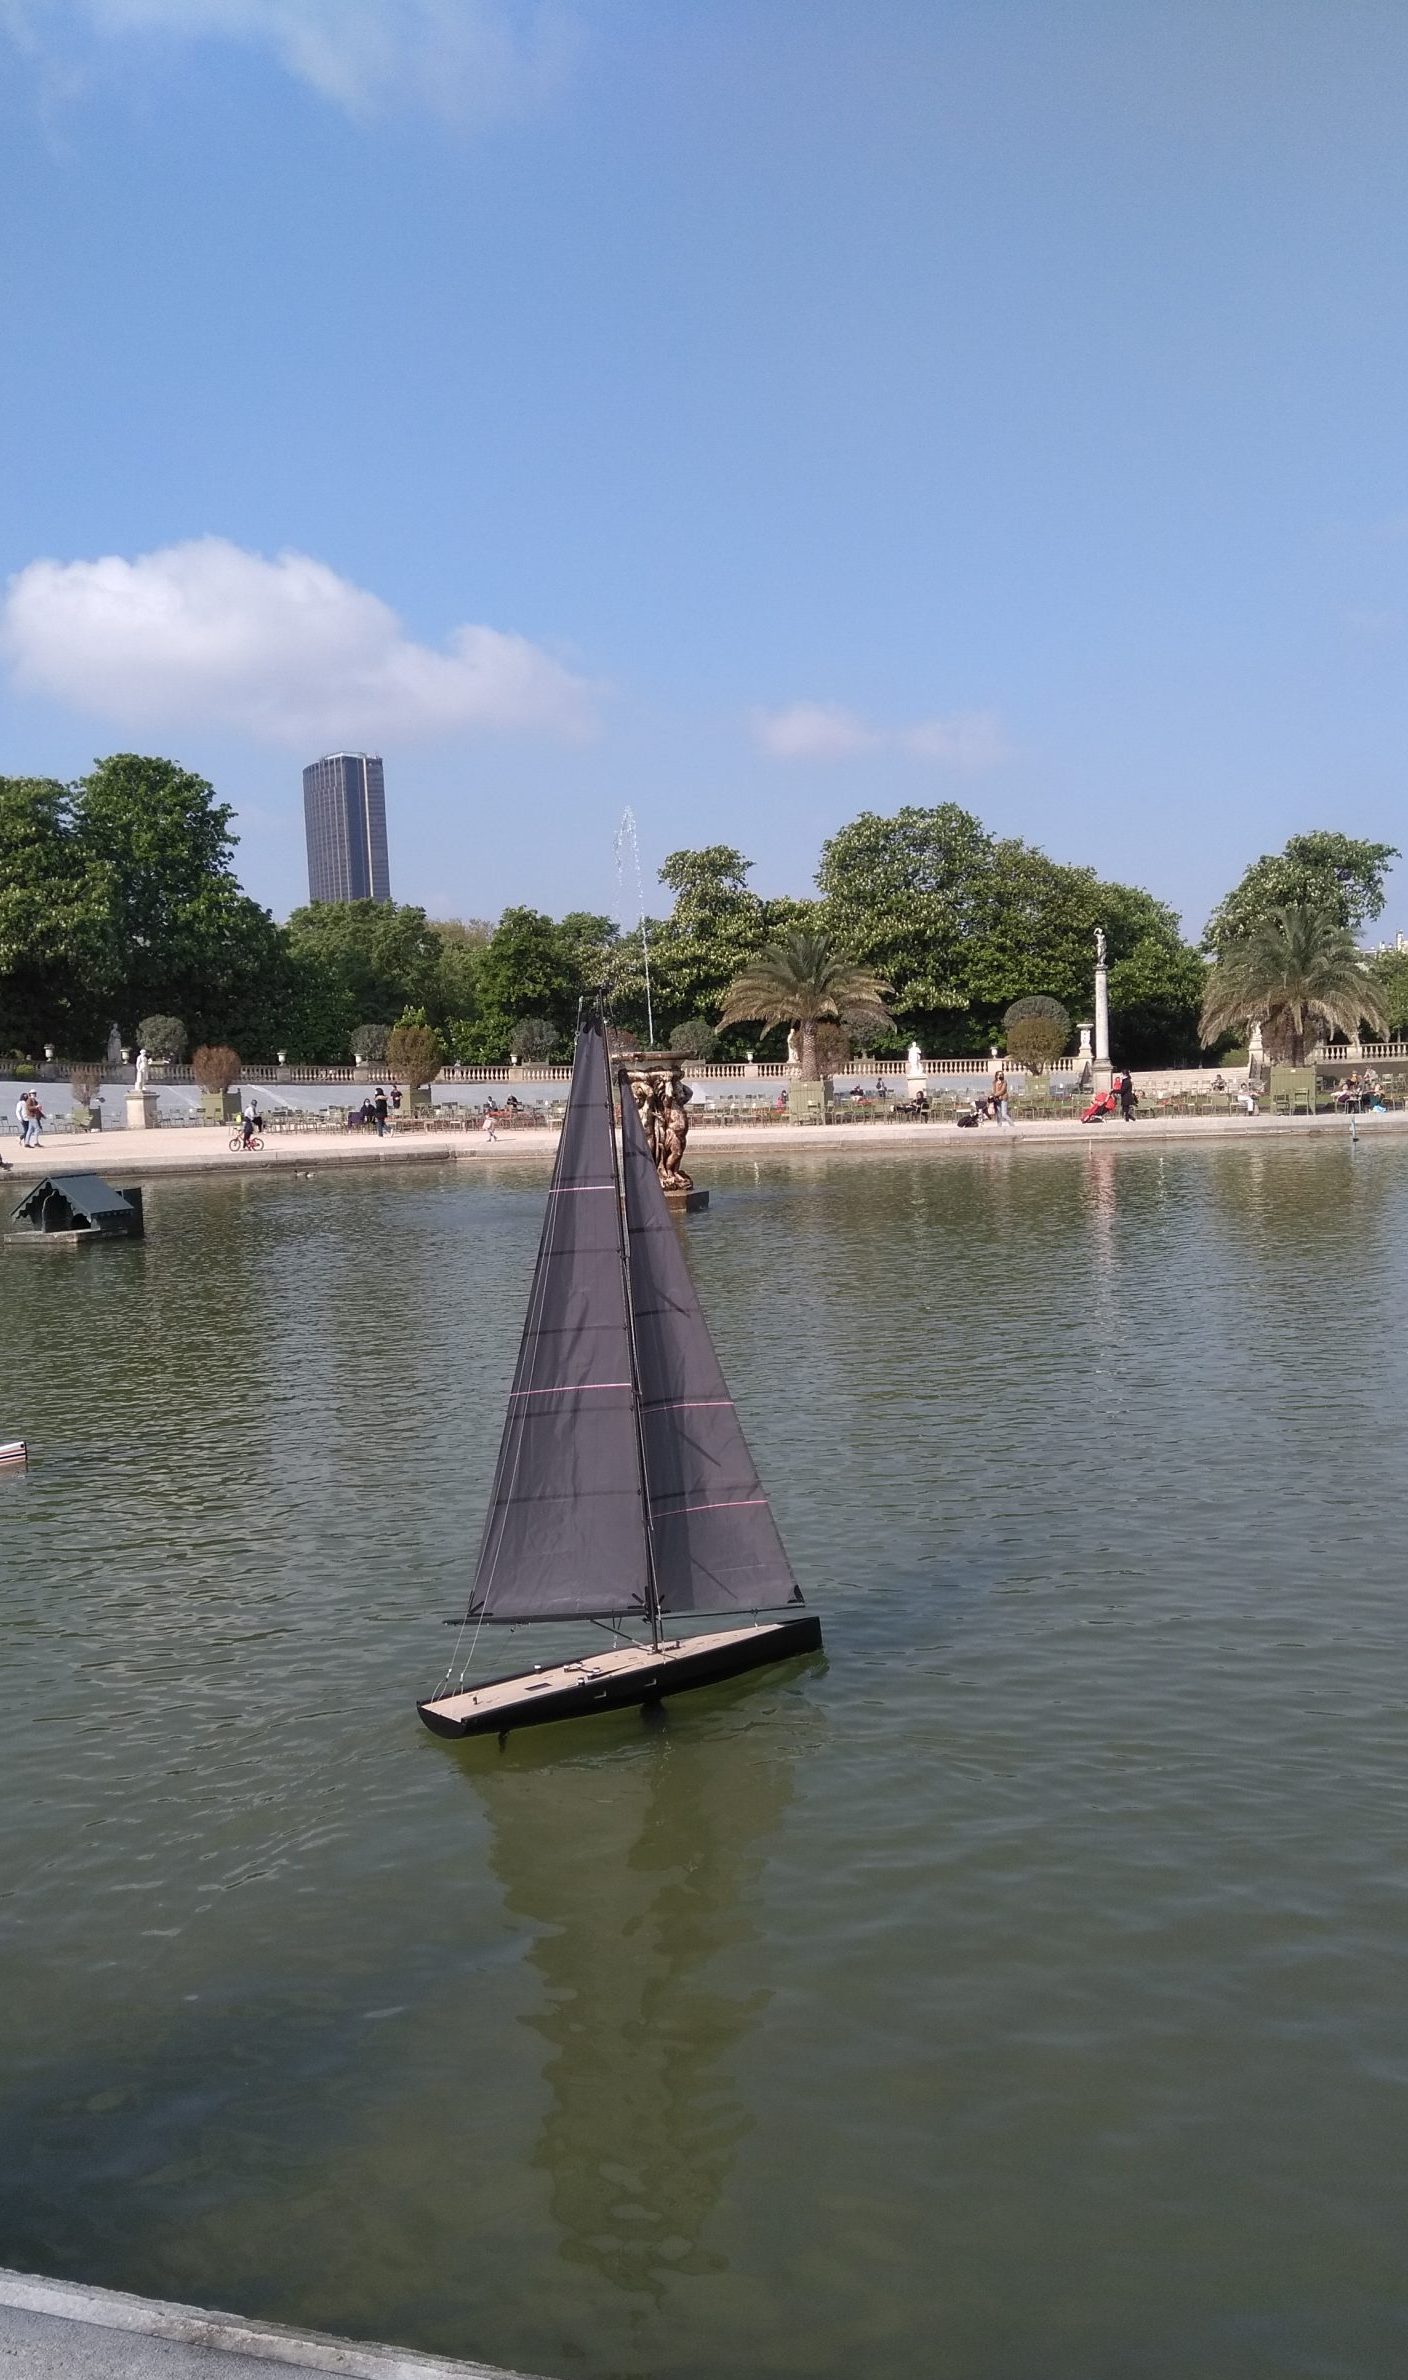
- Launching
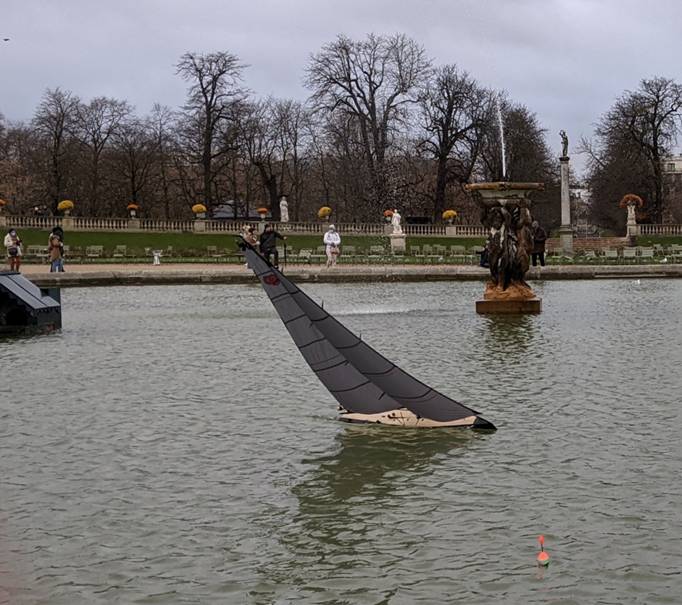
If you happen to be in Paris a Sunday morning, come say Hello at the Jardin du Luxembourg ‘s pond.
DESIGN
Covid crisis and minimal ressources: a 28″ screen, openSCAD, some paper, two block of styrofoam, 3mm plywood… and a lot of “week-end” time.
Choices made:
- composite hull because we are in the 21th century … and to keep the weight low
- fiberglass Vs carbon to be more easily repairable
- one hull is needed, I go for the lost (not really) mold method – The plug is used to build the final part directly. It is lower cost, faster and avoid me to store the mold after… the time saved on sanding/finetuning the plug will be use on the final part
Nice
We will see;-) I am planning to make it larger than a real scaled one.
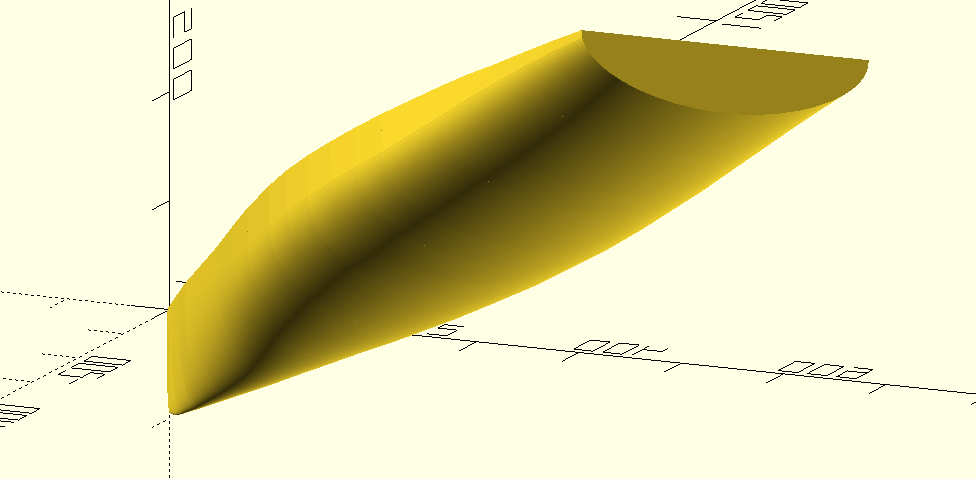
Run with openscad.
The first parameter allows to choose the display mode.
i.e: processing=4 is generating one bulkhead, identified by the other parameter BH_id (range 0 .. 11). The bulkheads are separated by n*XPS_thickness (n is defined in BH_xpsnb array). This is the mechanism which allowed me to copy the bulkheads and prepare the styrofoam sandwich.
You can also generate the STL files, print them, lasercut them, ..
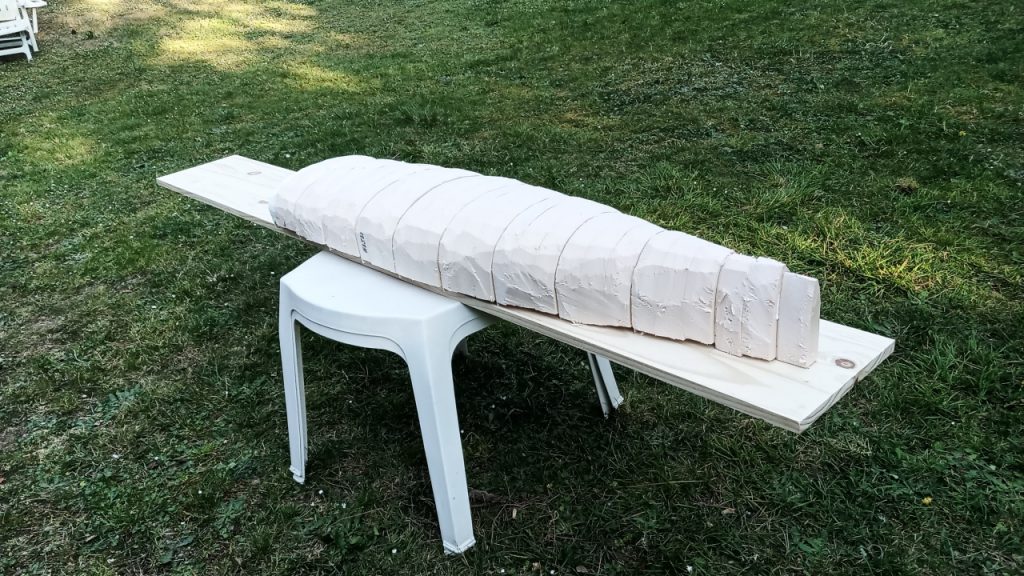
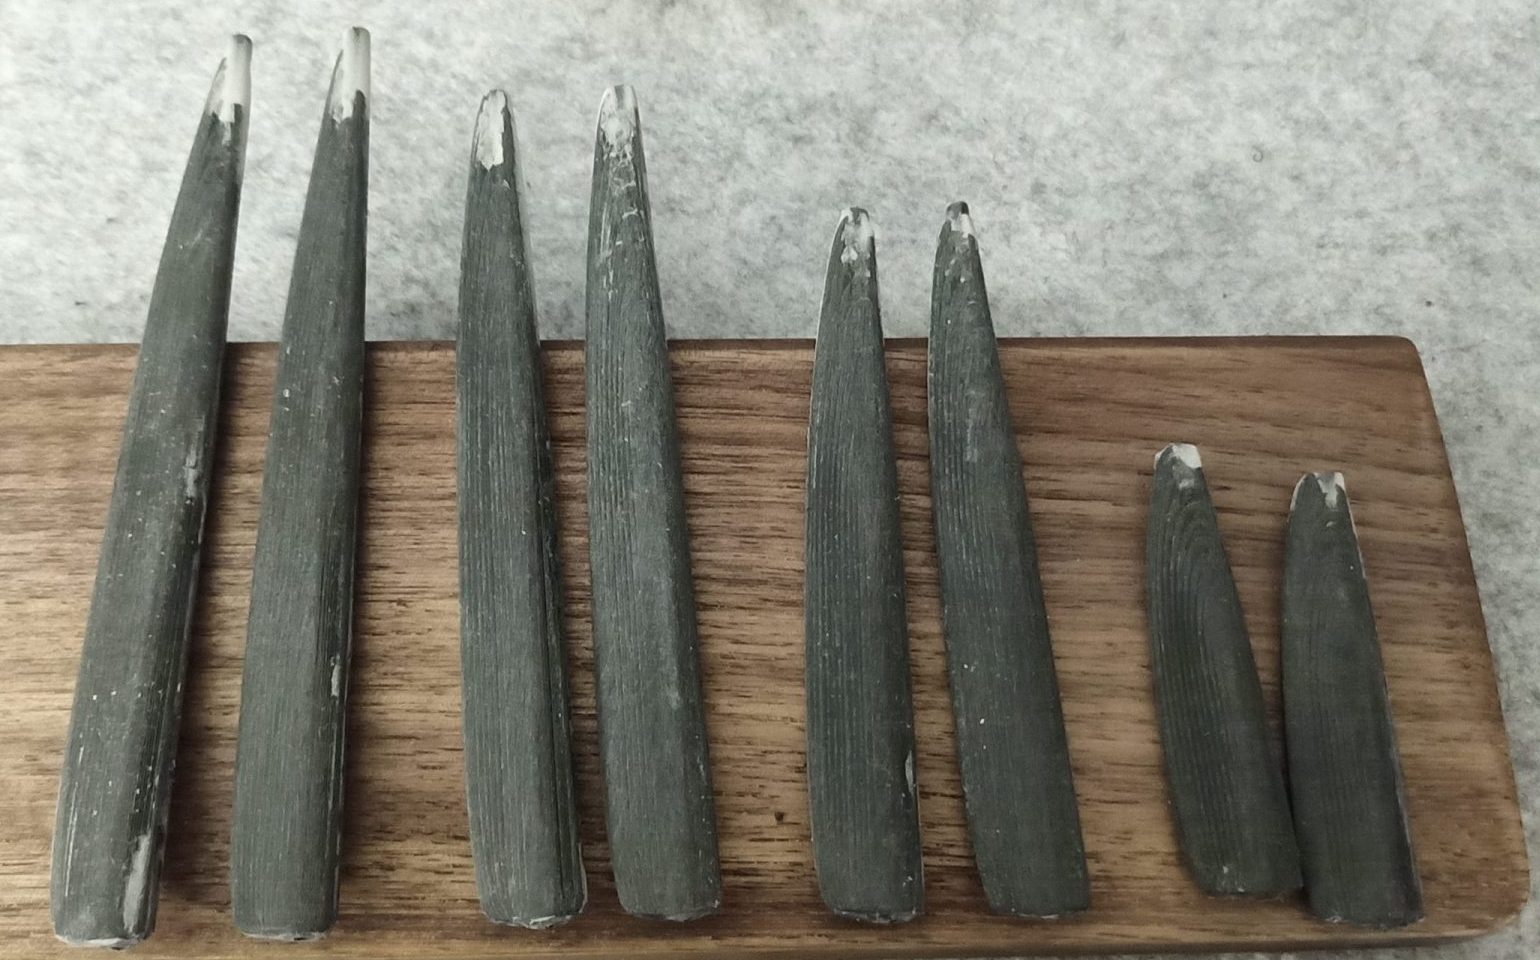
SHAPING
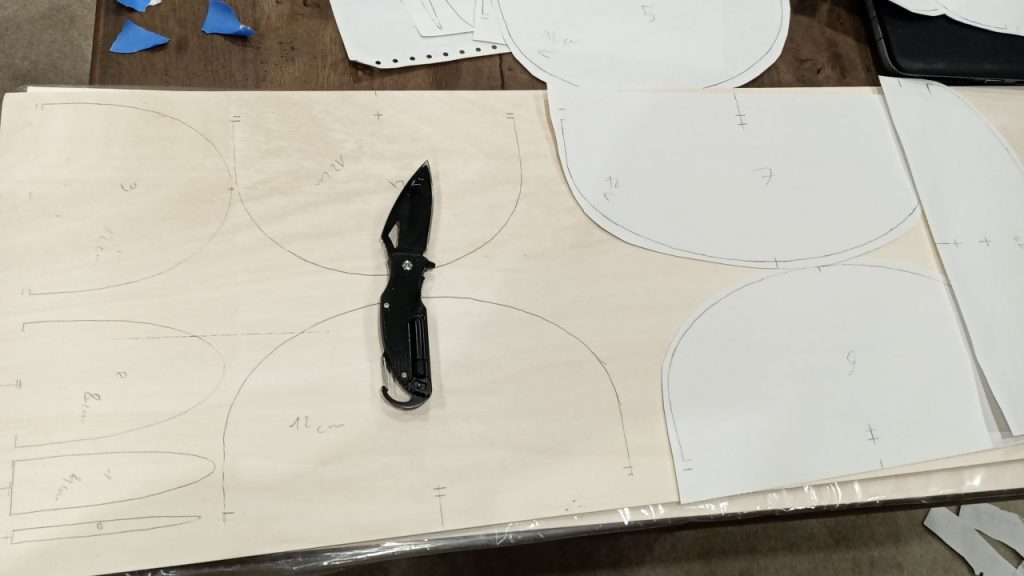
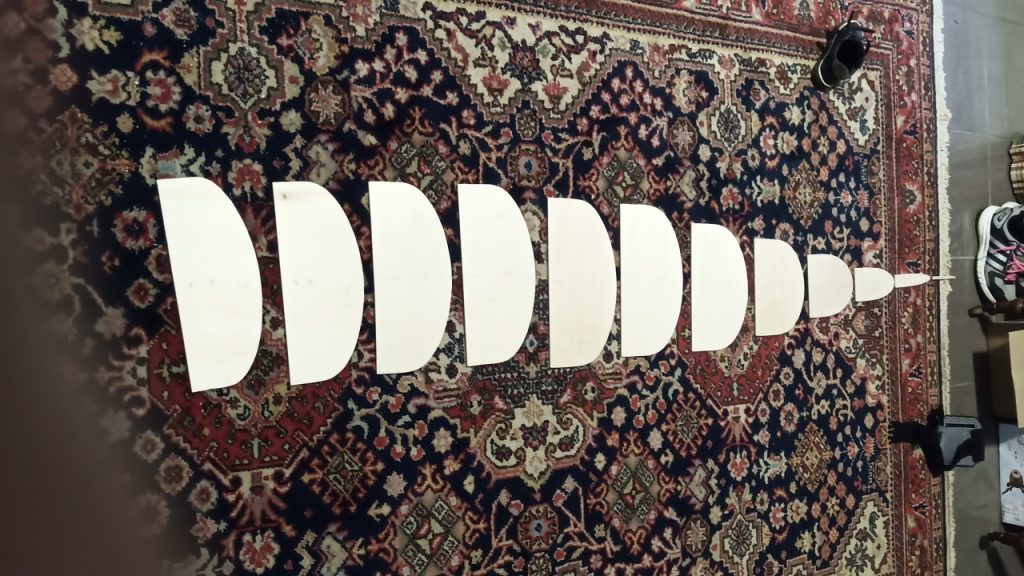
Calibrate the screen size and copy over each bulkhead with paper.
Mirror the imprint on the plywood and cut with a manual scroll saw.
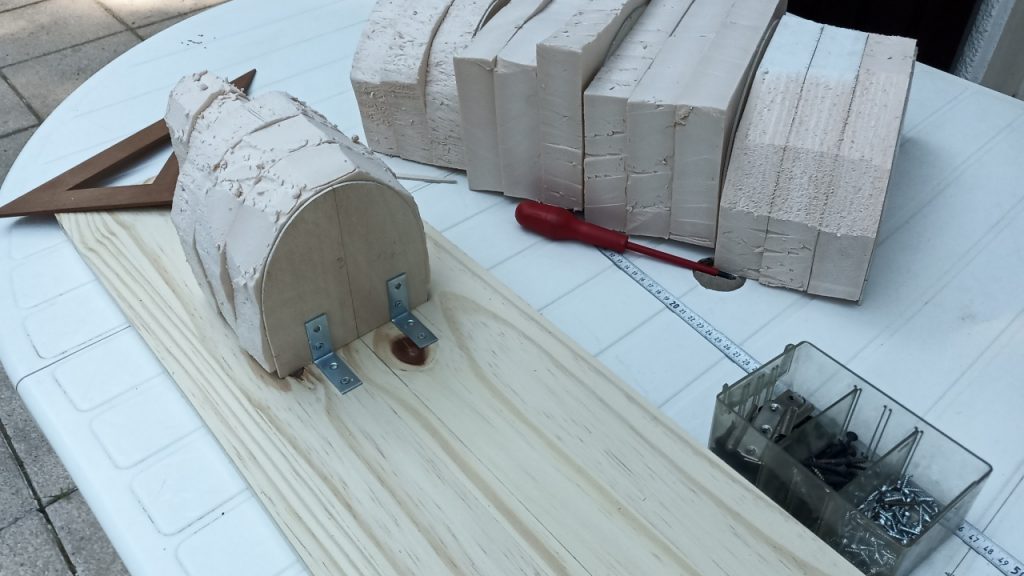
40mm styrofoam cuts to reach the 120mm spacing stated between bulkheads.
3 blocks of styrofoam and one bulkhead glued together and fixed on the support.
(The bow has a lower number of styrofoam layers (two and one on the last bulkhead)
HULL
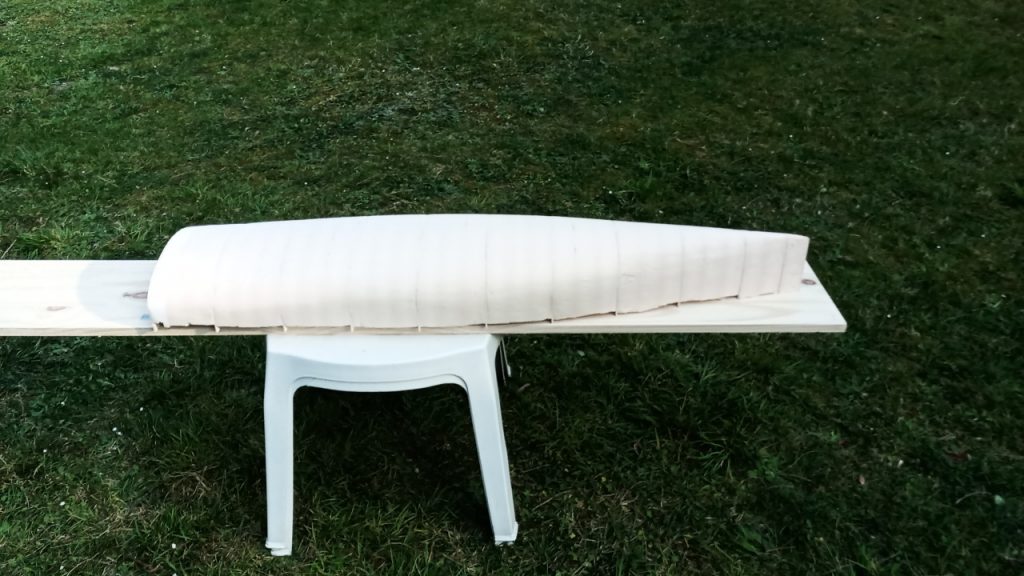
2020, May 2-3:
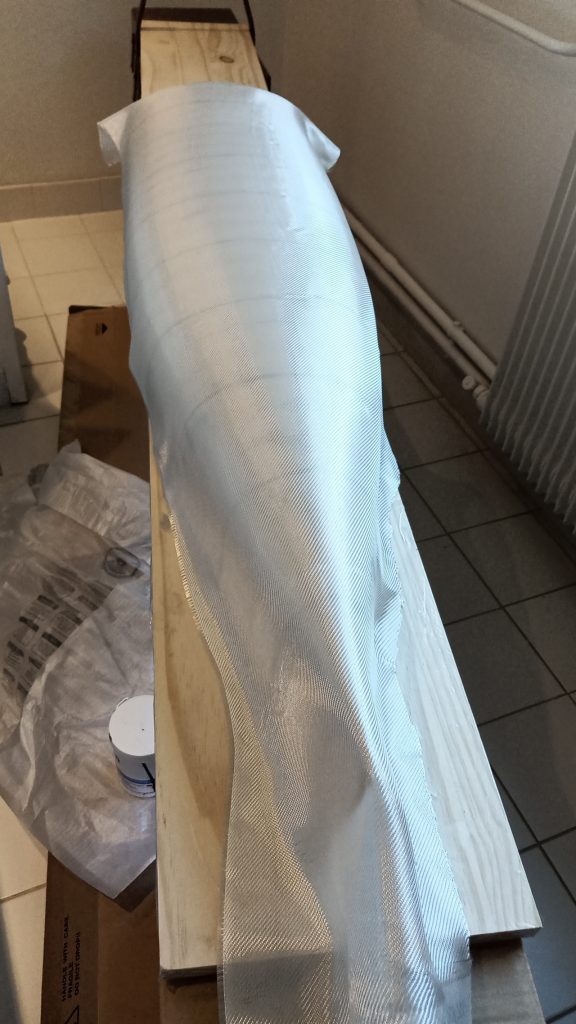
Nothing much to do, still waiting for the delivery of fiberglass cloth.
packing tape and mold release wax applied.
|
|
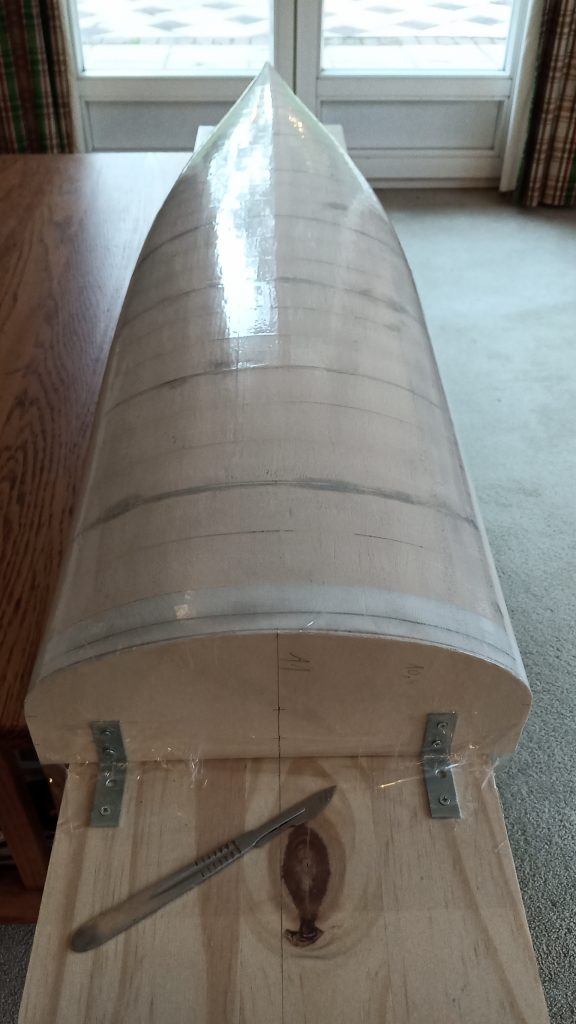
2020, May 6:
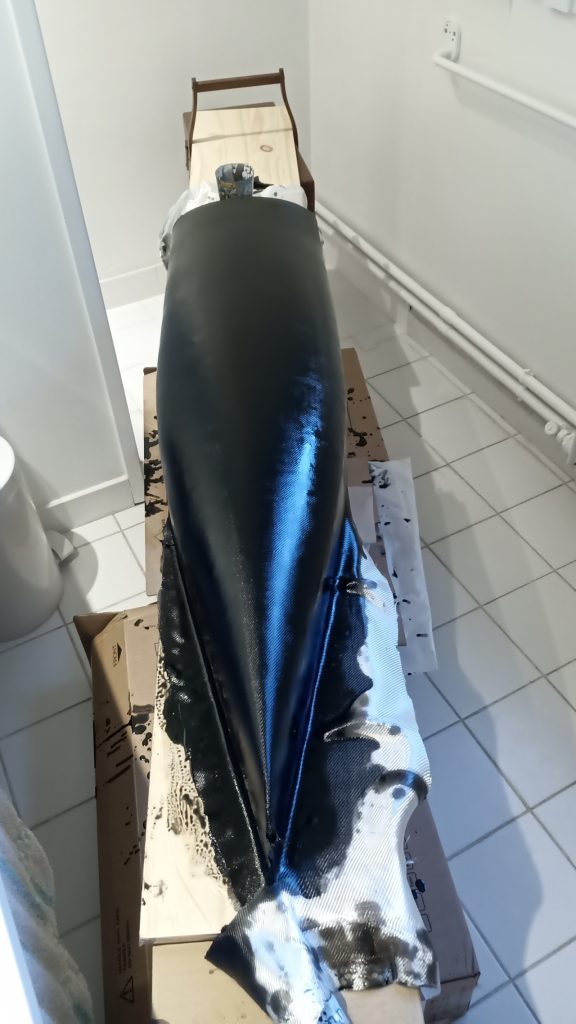
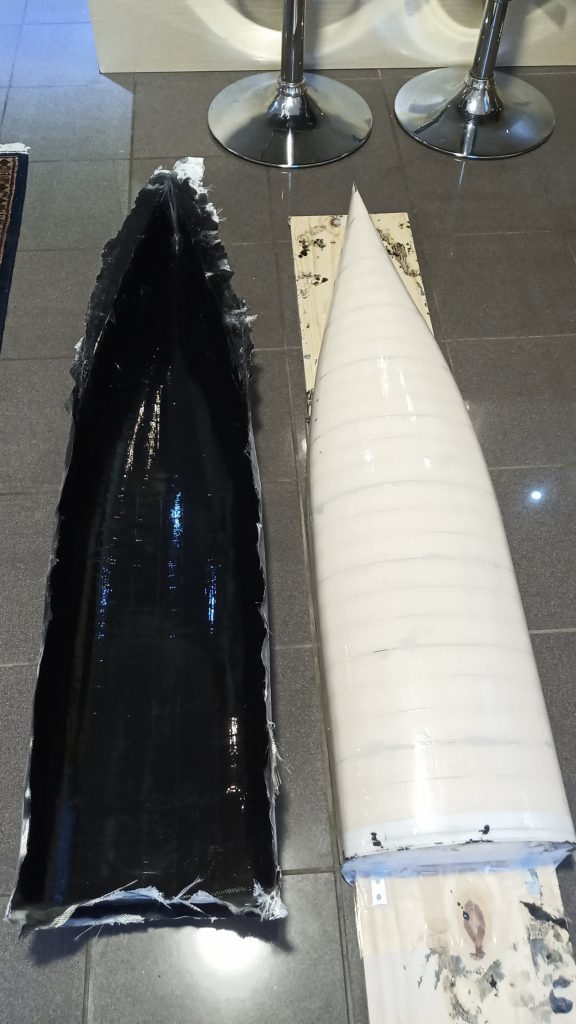
Hull lost mold fiberglassing.
- 2 layers of 160gr/m2 sergé fiberglass cloth
- Slow epoxy resin
- Epoxy black RAL 9005 pigments
The color is useful during fiberglass impregnation, it helps to make it even. It creates also a base for the hull final color, perhaps allowing less paint job.
 |
 |
2020, May 9:
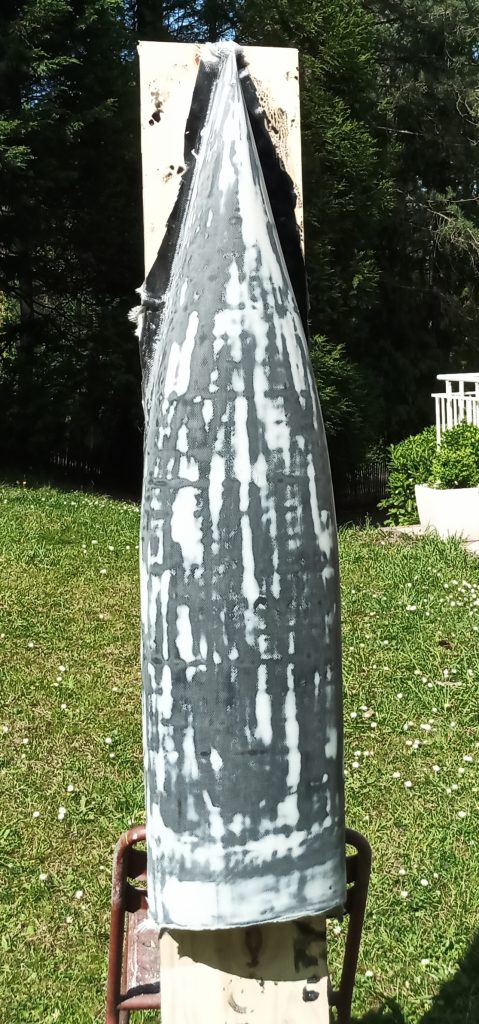
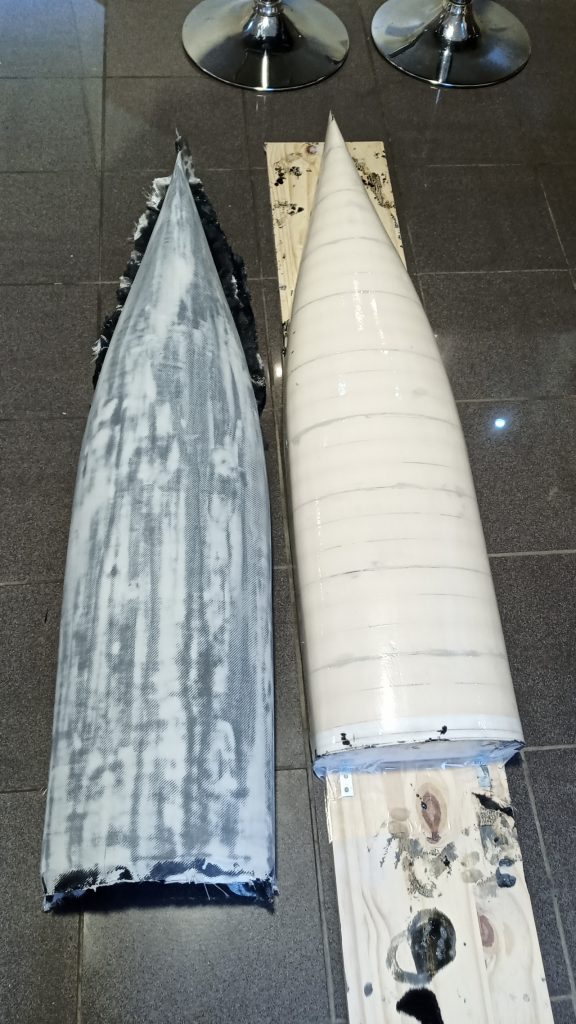
lot of sanding (reducing a bit the previous fiberglass layers), epoxy putty to level properly the surface, sanding, the structural finishing double 160gr/m2 fiberglass layers, ultra light sanding, epoxy putty and final sanding!
 |
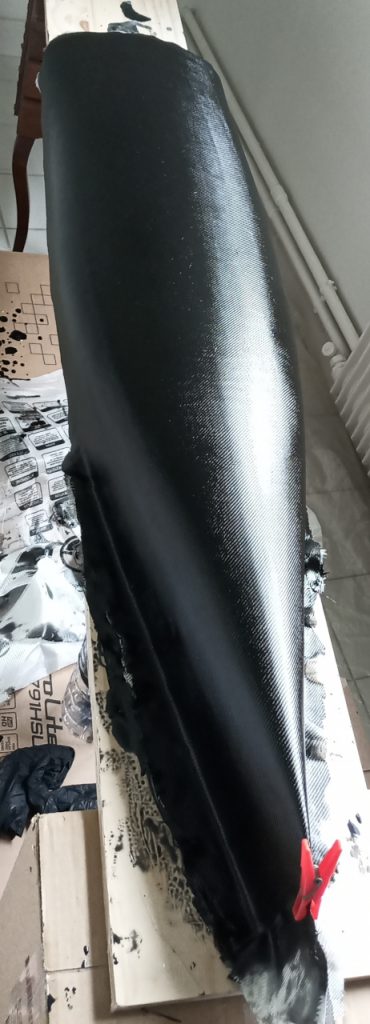 |
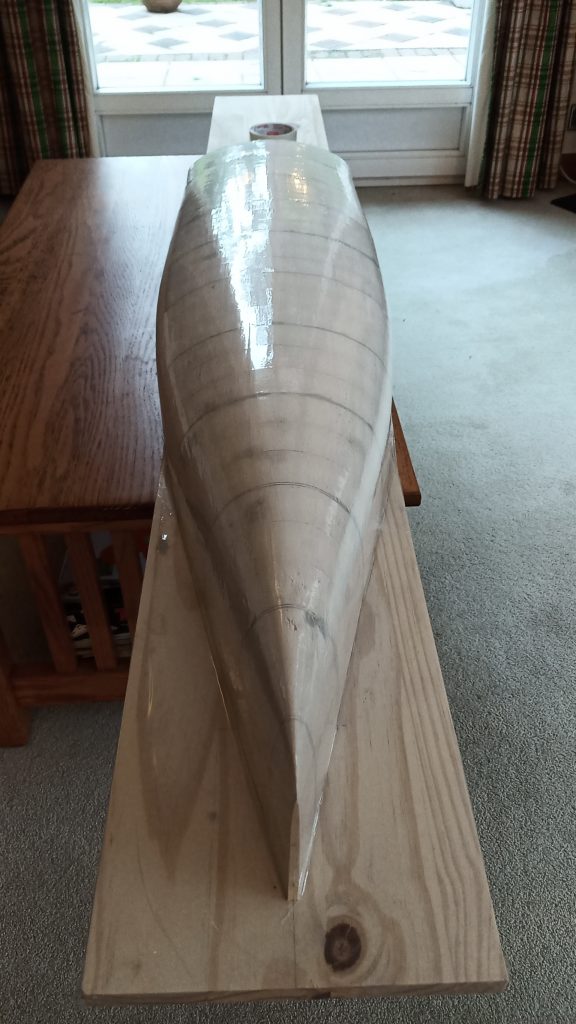
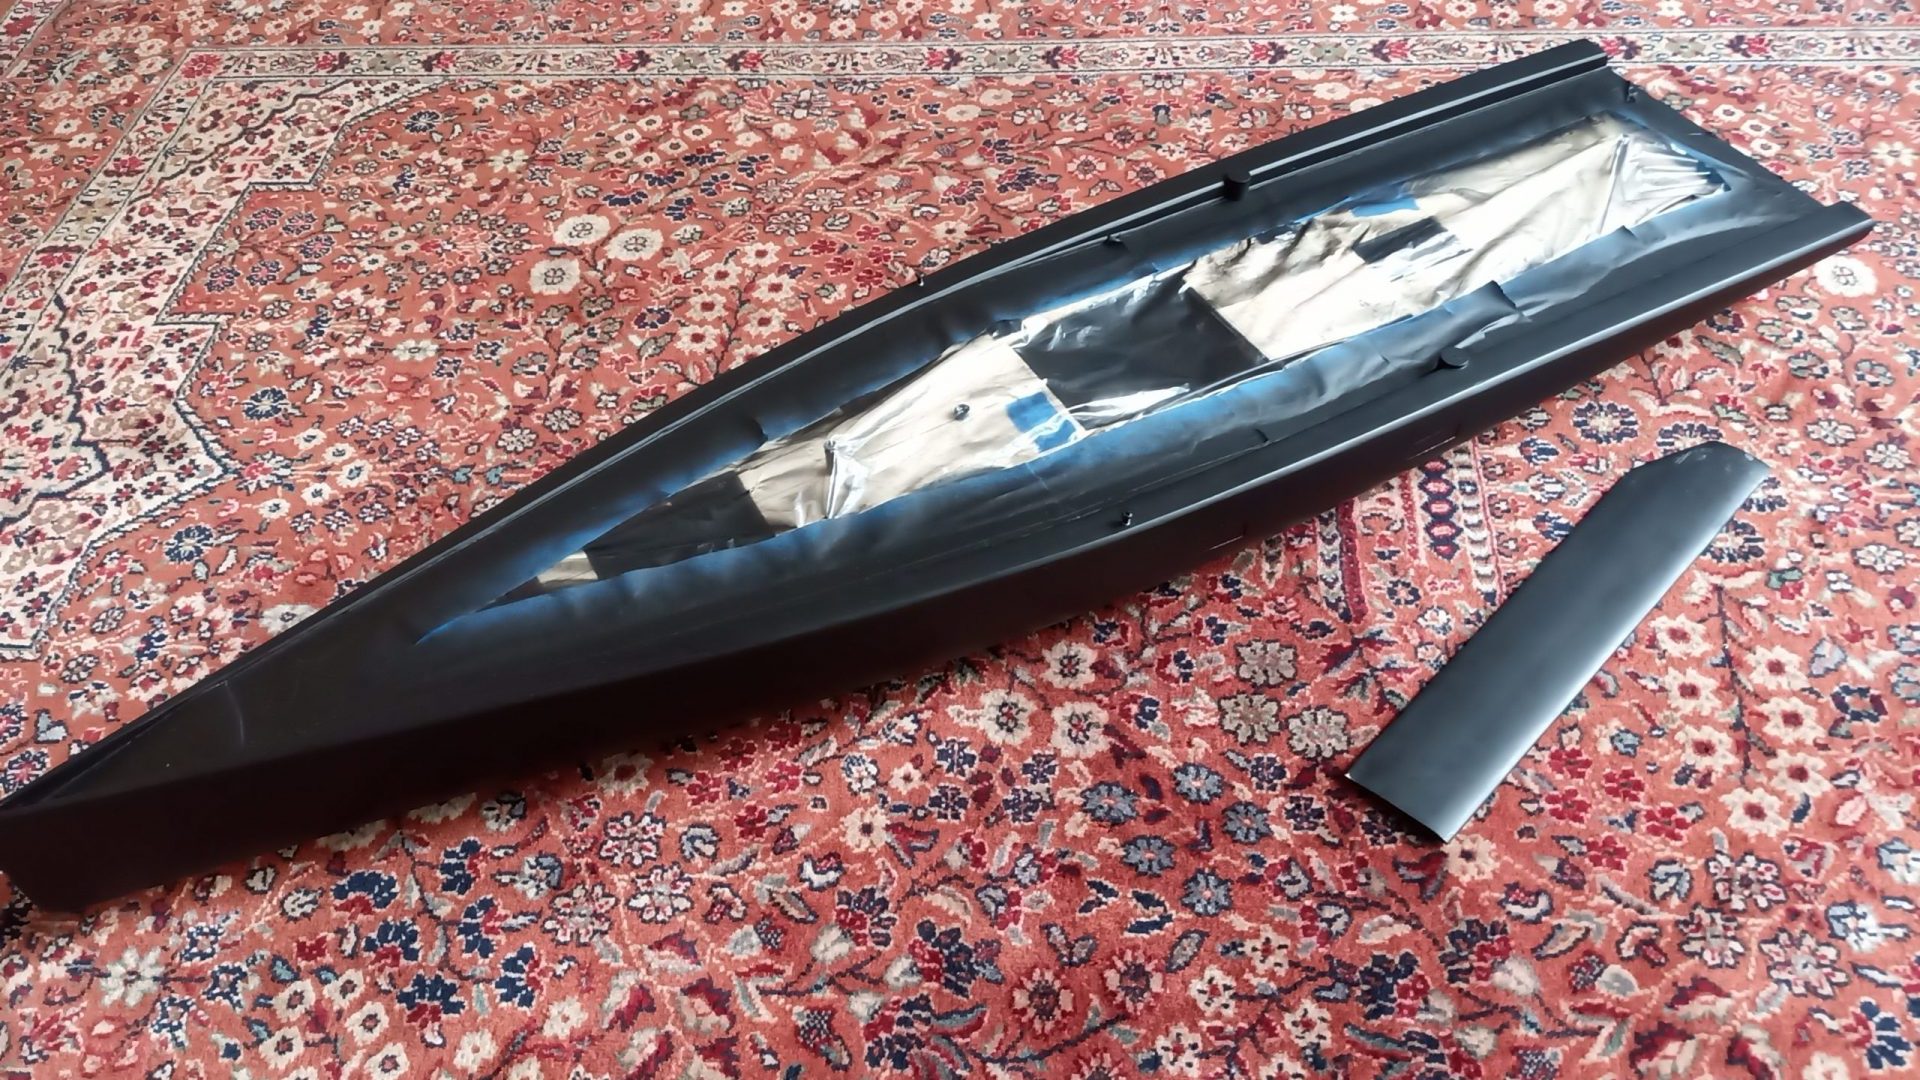
2020, May 10:
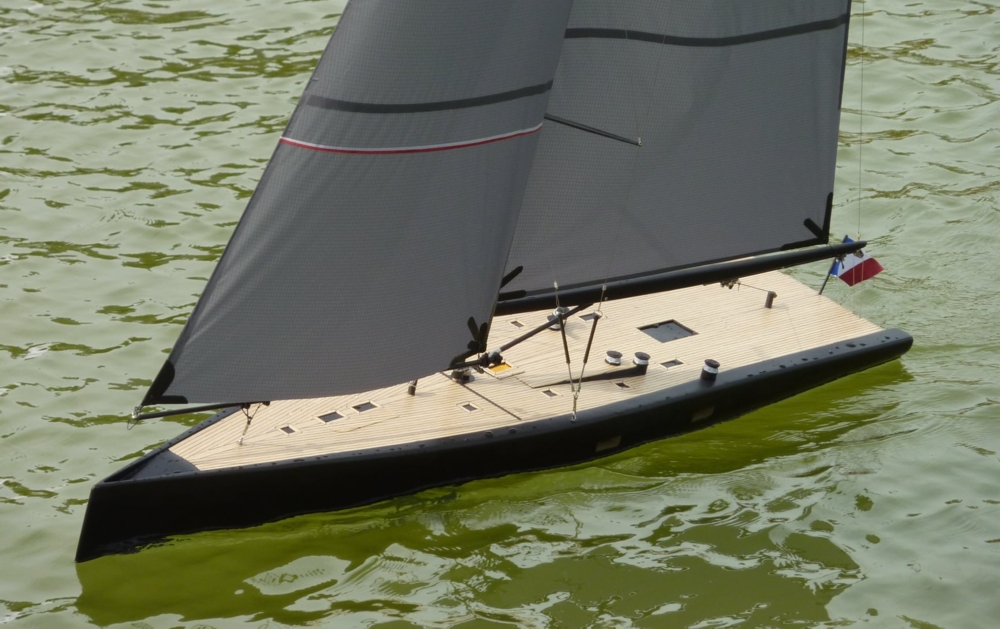
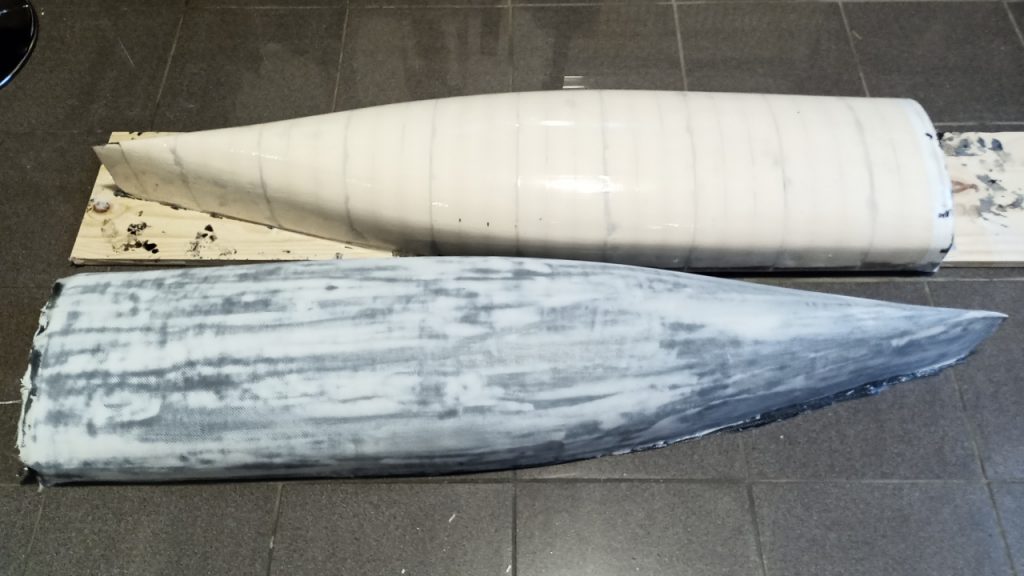
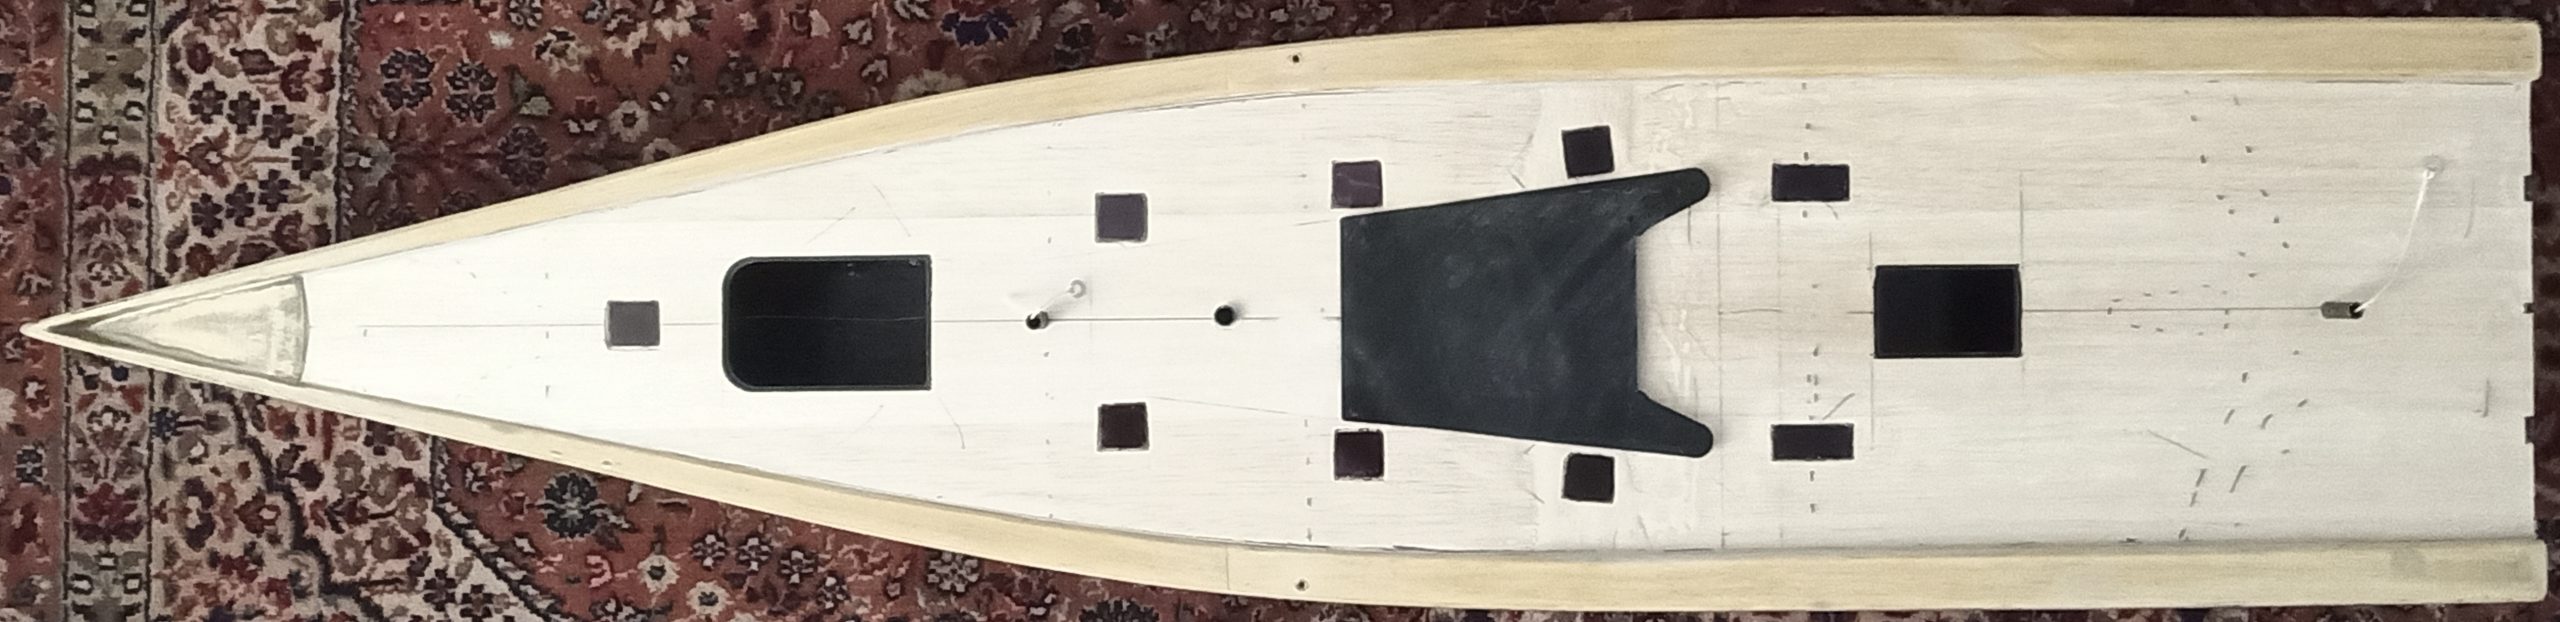
Here’s come my 1200mm wally tango hull ! 😎
Resin/Pigment/Putty/fiberglass total cost: ~50 Euros.
Weight of the untrimmed hull: 720gr.
I still have to trim a big part to the deck limit. I will probably land around ~600/650gr which is not bad at all considering it is a 1200m stiff hull with at least 2 layers of 160gr fiberglass. It should be able to take some rough hits.
 |
 |
Trimmed! 610gr

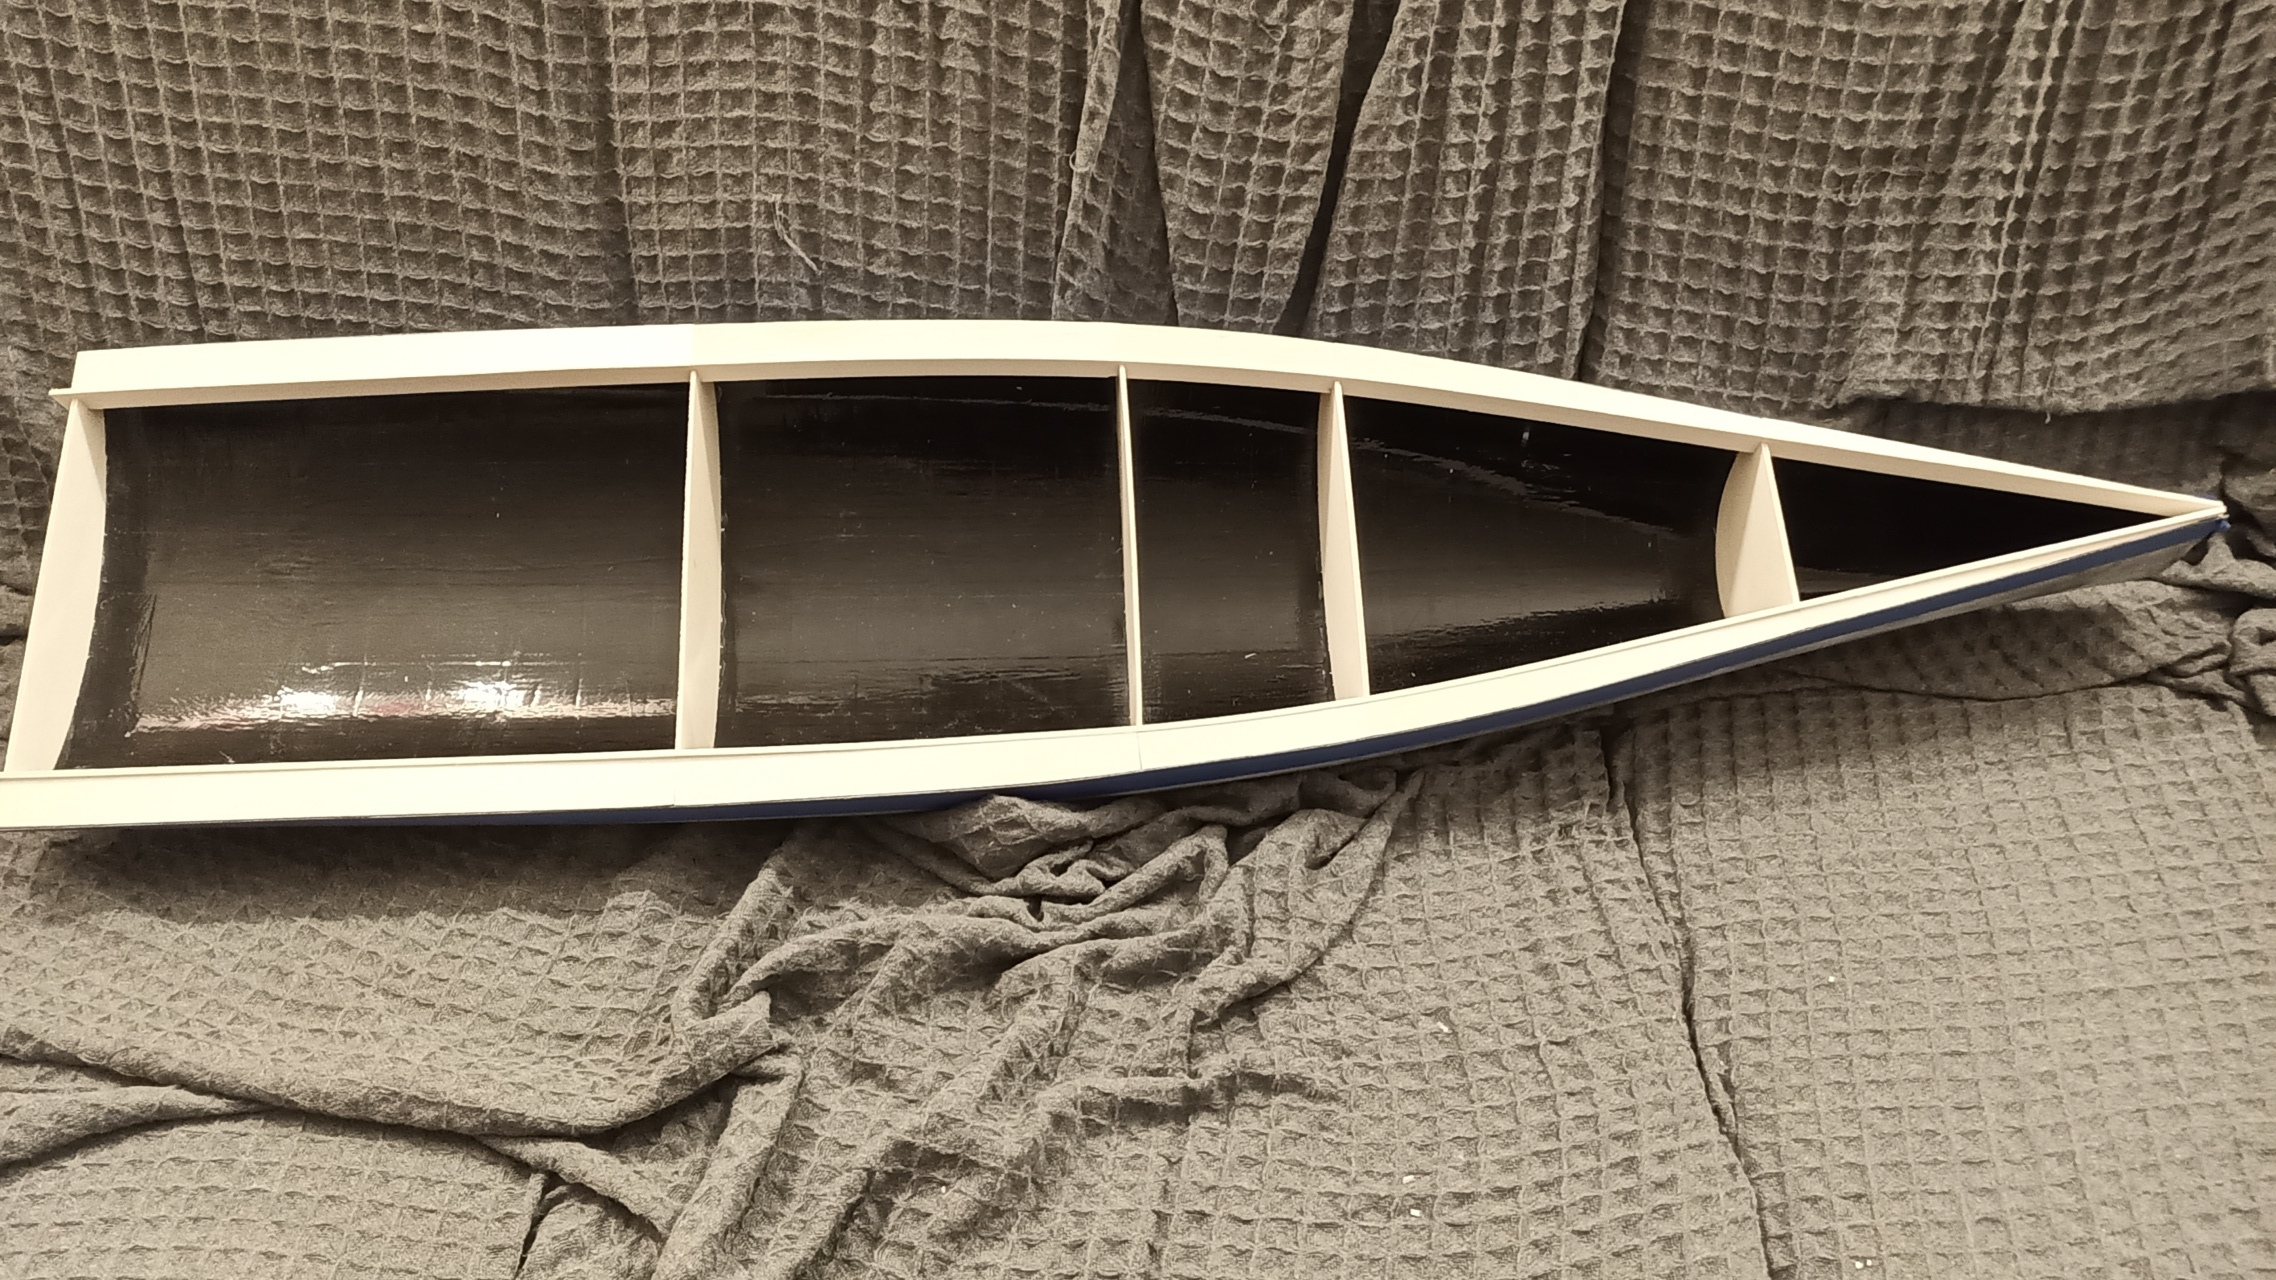
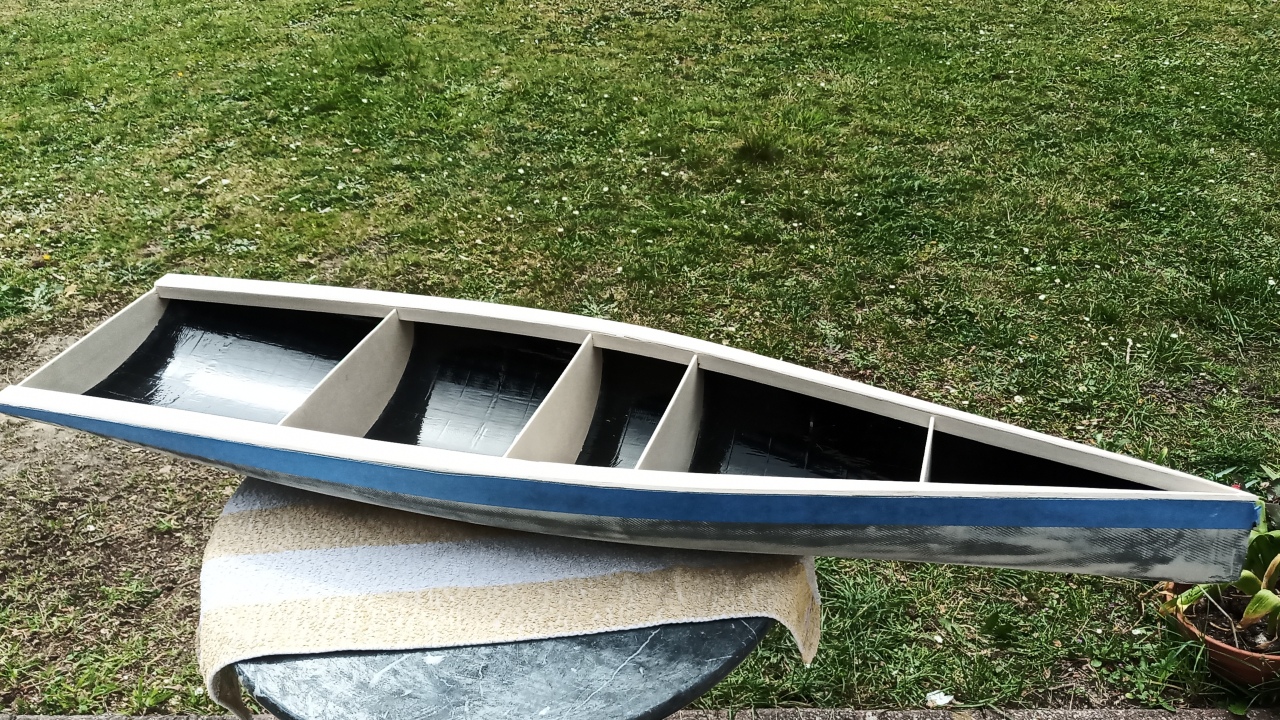
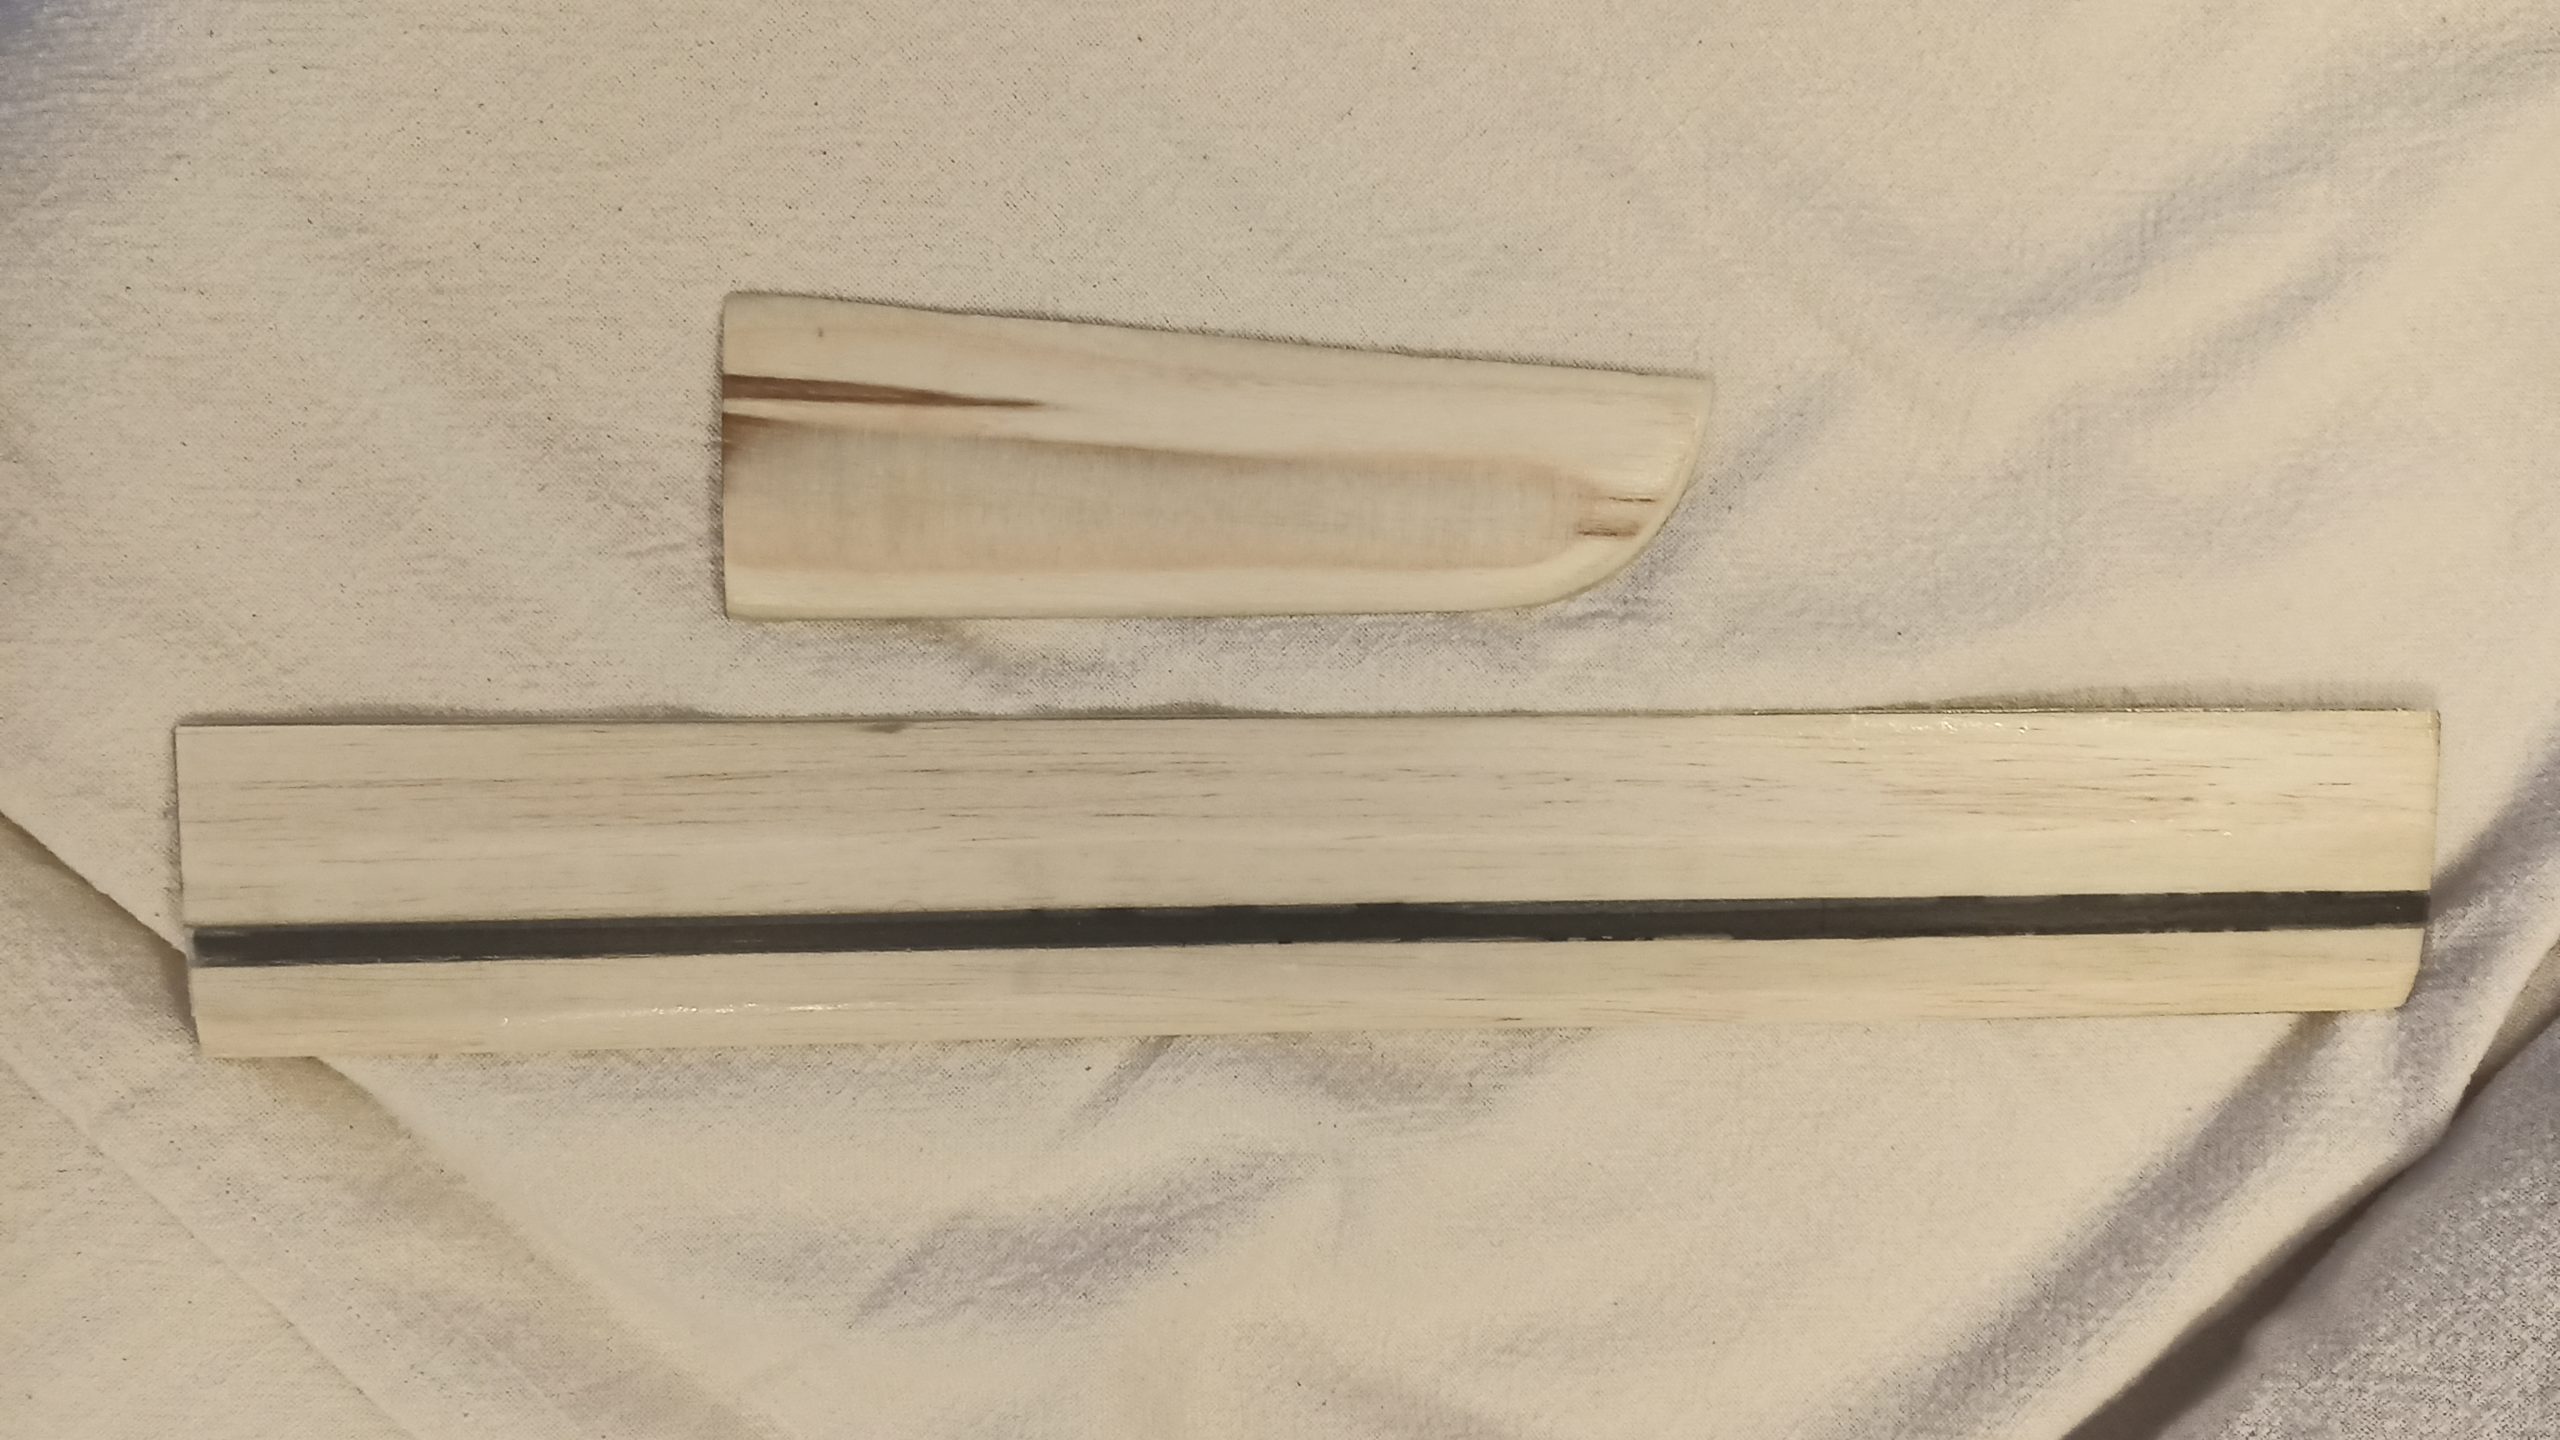
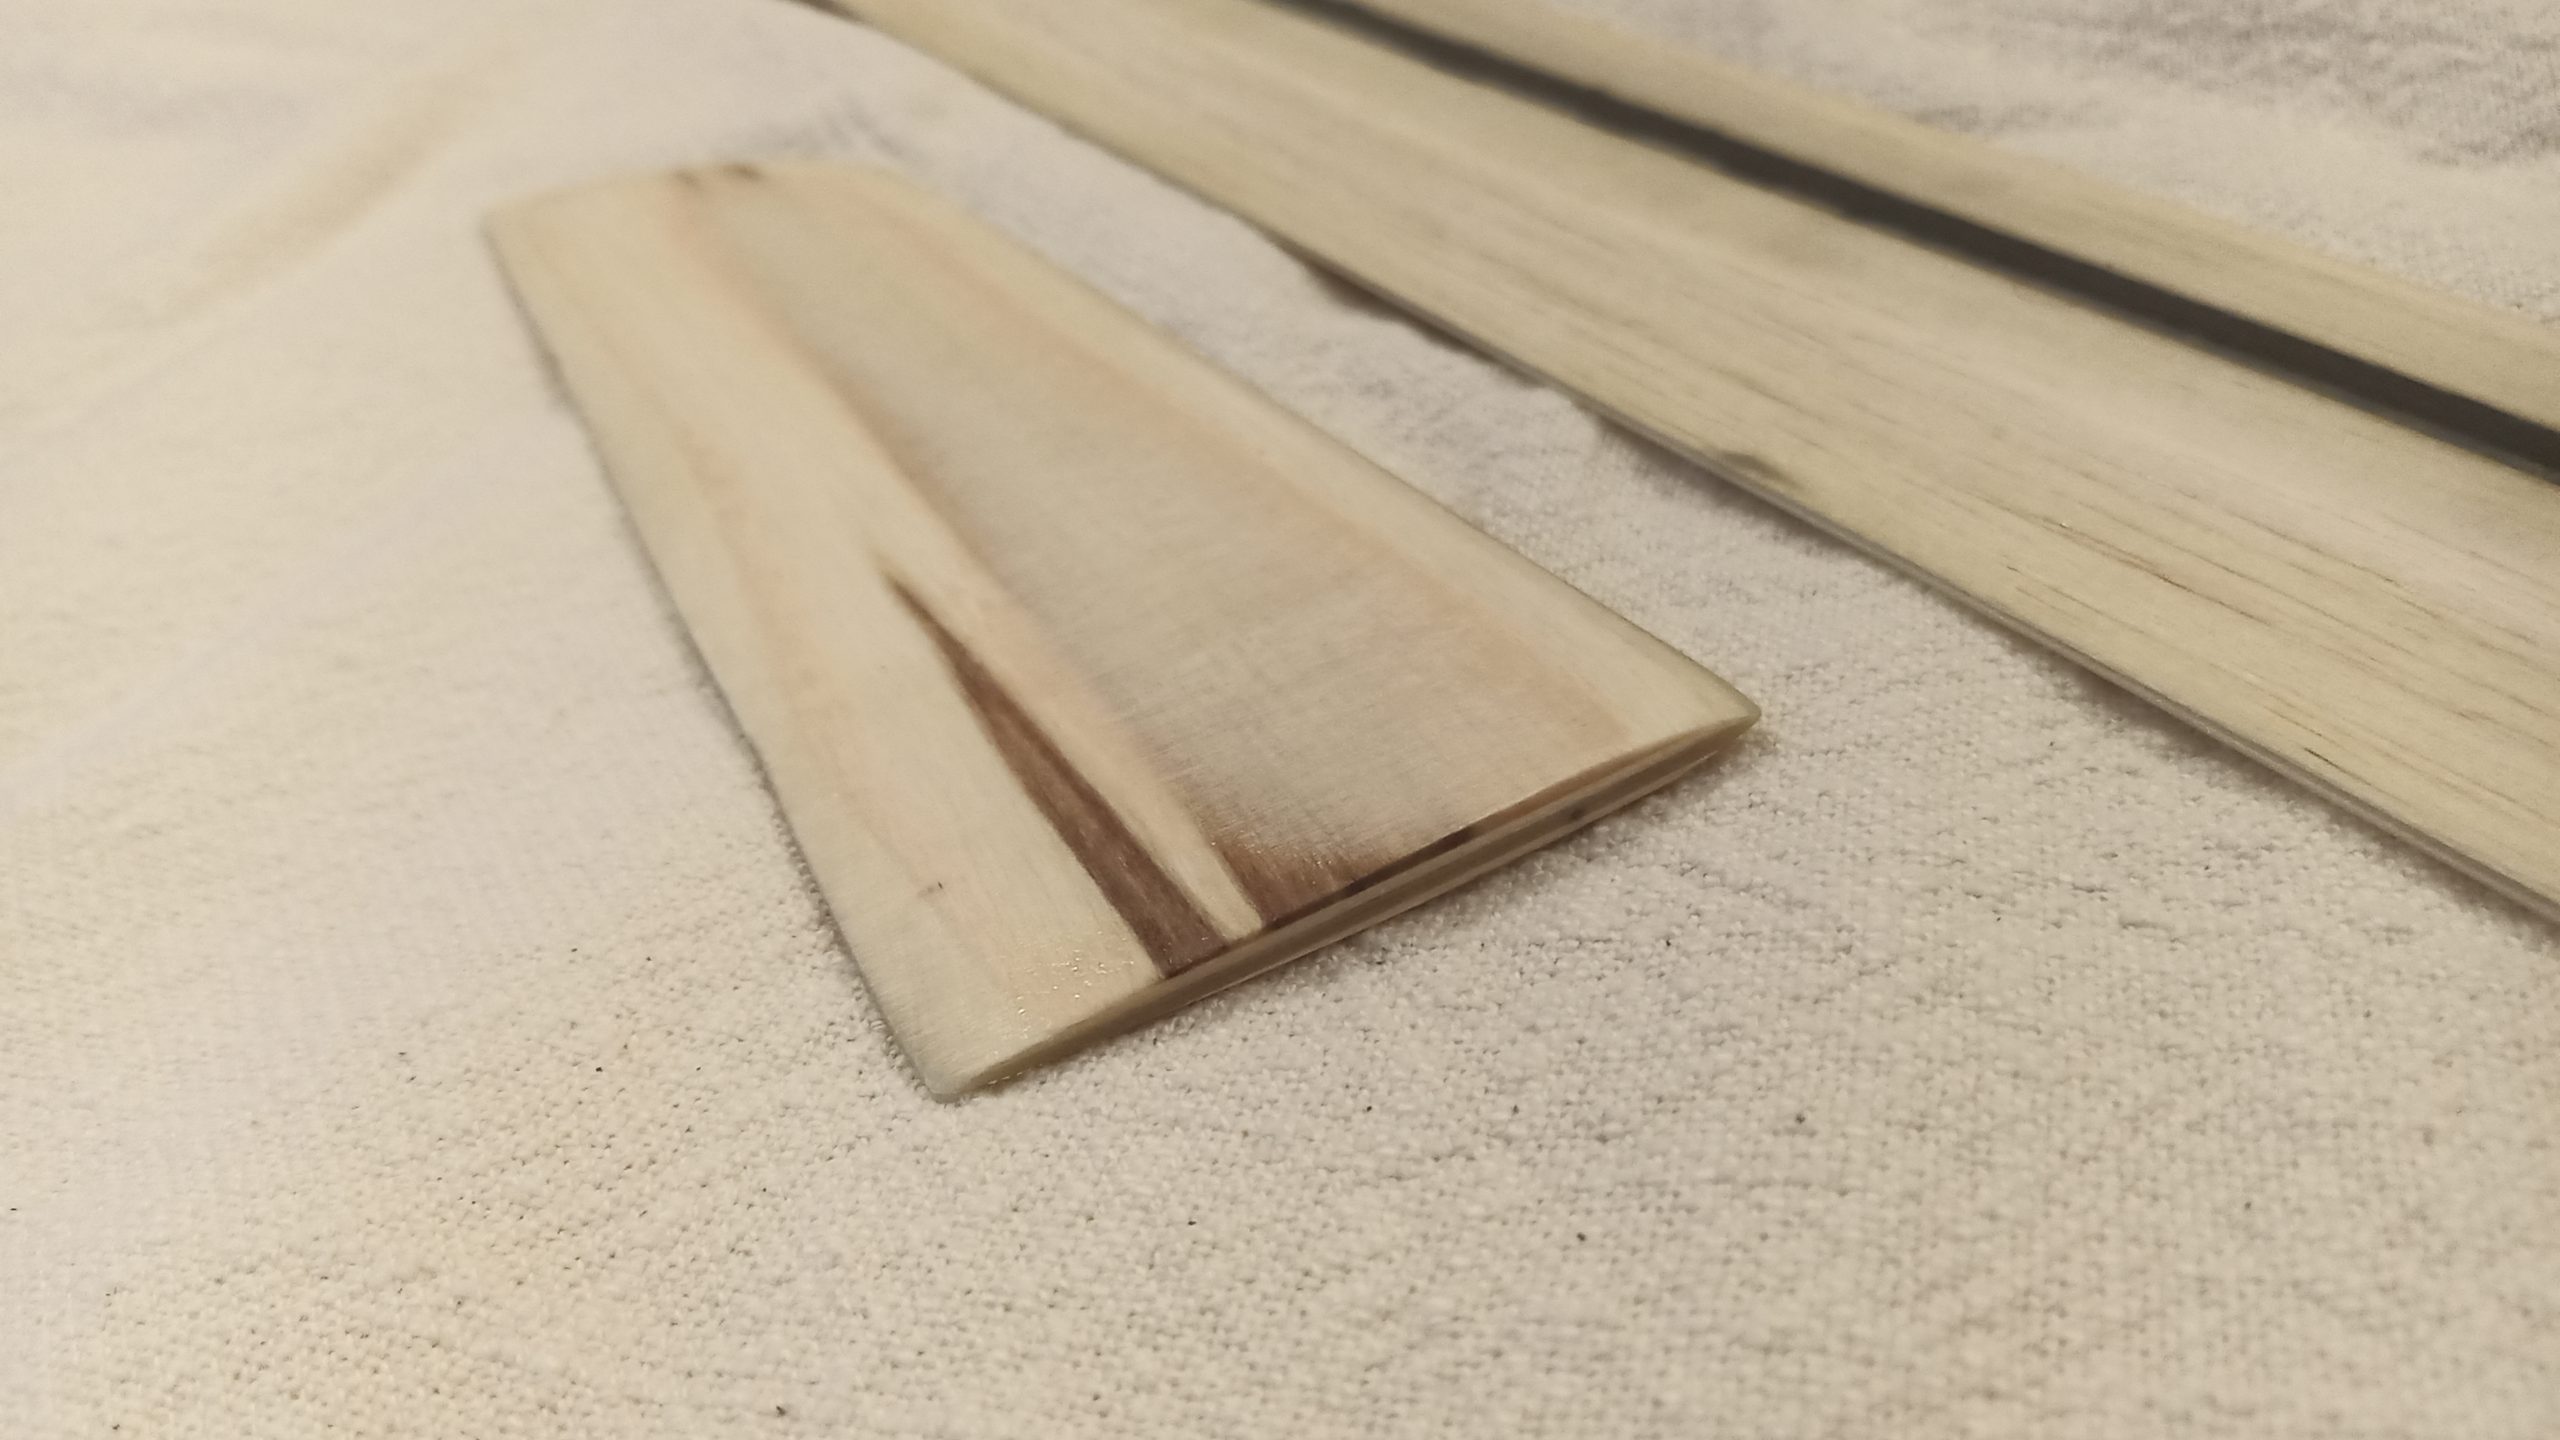
HULL BORDER
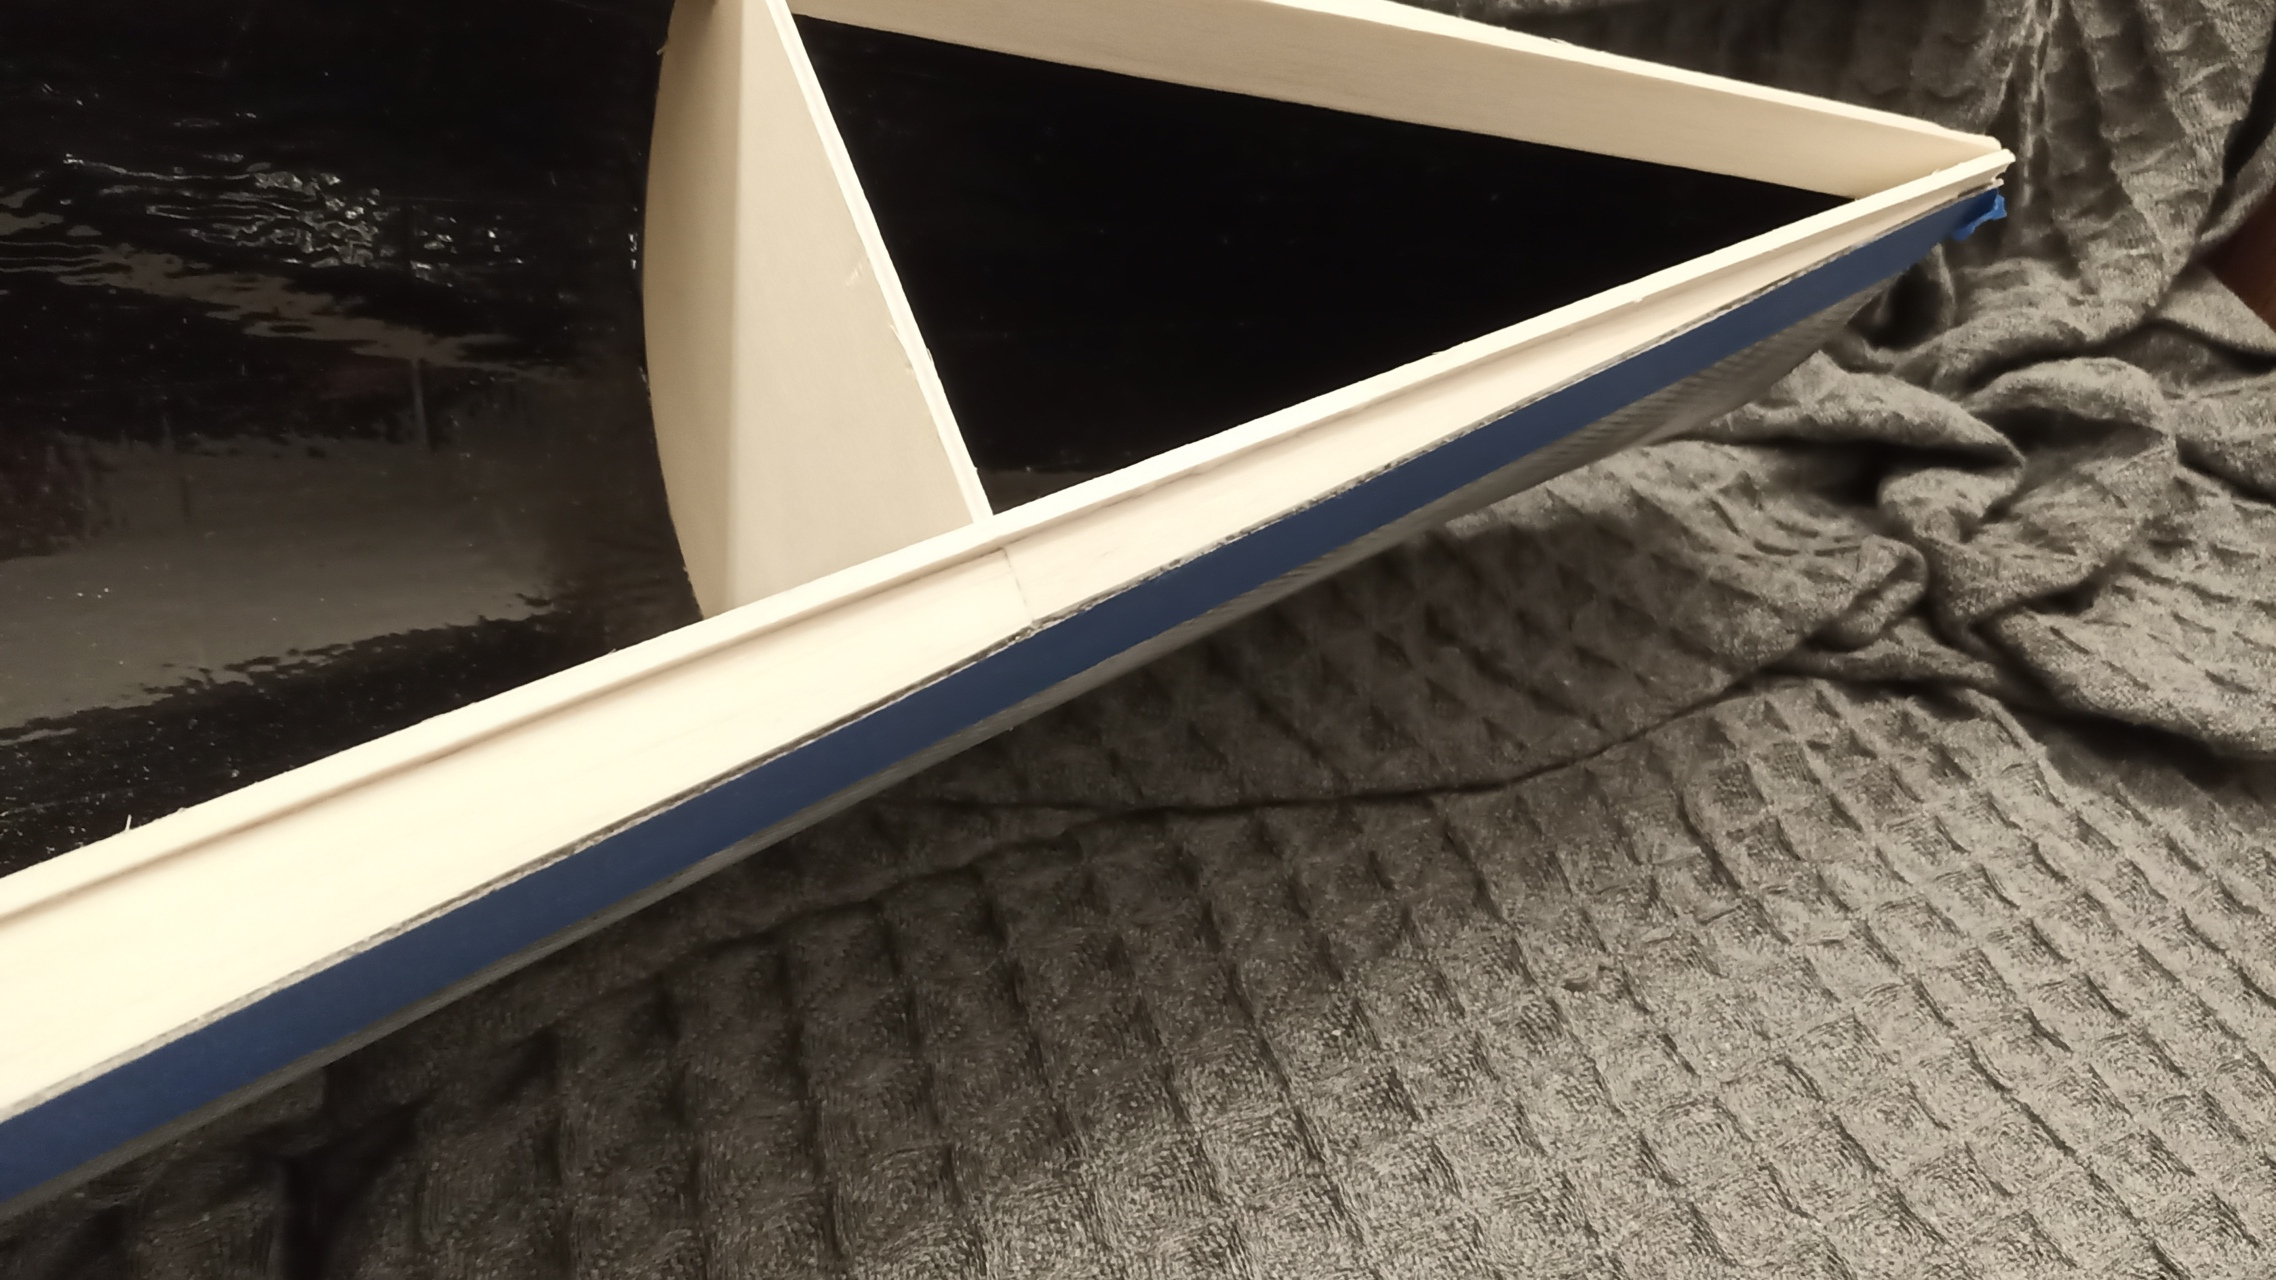
Borders: Light bulkheads with 3mm plywood and border are shaped with 3mm balsa. It aims to provide a light structure easy to finetune. I will see if an added G4 primer will provide enough strength or I will simply fiberglass the wood…
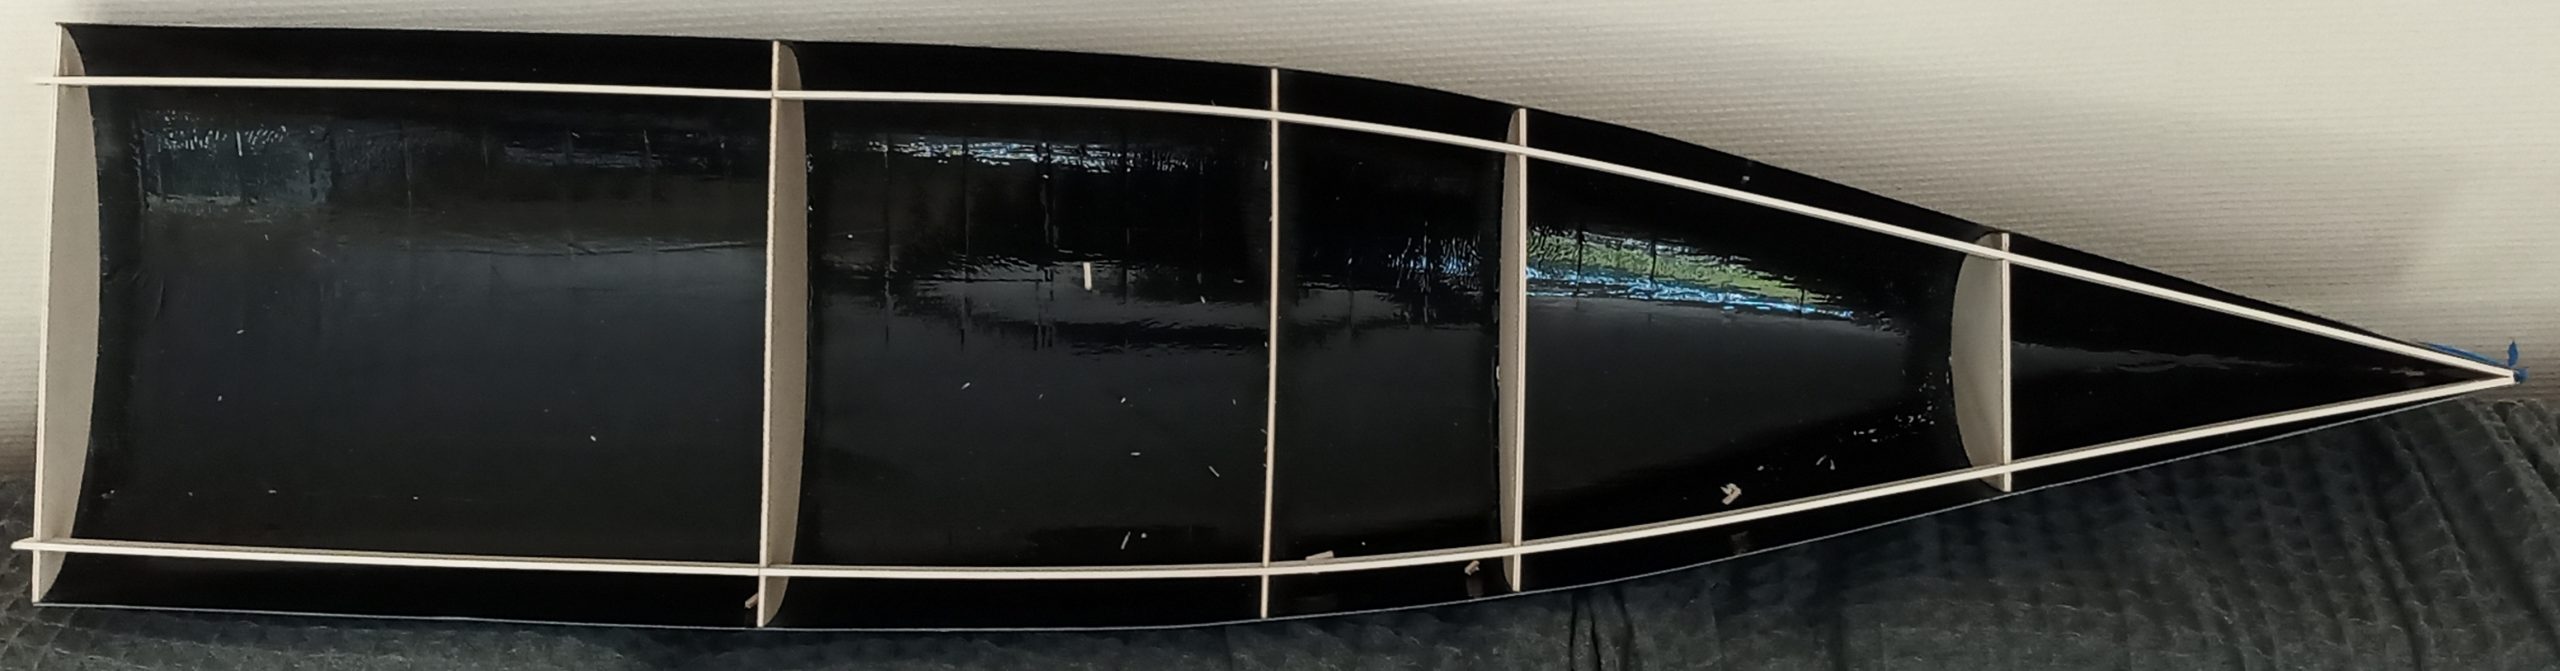
3mm Balsa custom insertion
Trimming and sanding
Second layer of 3mm balsa on top and bevel
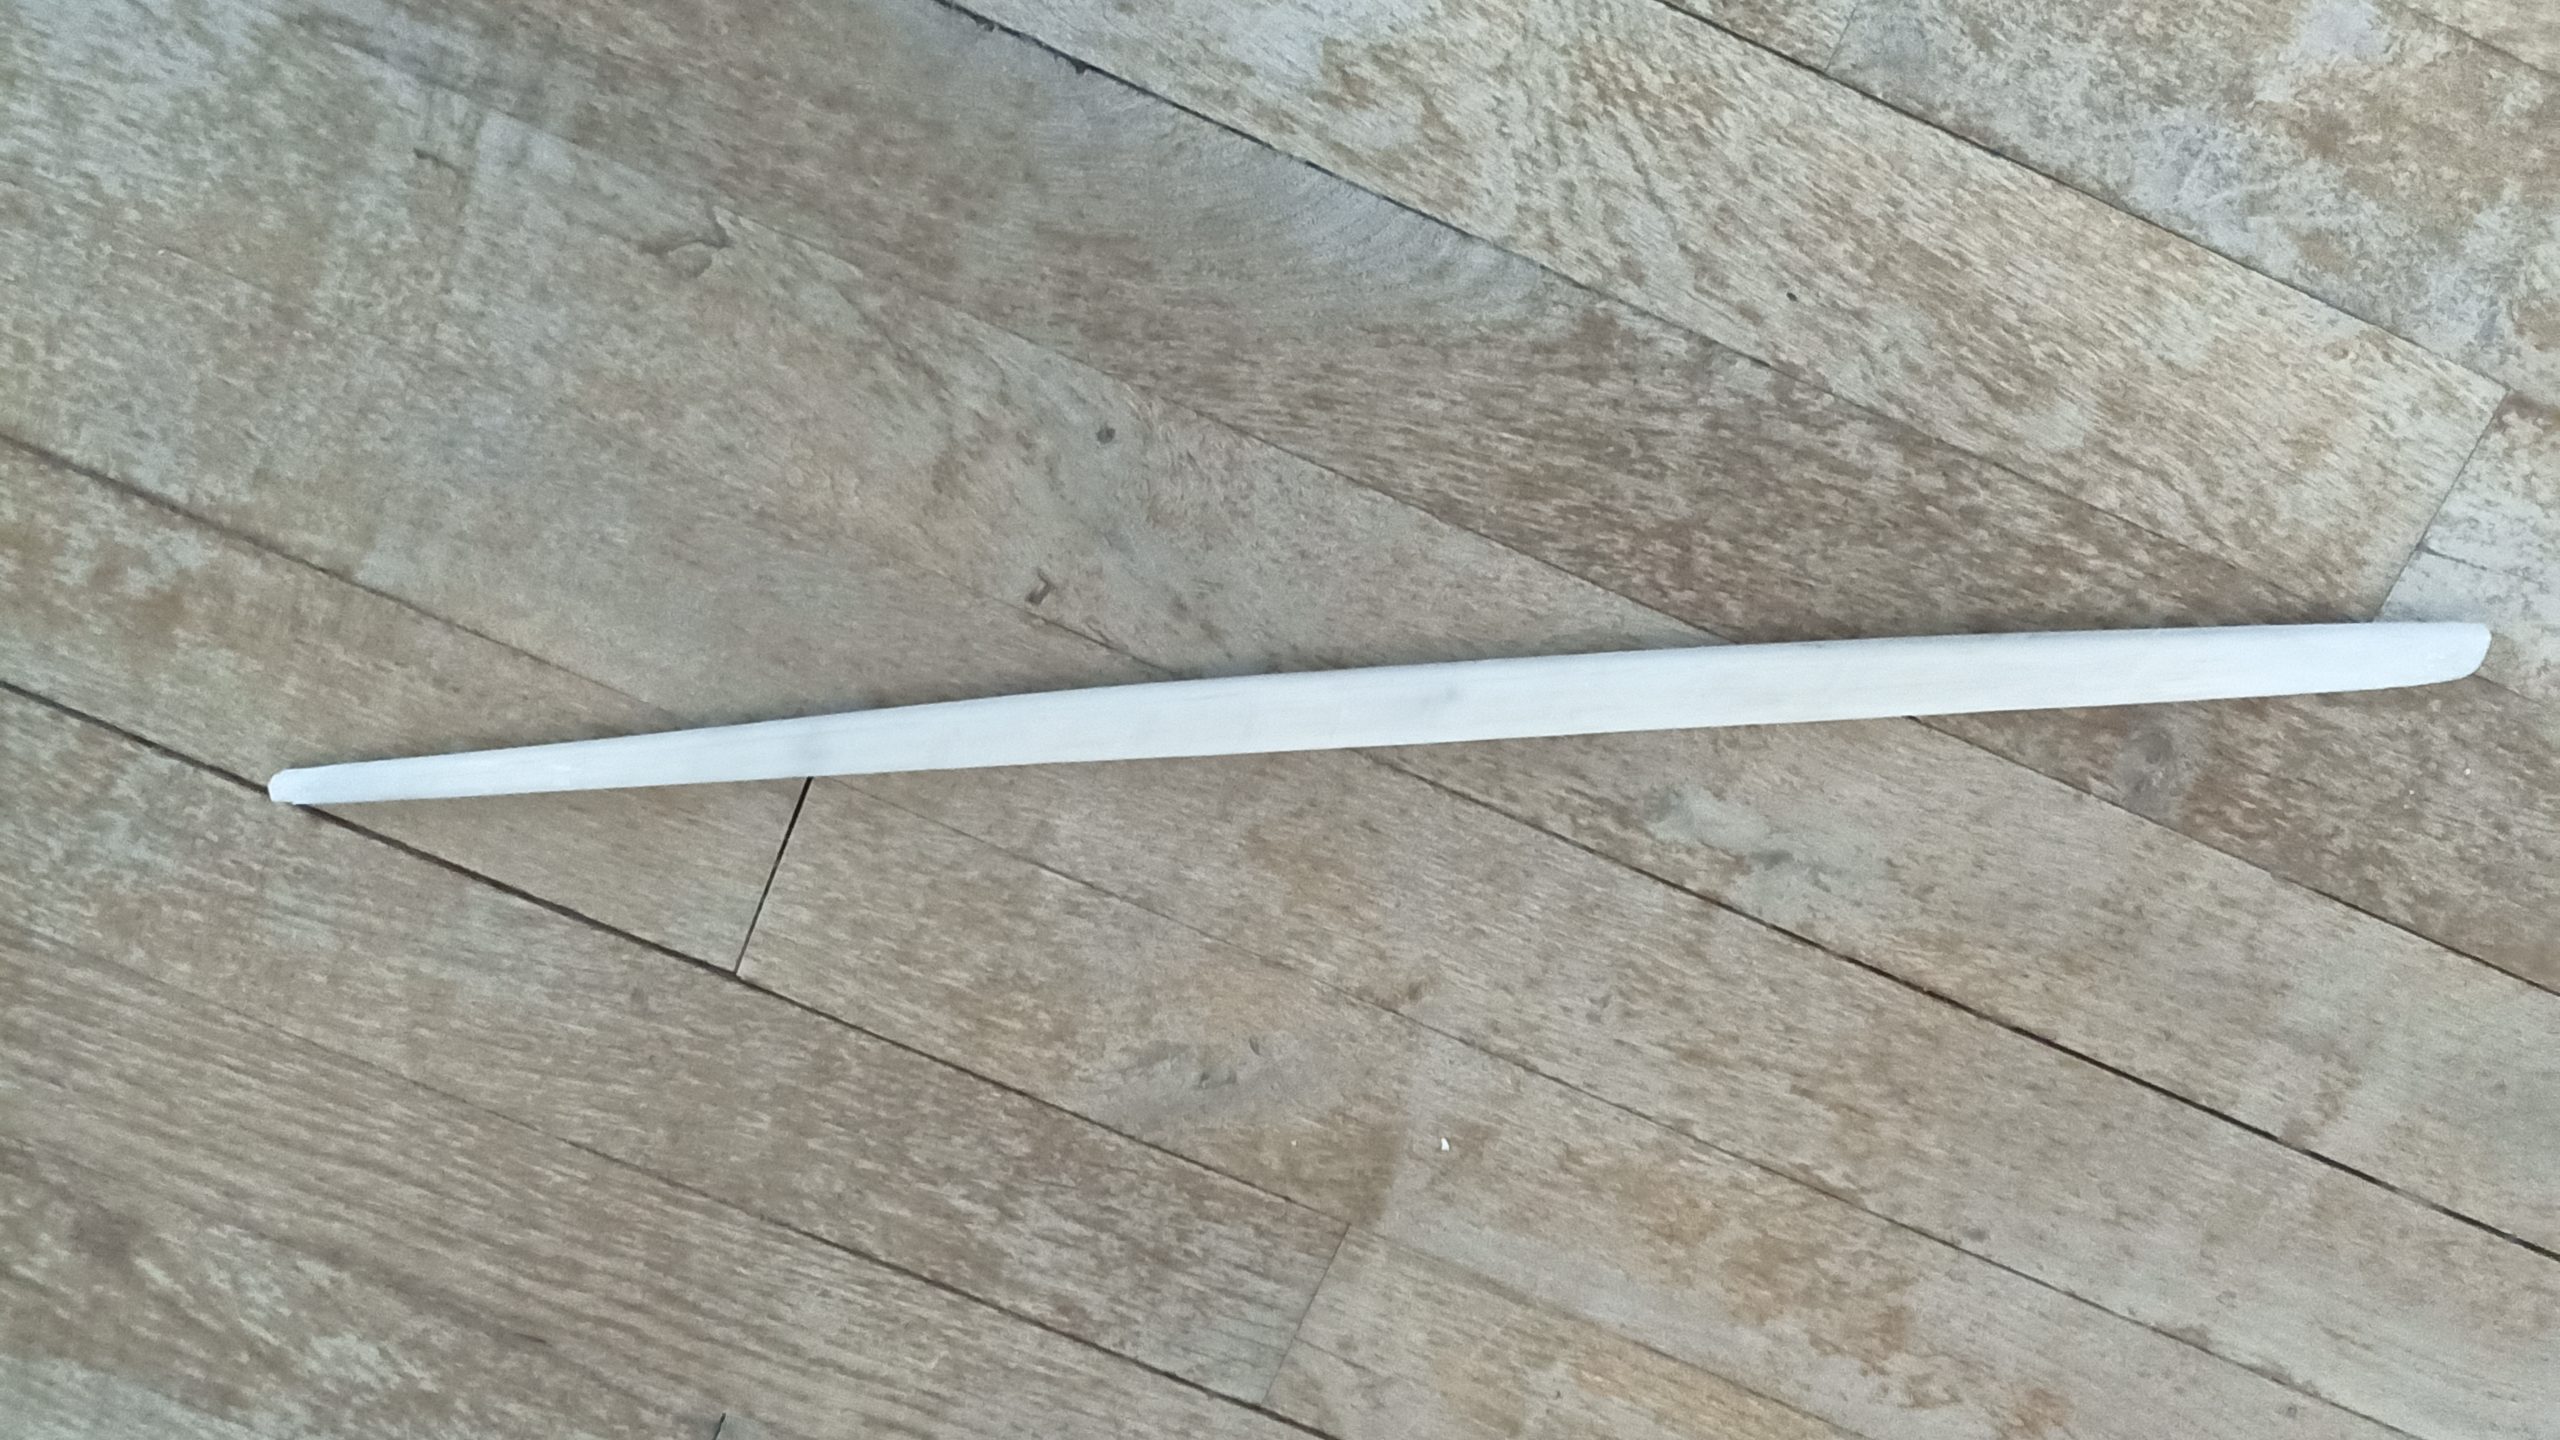
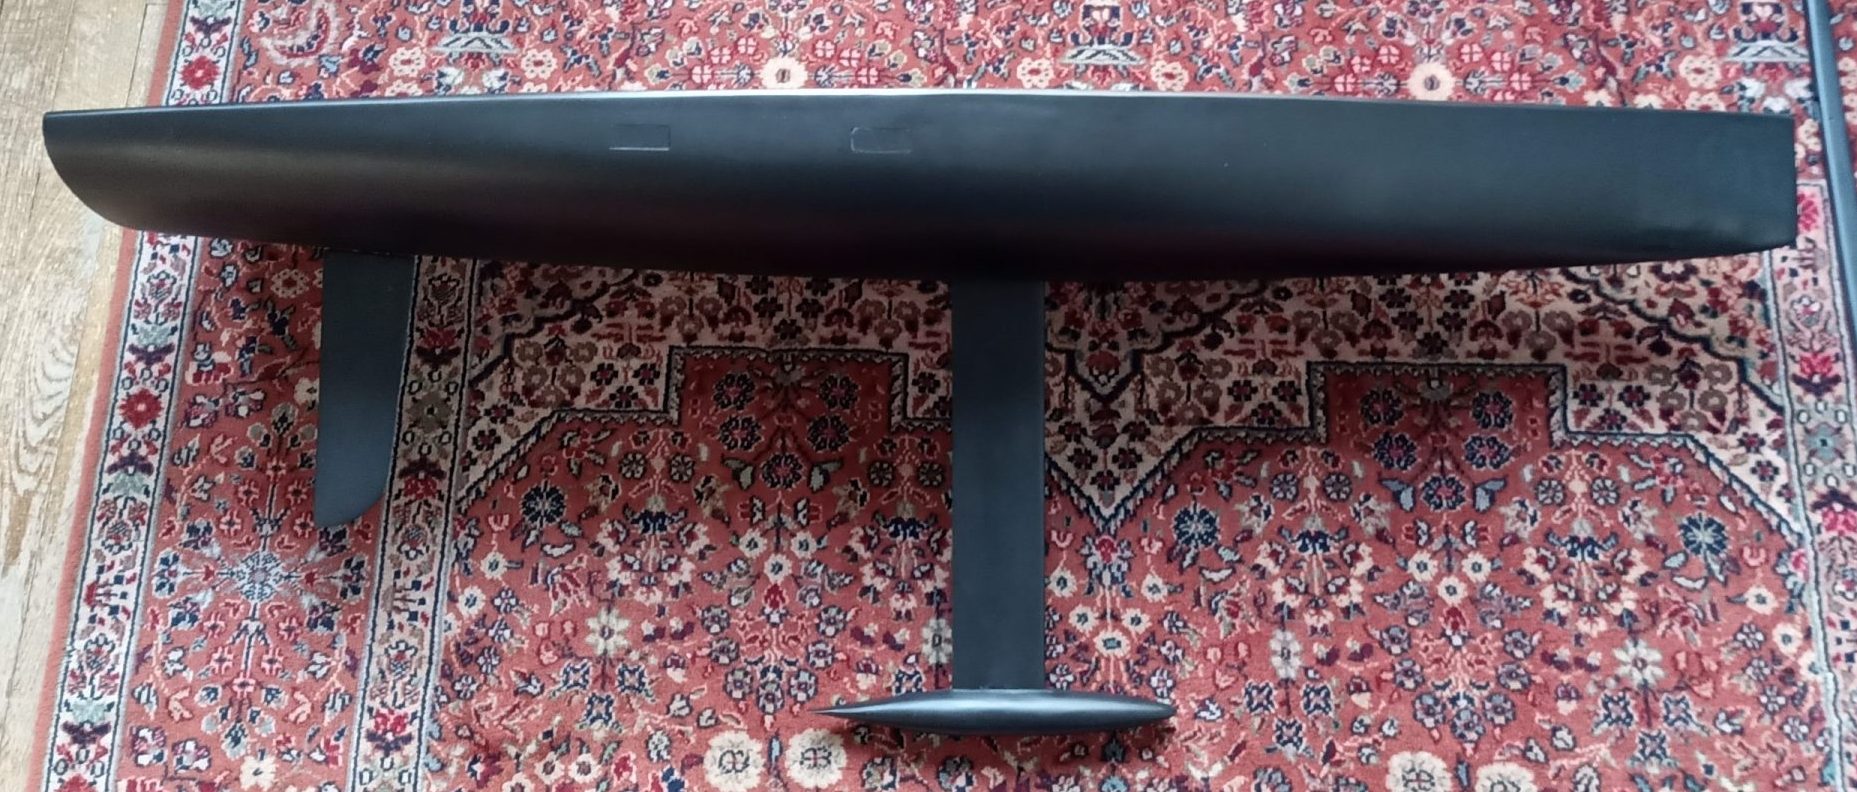
RUDDER AND FIN
The rudder is 4 layers of 160gr/m2 fiberglass encapsulated between plywood and shaped. The middle fiberglass is for stiffness and leading/trailing edge hardness. 19cm, 30gr
The fin is from center: 4 layers of 160gr/m2 fiberglass, balsa 3mm, 2 layers of 160gr/m2 fiberglass covering and fixing the middle shaped carbon tube of 8mm. The middle fiberglass is a bit for stiffness and mainly for leading/trailing edge hardness. The carbon tube has two purposes: stiffness and holding top/down brass knurl nuts.
40cm, 7.5mm thickness, 87gr, bending 17mm with 1600gr bulb.
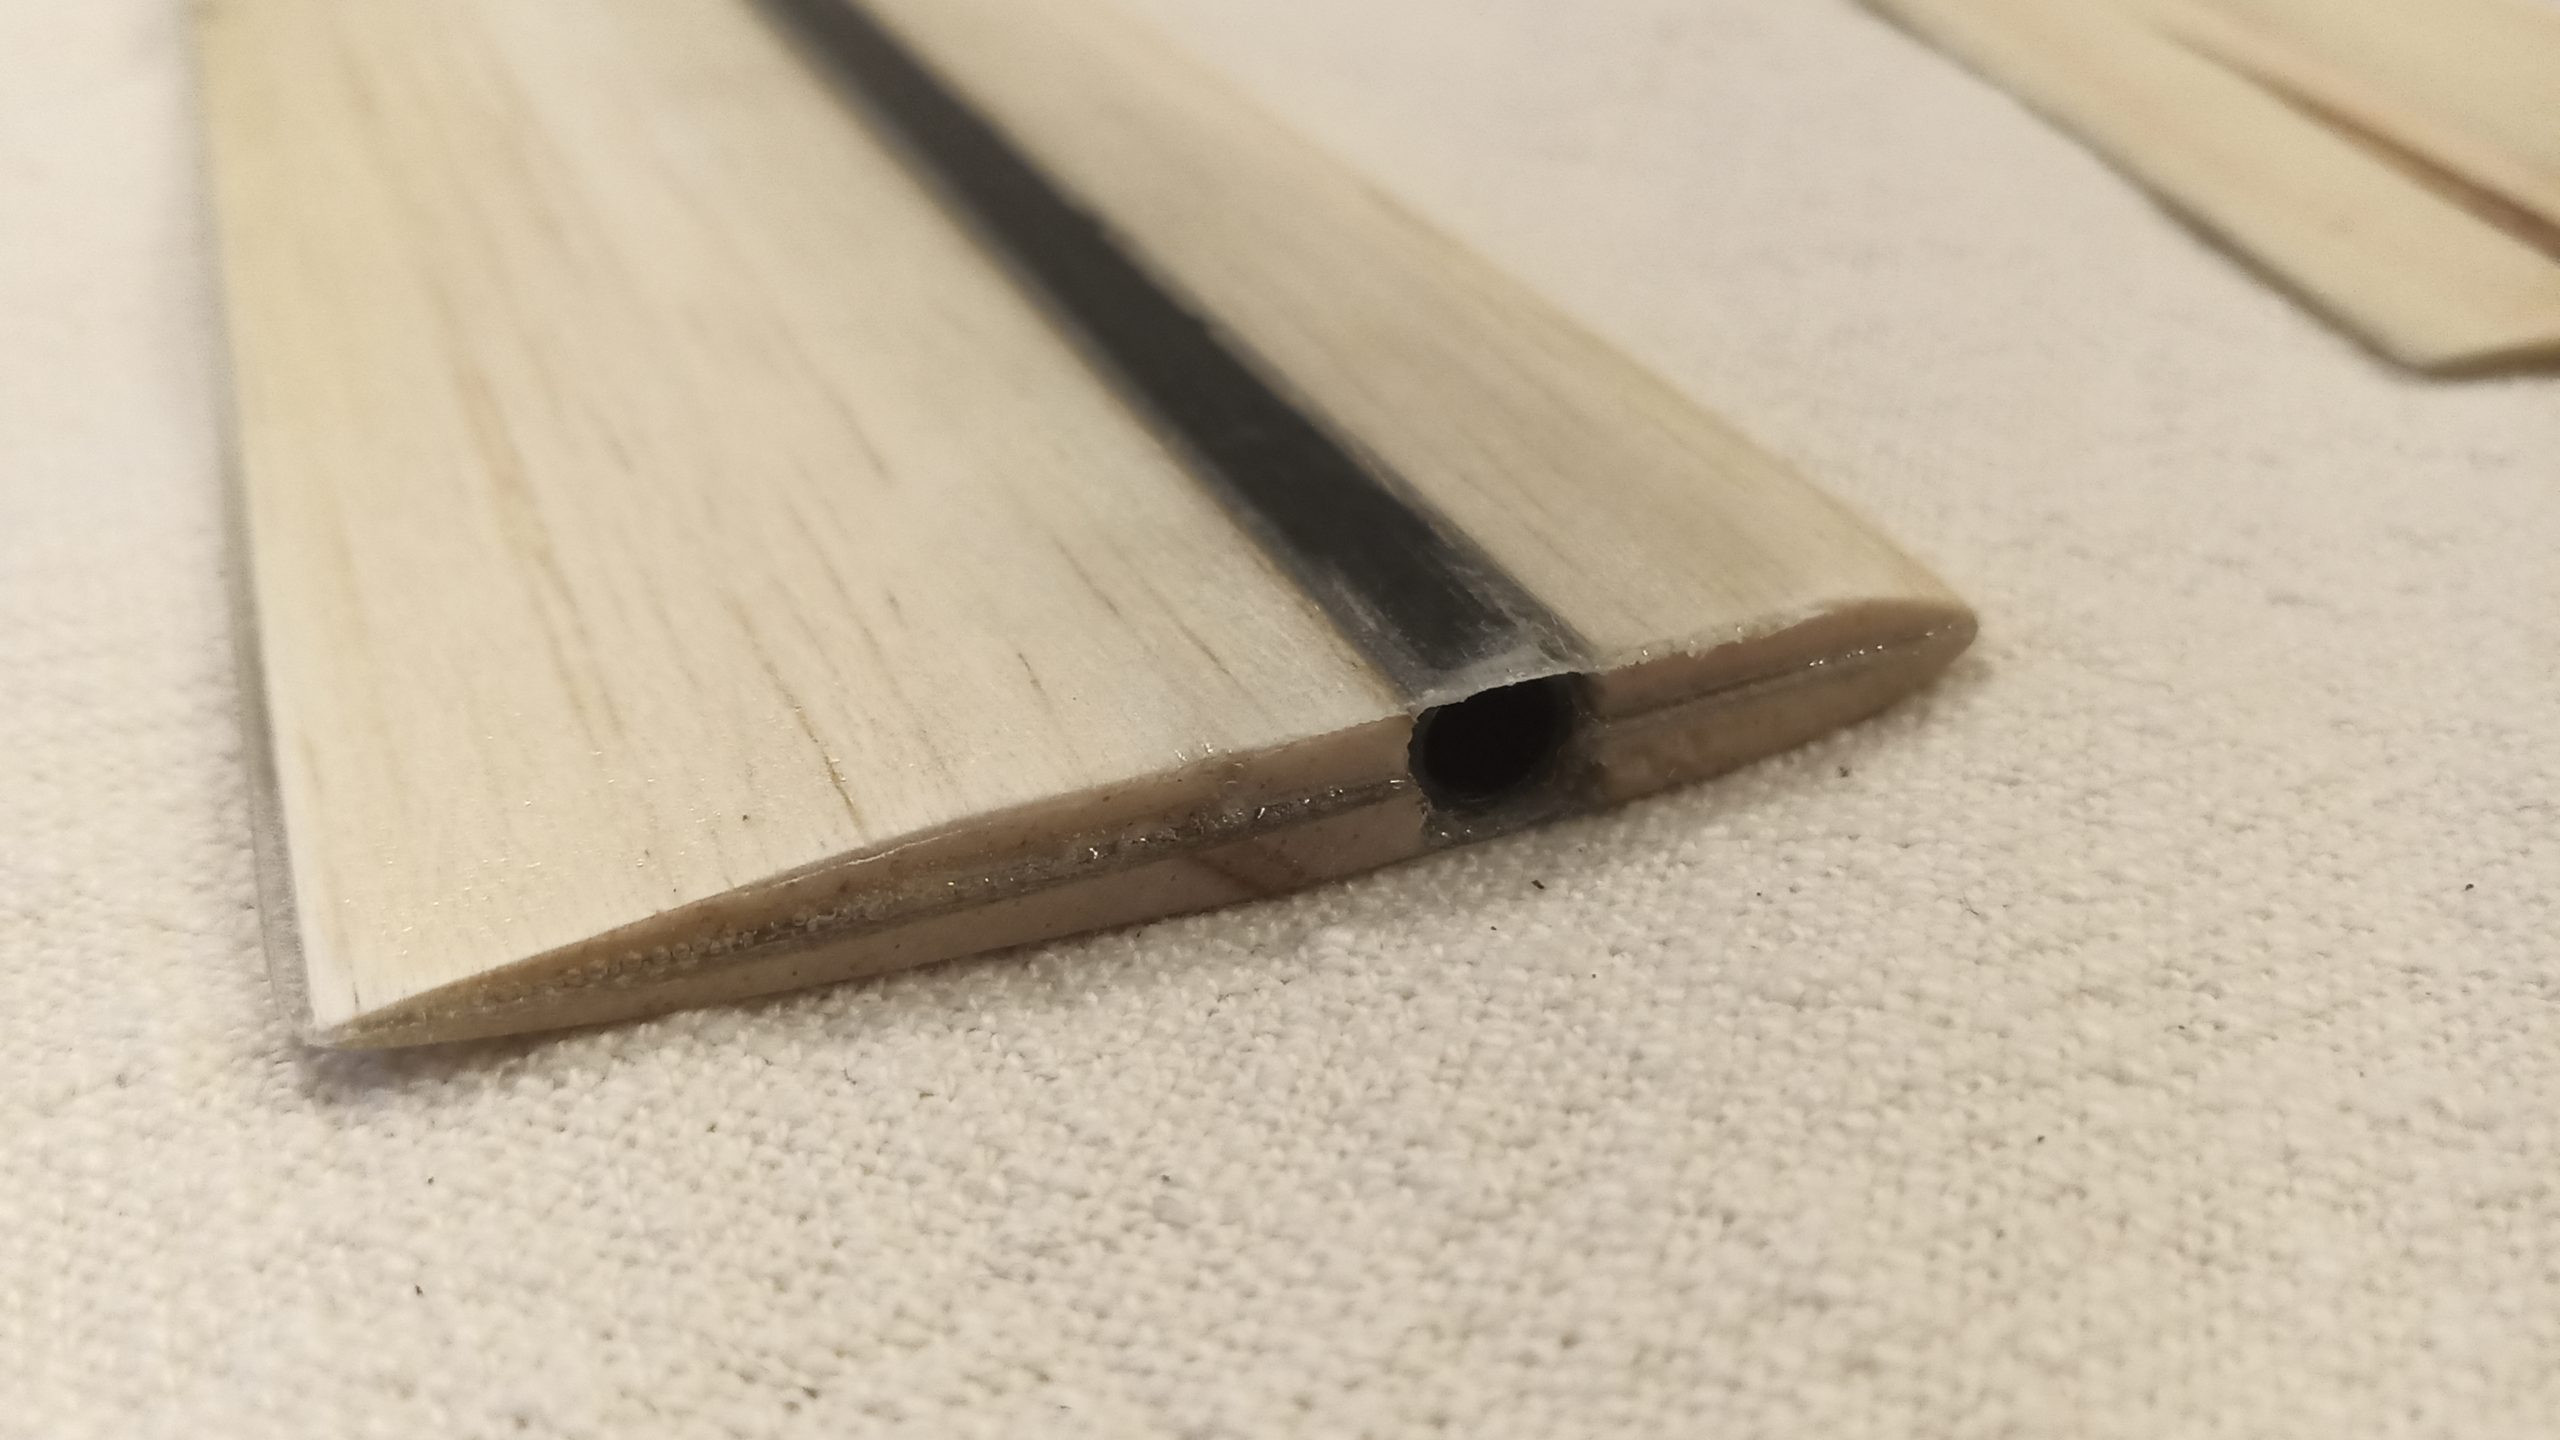
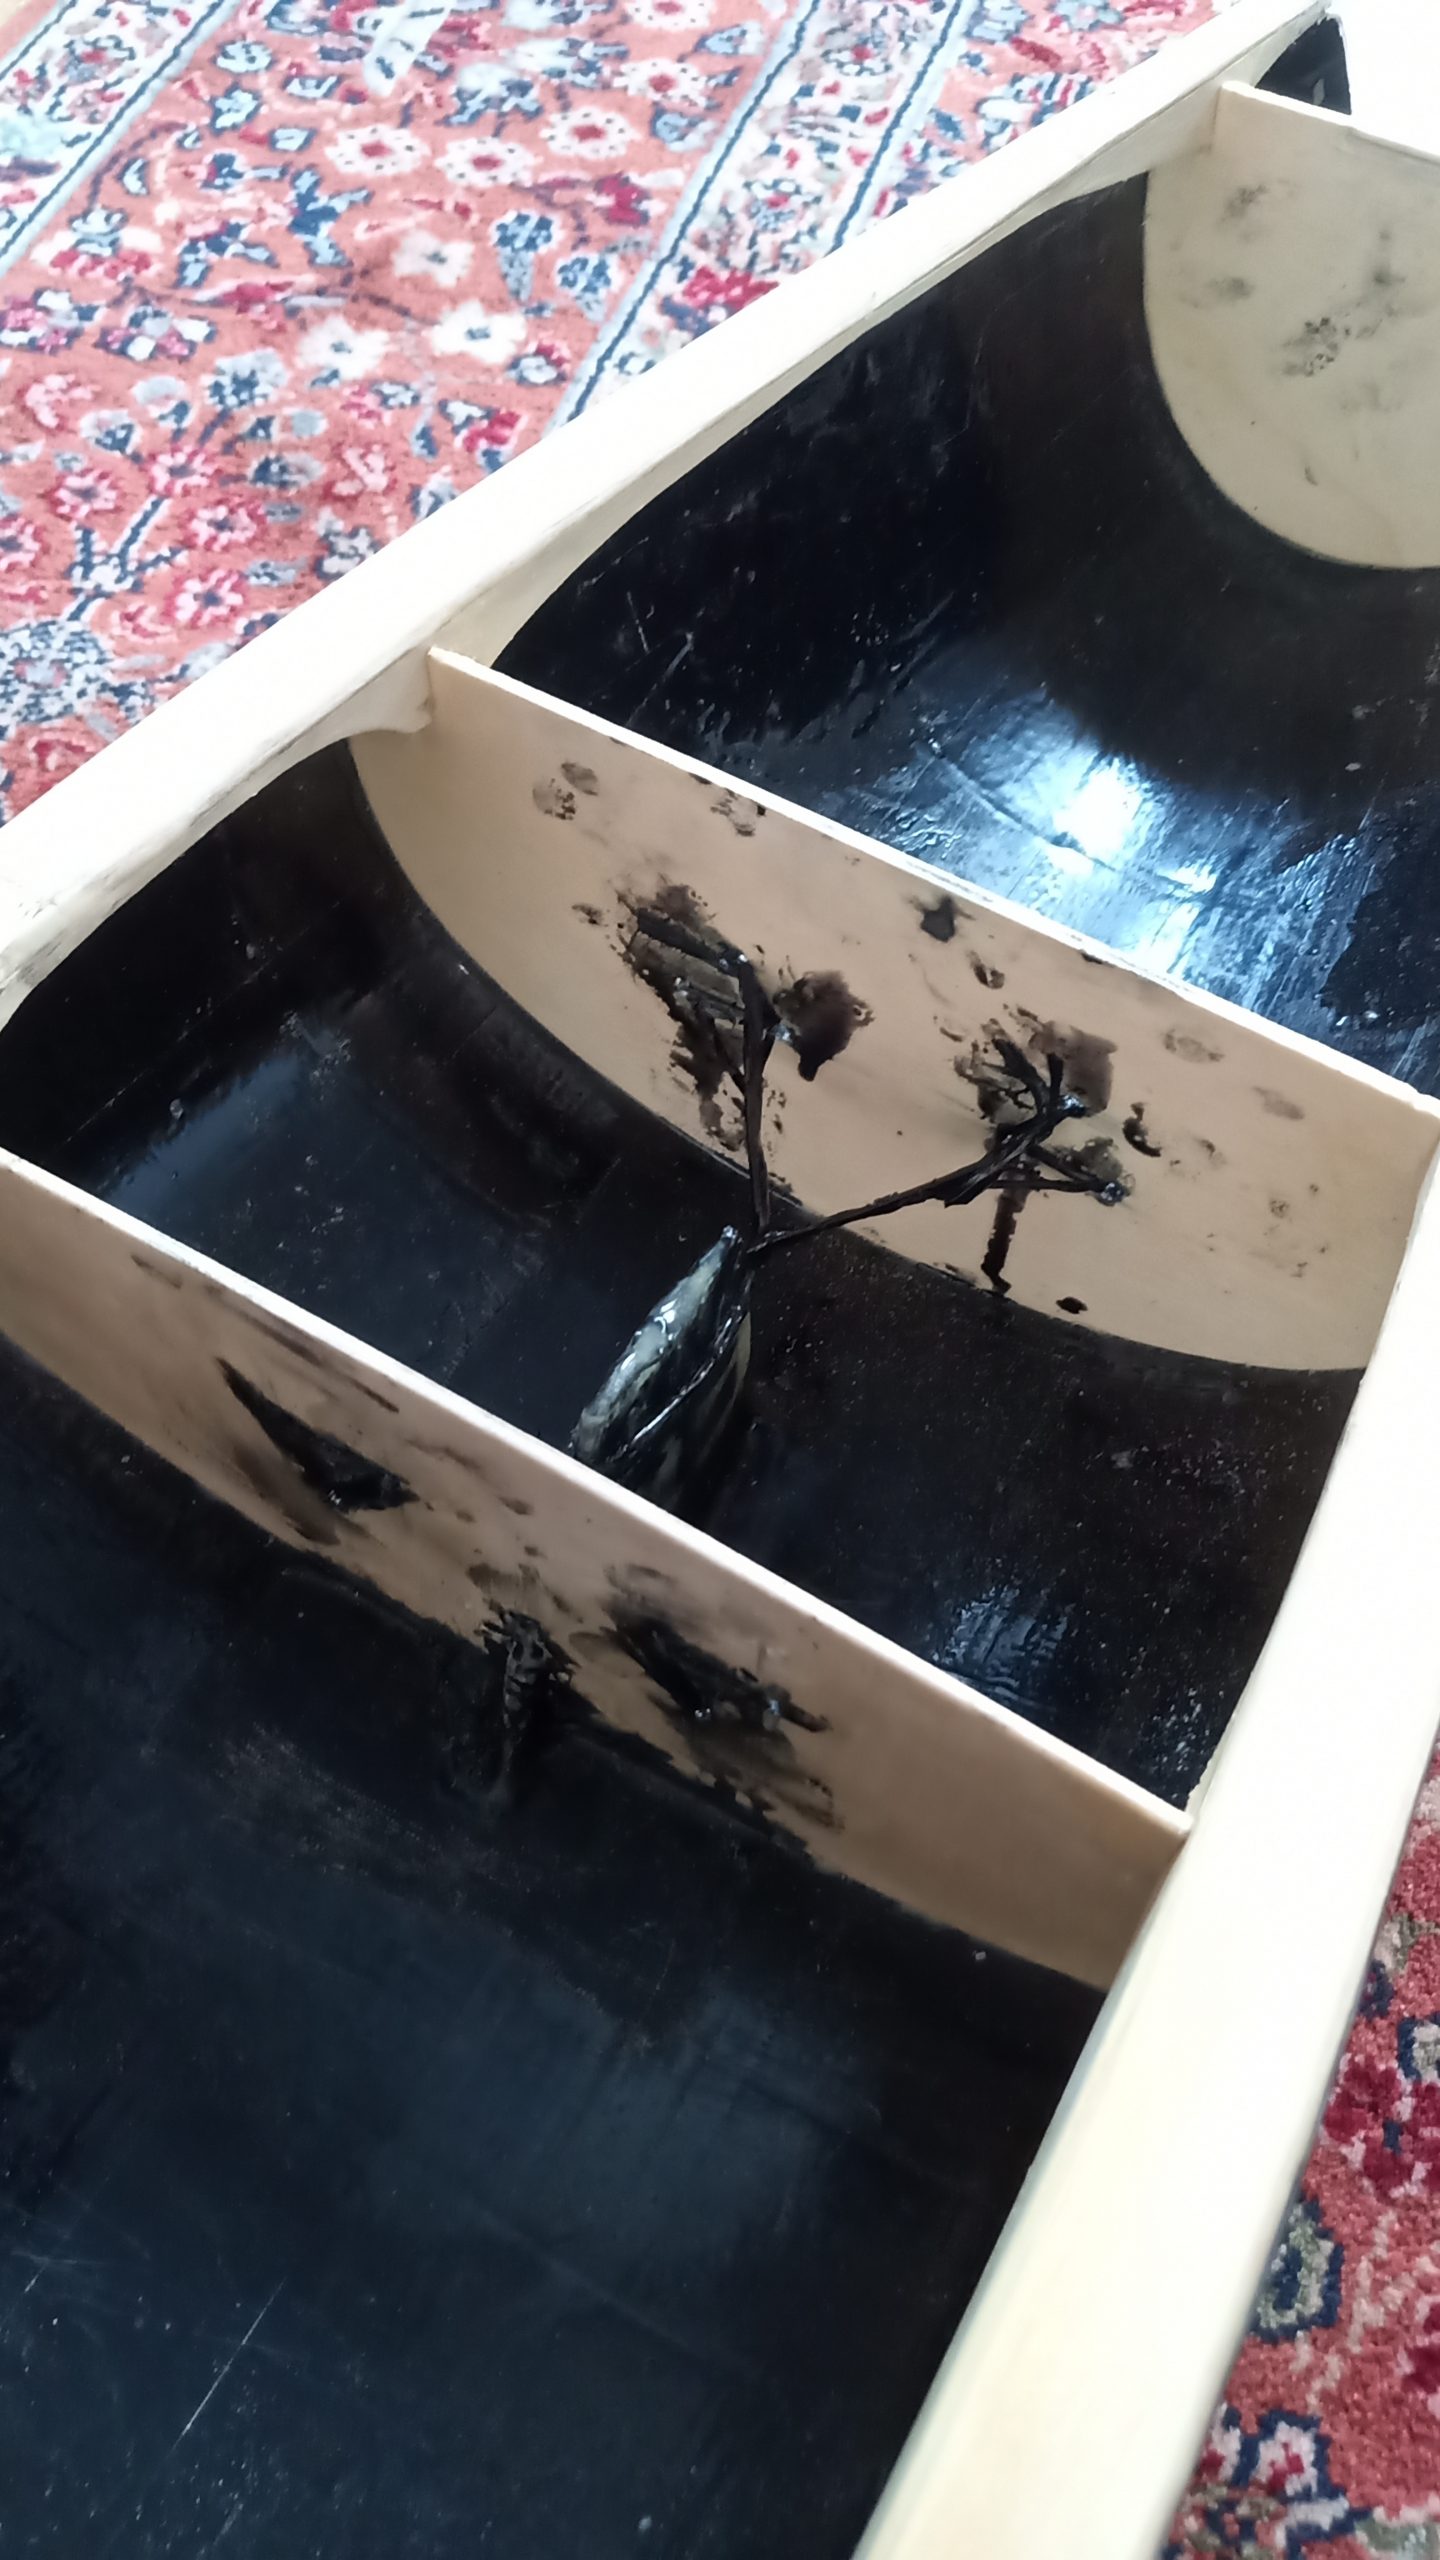
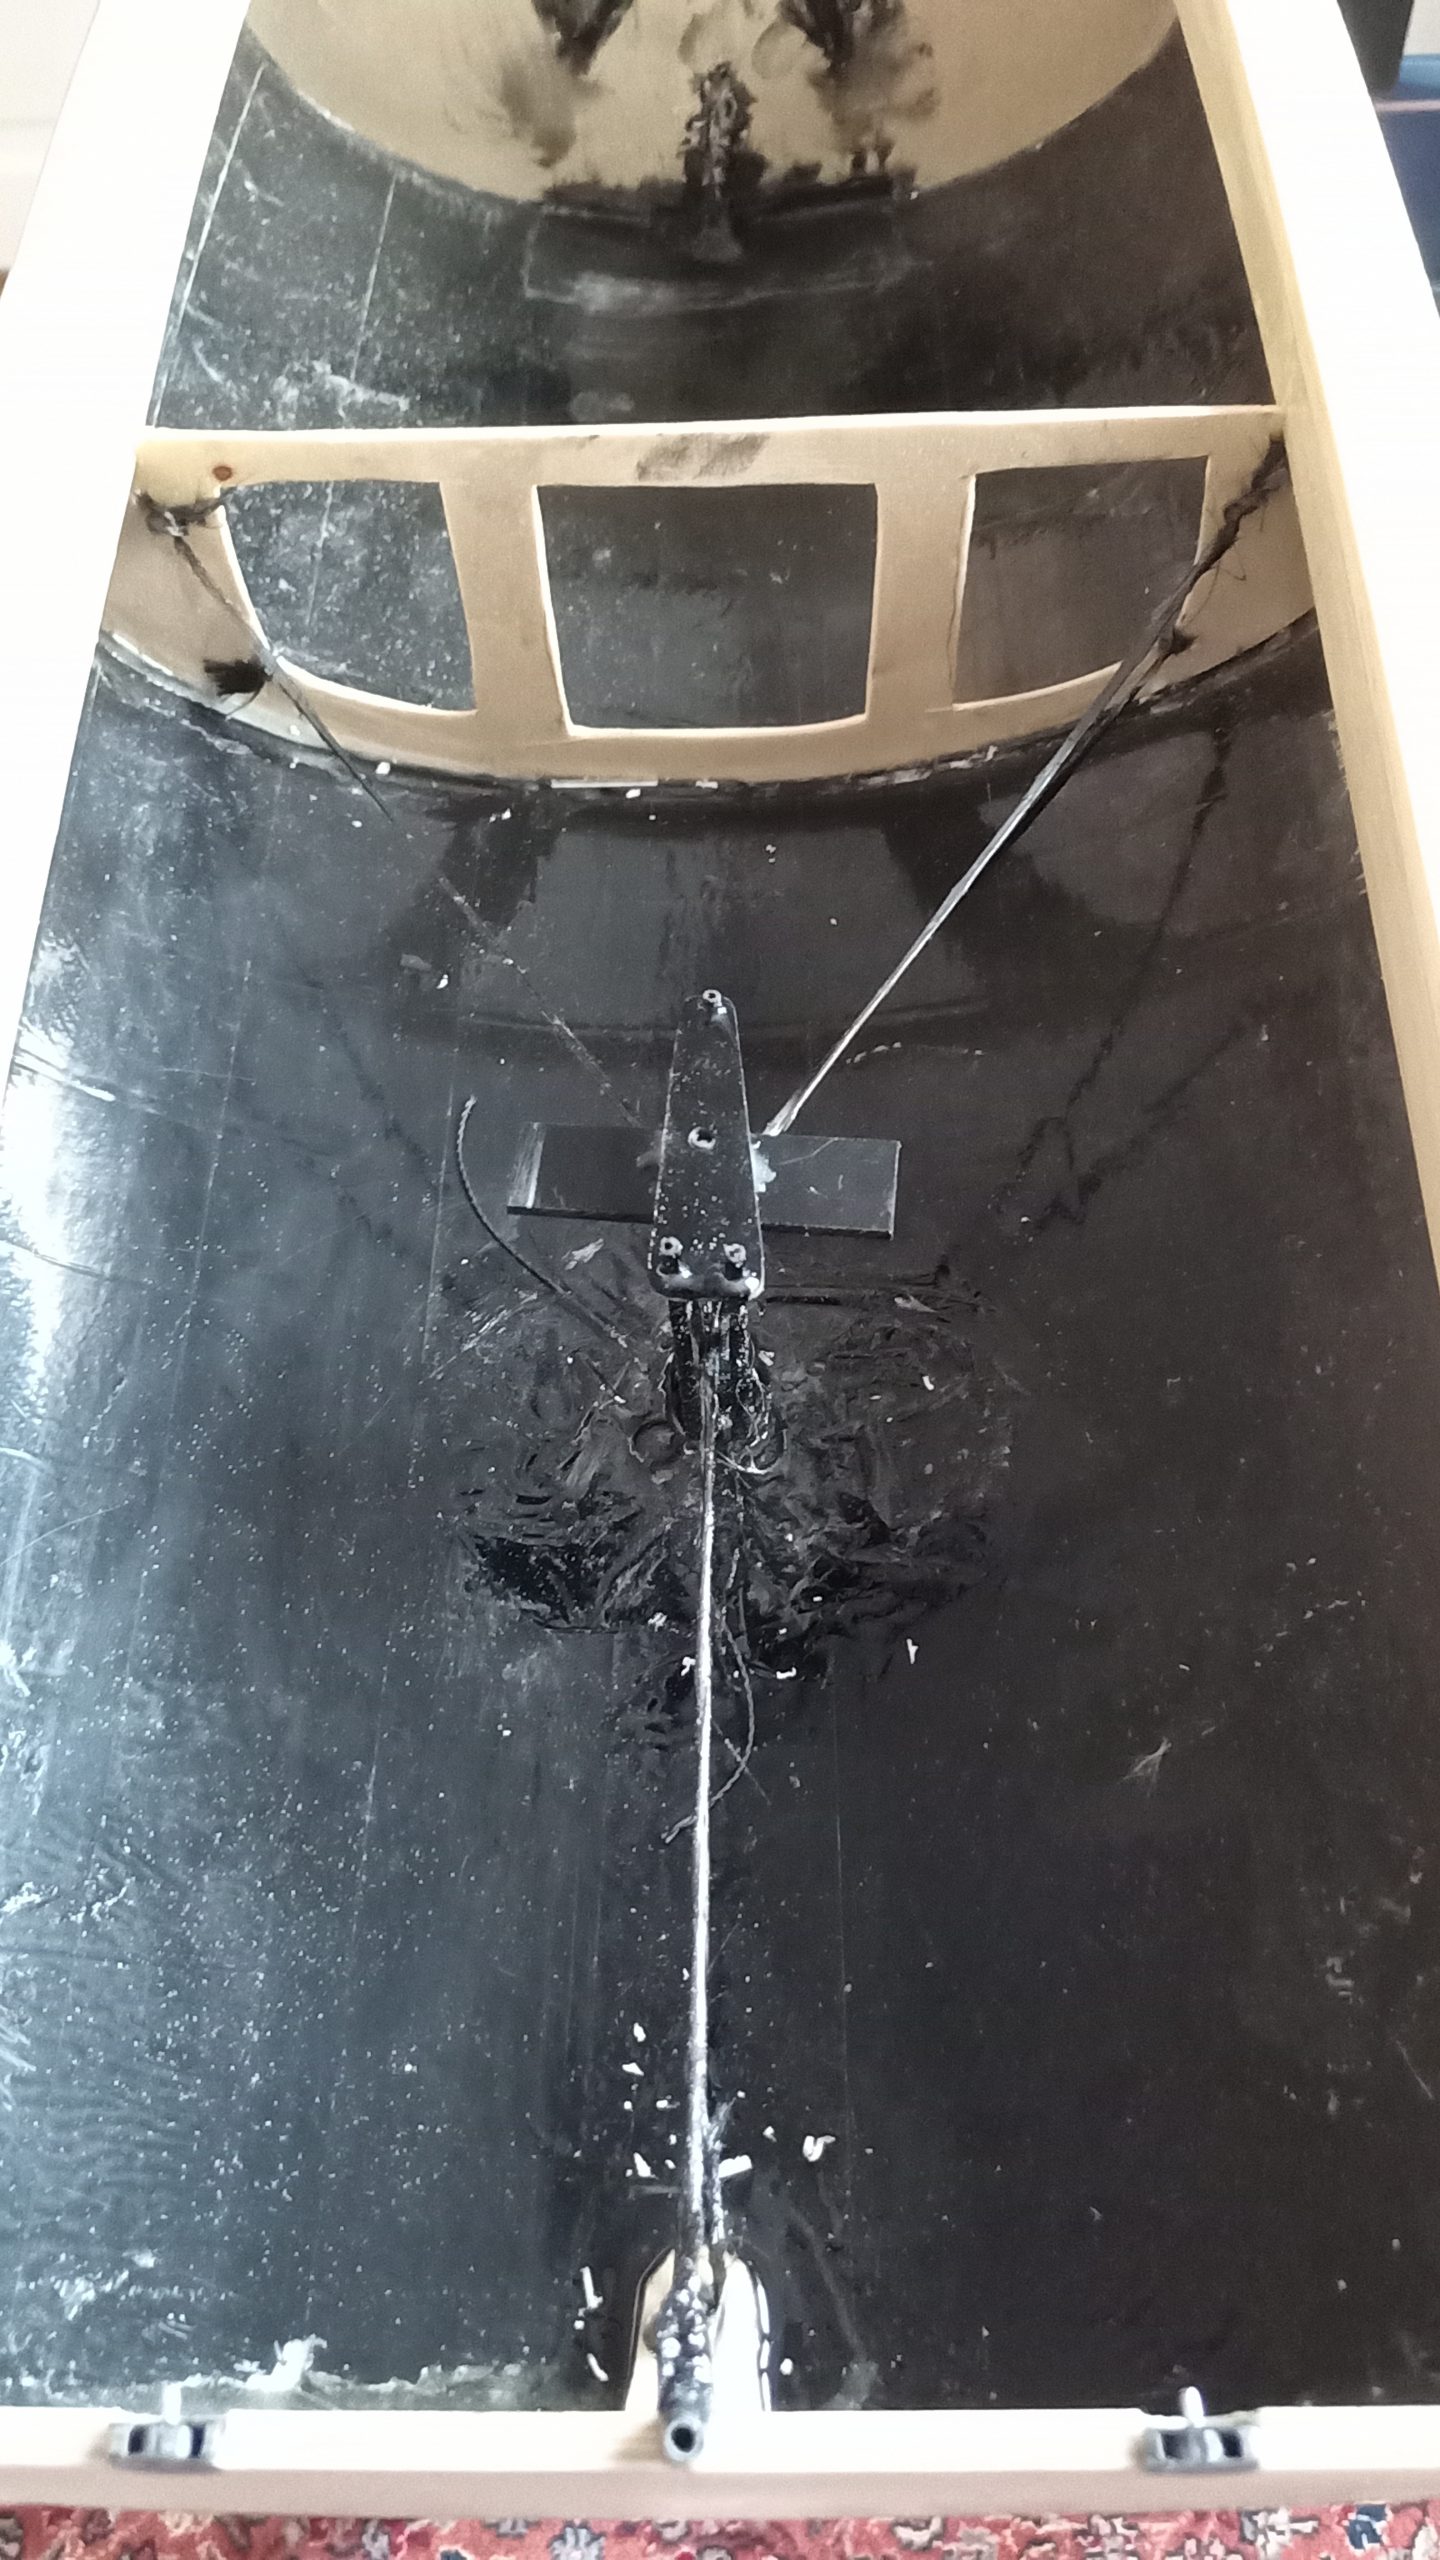
Keel box is built on the fin: unidirectional carbon 200gr and multiple layers of fiberglass.

Keel box settled in the hull, rock solid and light weight: epoxy glue against the hull, high strength unidirectional carbon 200gr stratified web over the box head and bulkheads, one layer of fiberglass 160gr over the seal (box / hull). I used black pigment in my resin to ensure visual control of the epoxy resin covering, it looks a bit messy but still very useful.
The front is prepared and reinforced to hold the jib stay and possibly a classic headsail like the real 1:1 tango… but I will probably finish with a classic RC jib boom.


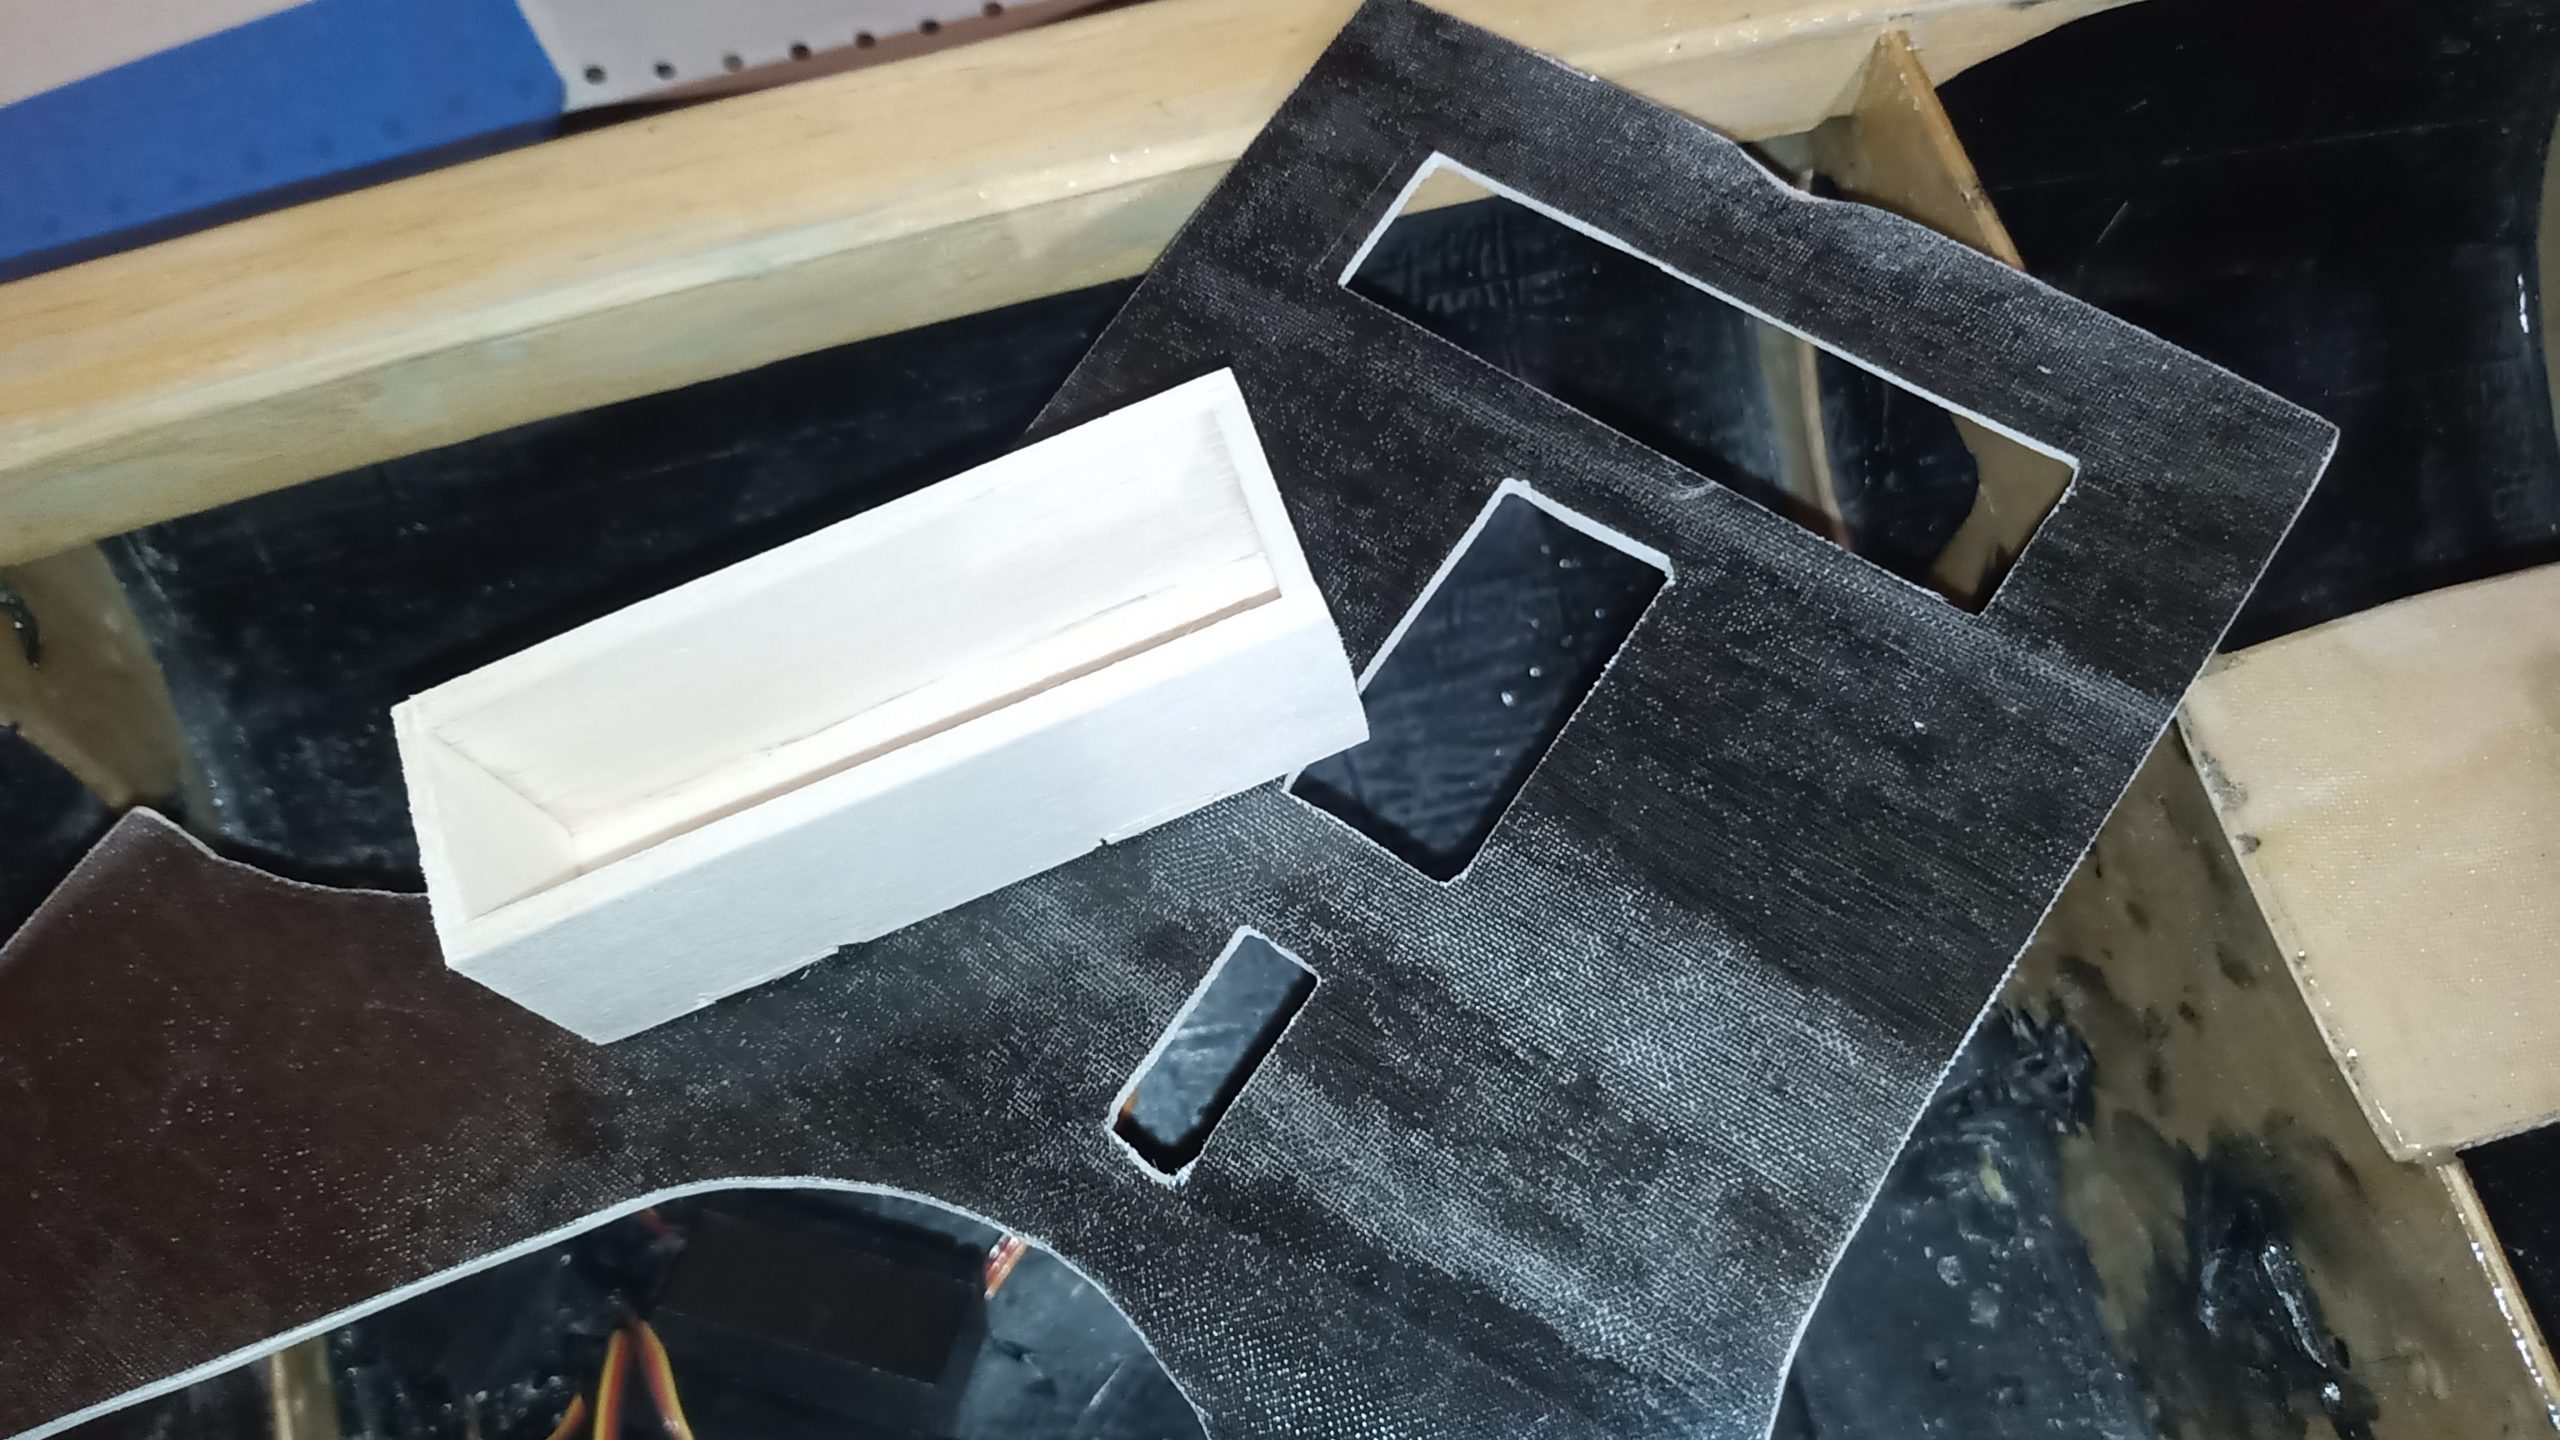
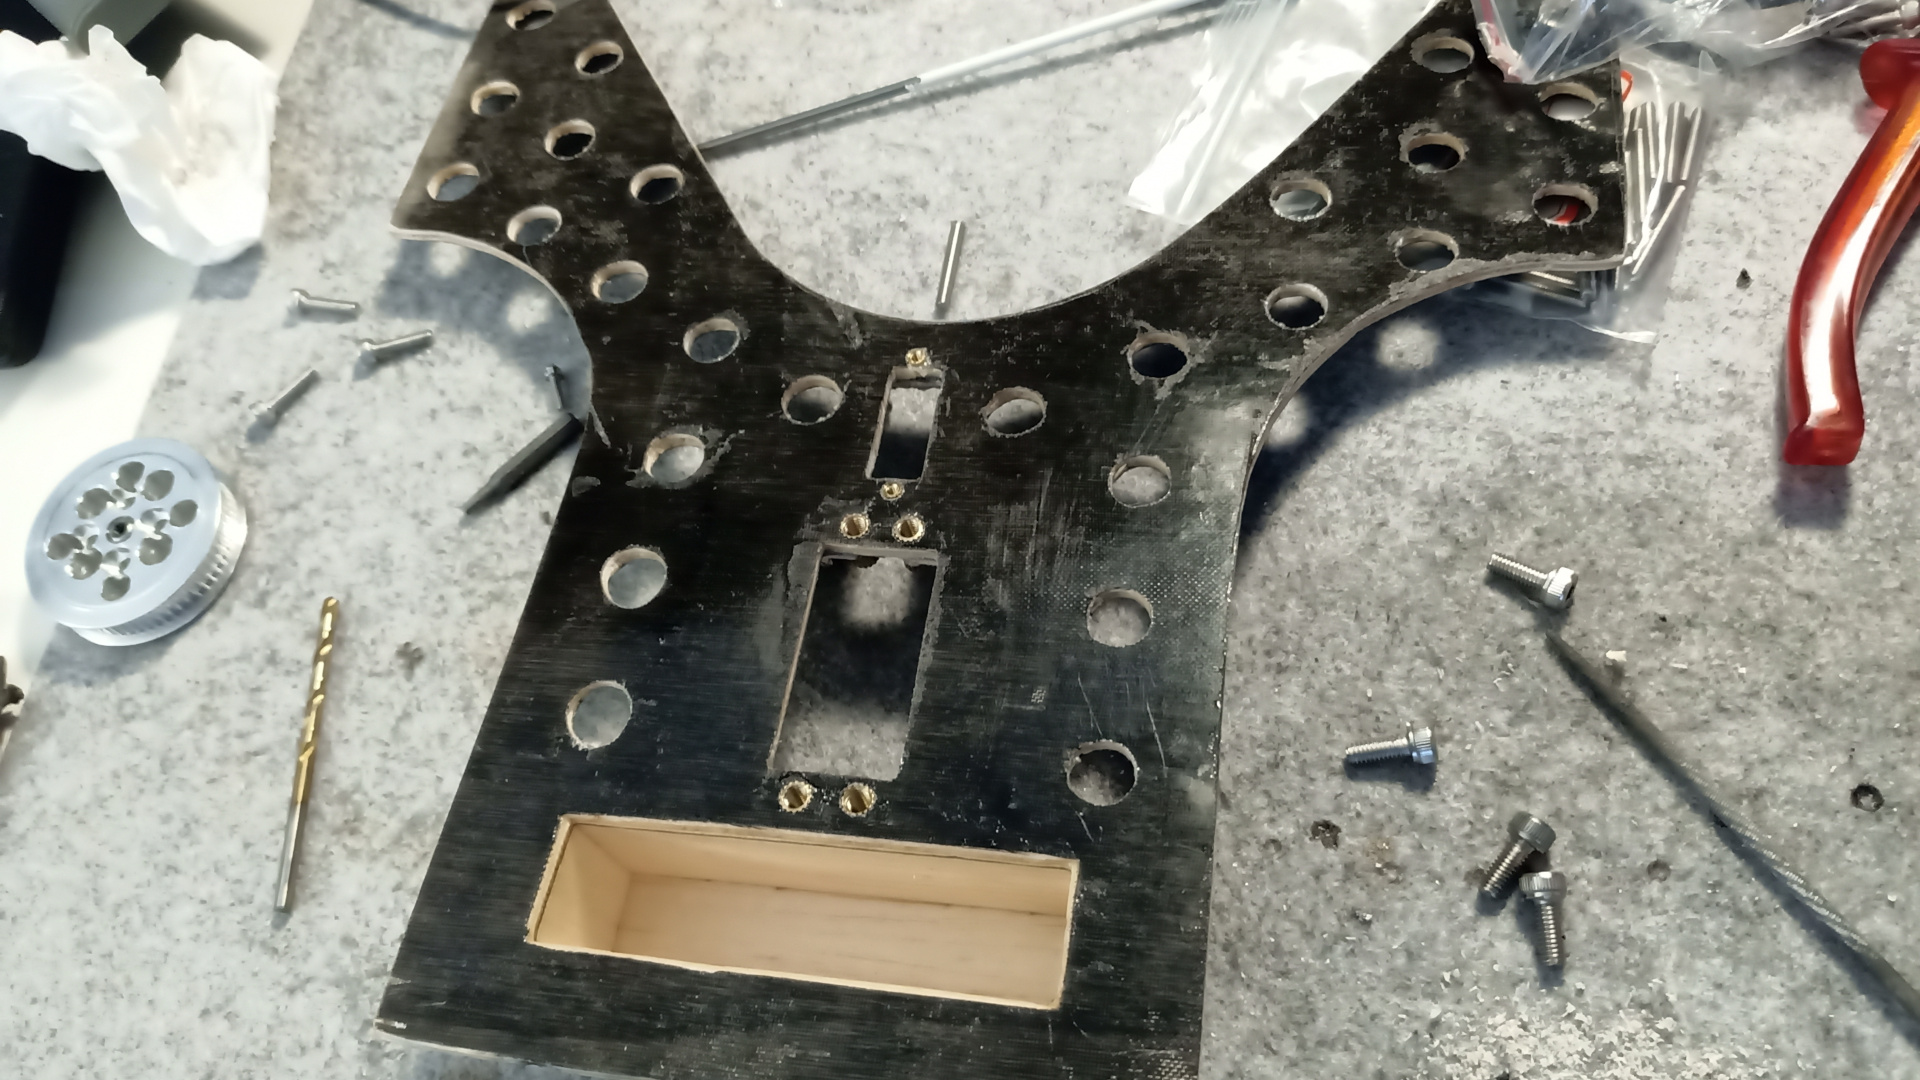
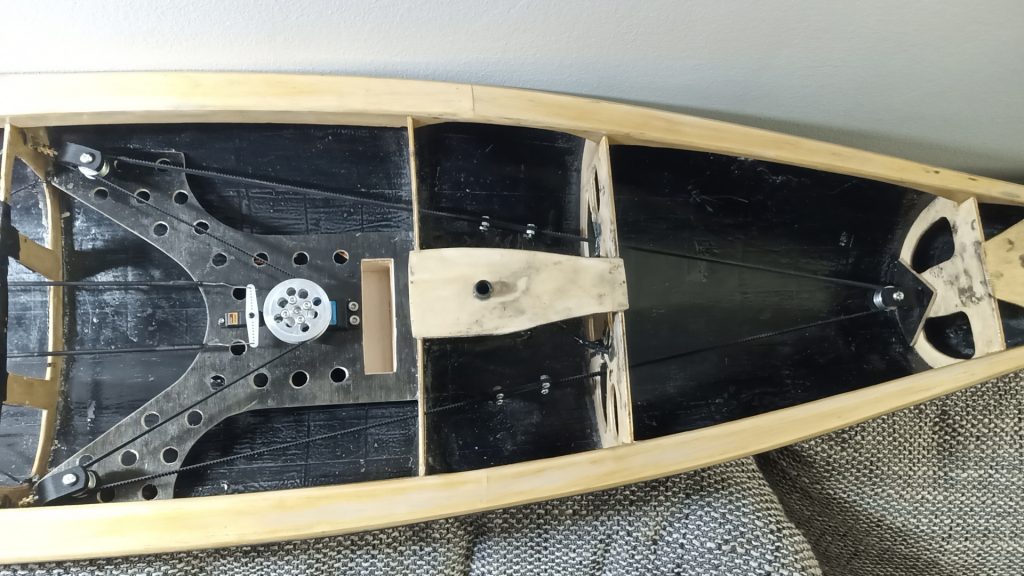
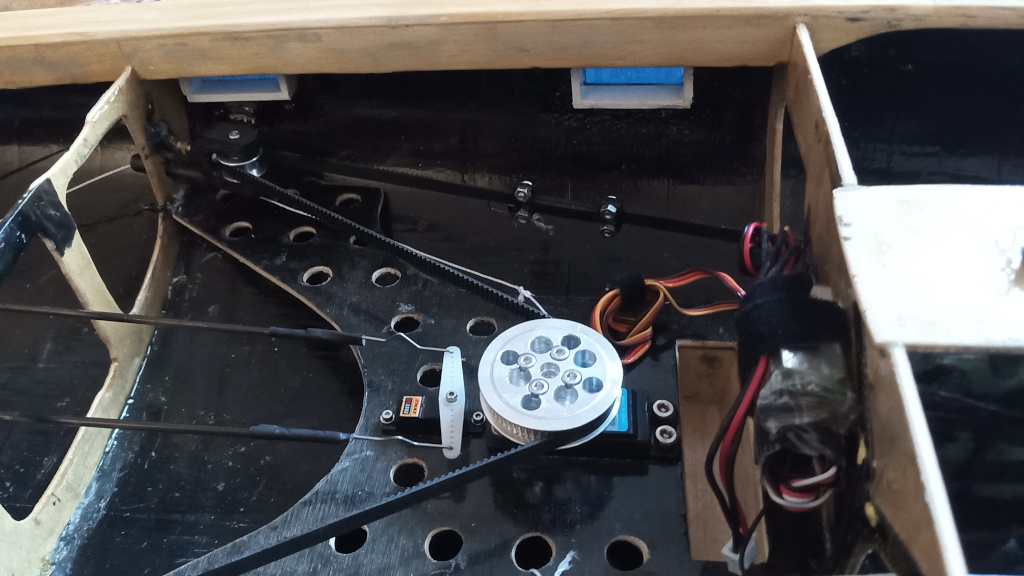
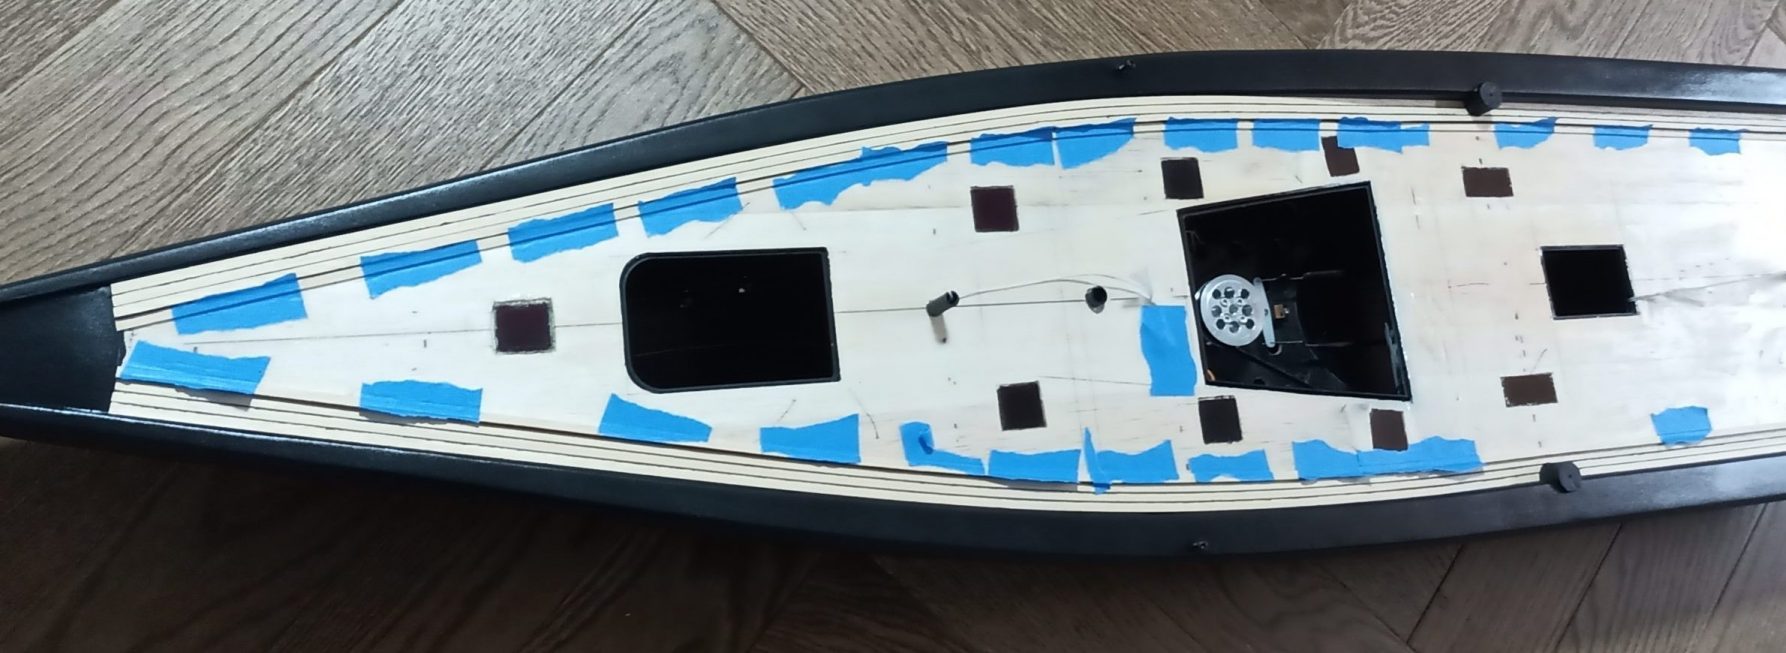
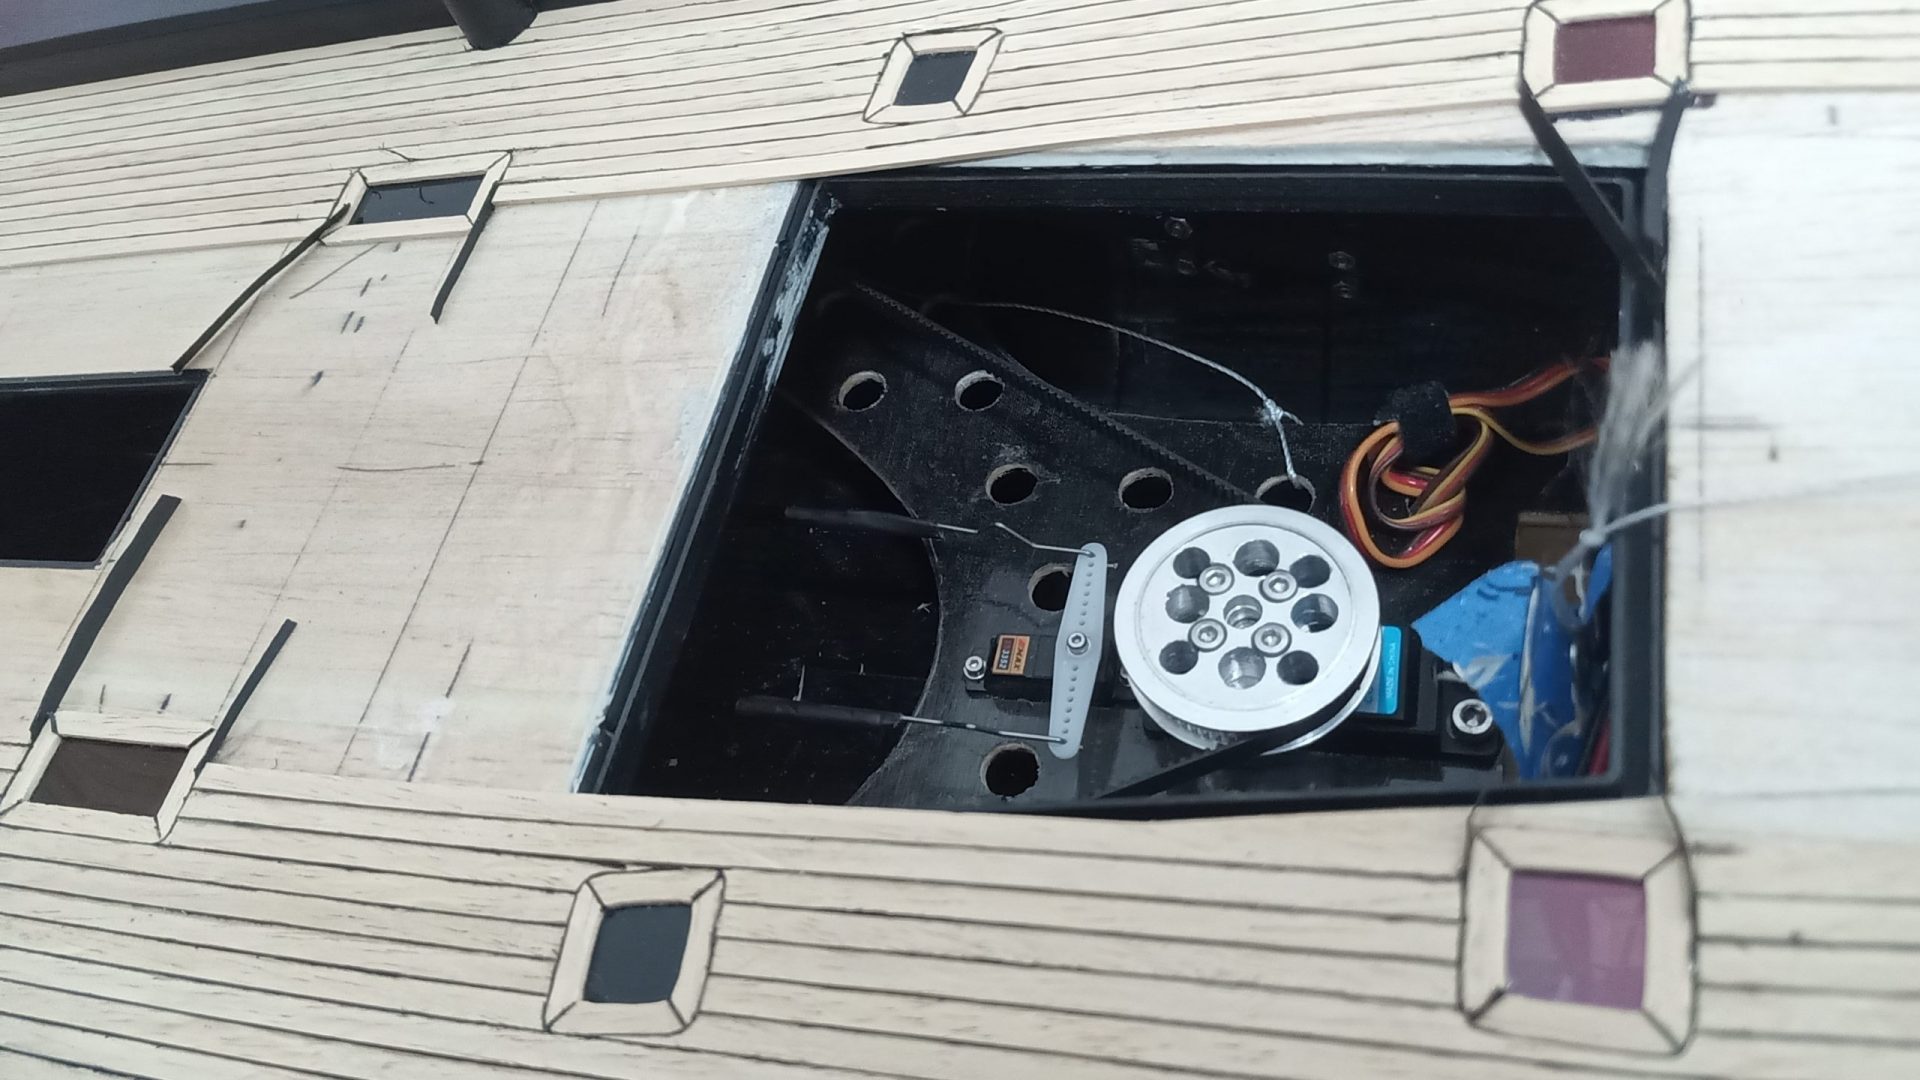
SERVO PLATE
Servo plate prepared with a sandwich fiberglass160+plywood+fiberglass160, good stiffness, acceptable weight: ~30gr. I added a protected hatch for the battery. Everything is “low-level” as possible: the more weight under the waterline, the better.
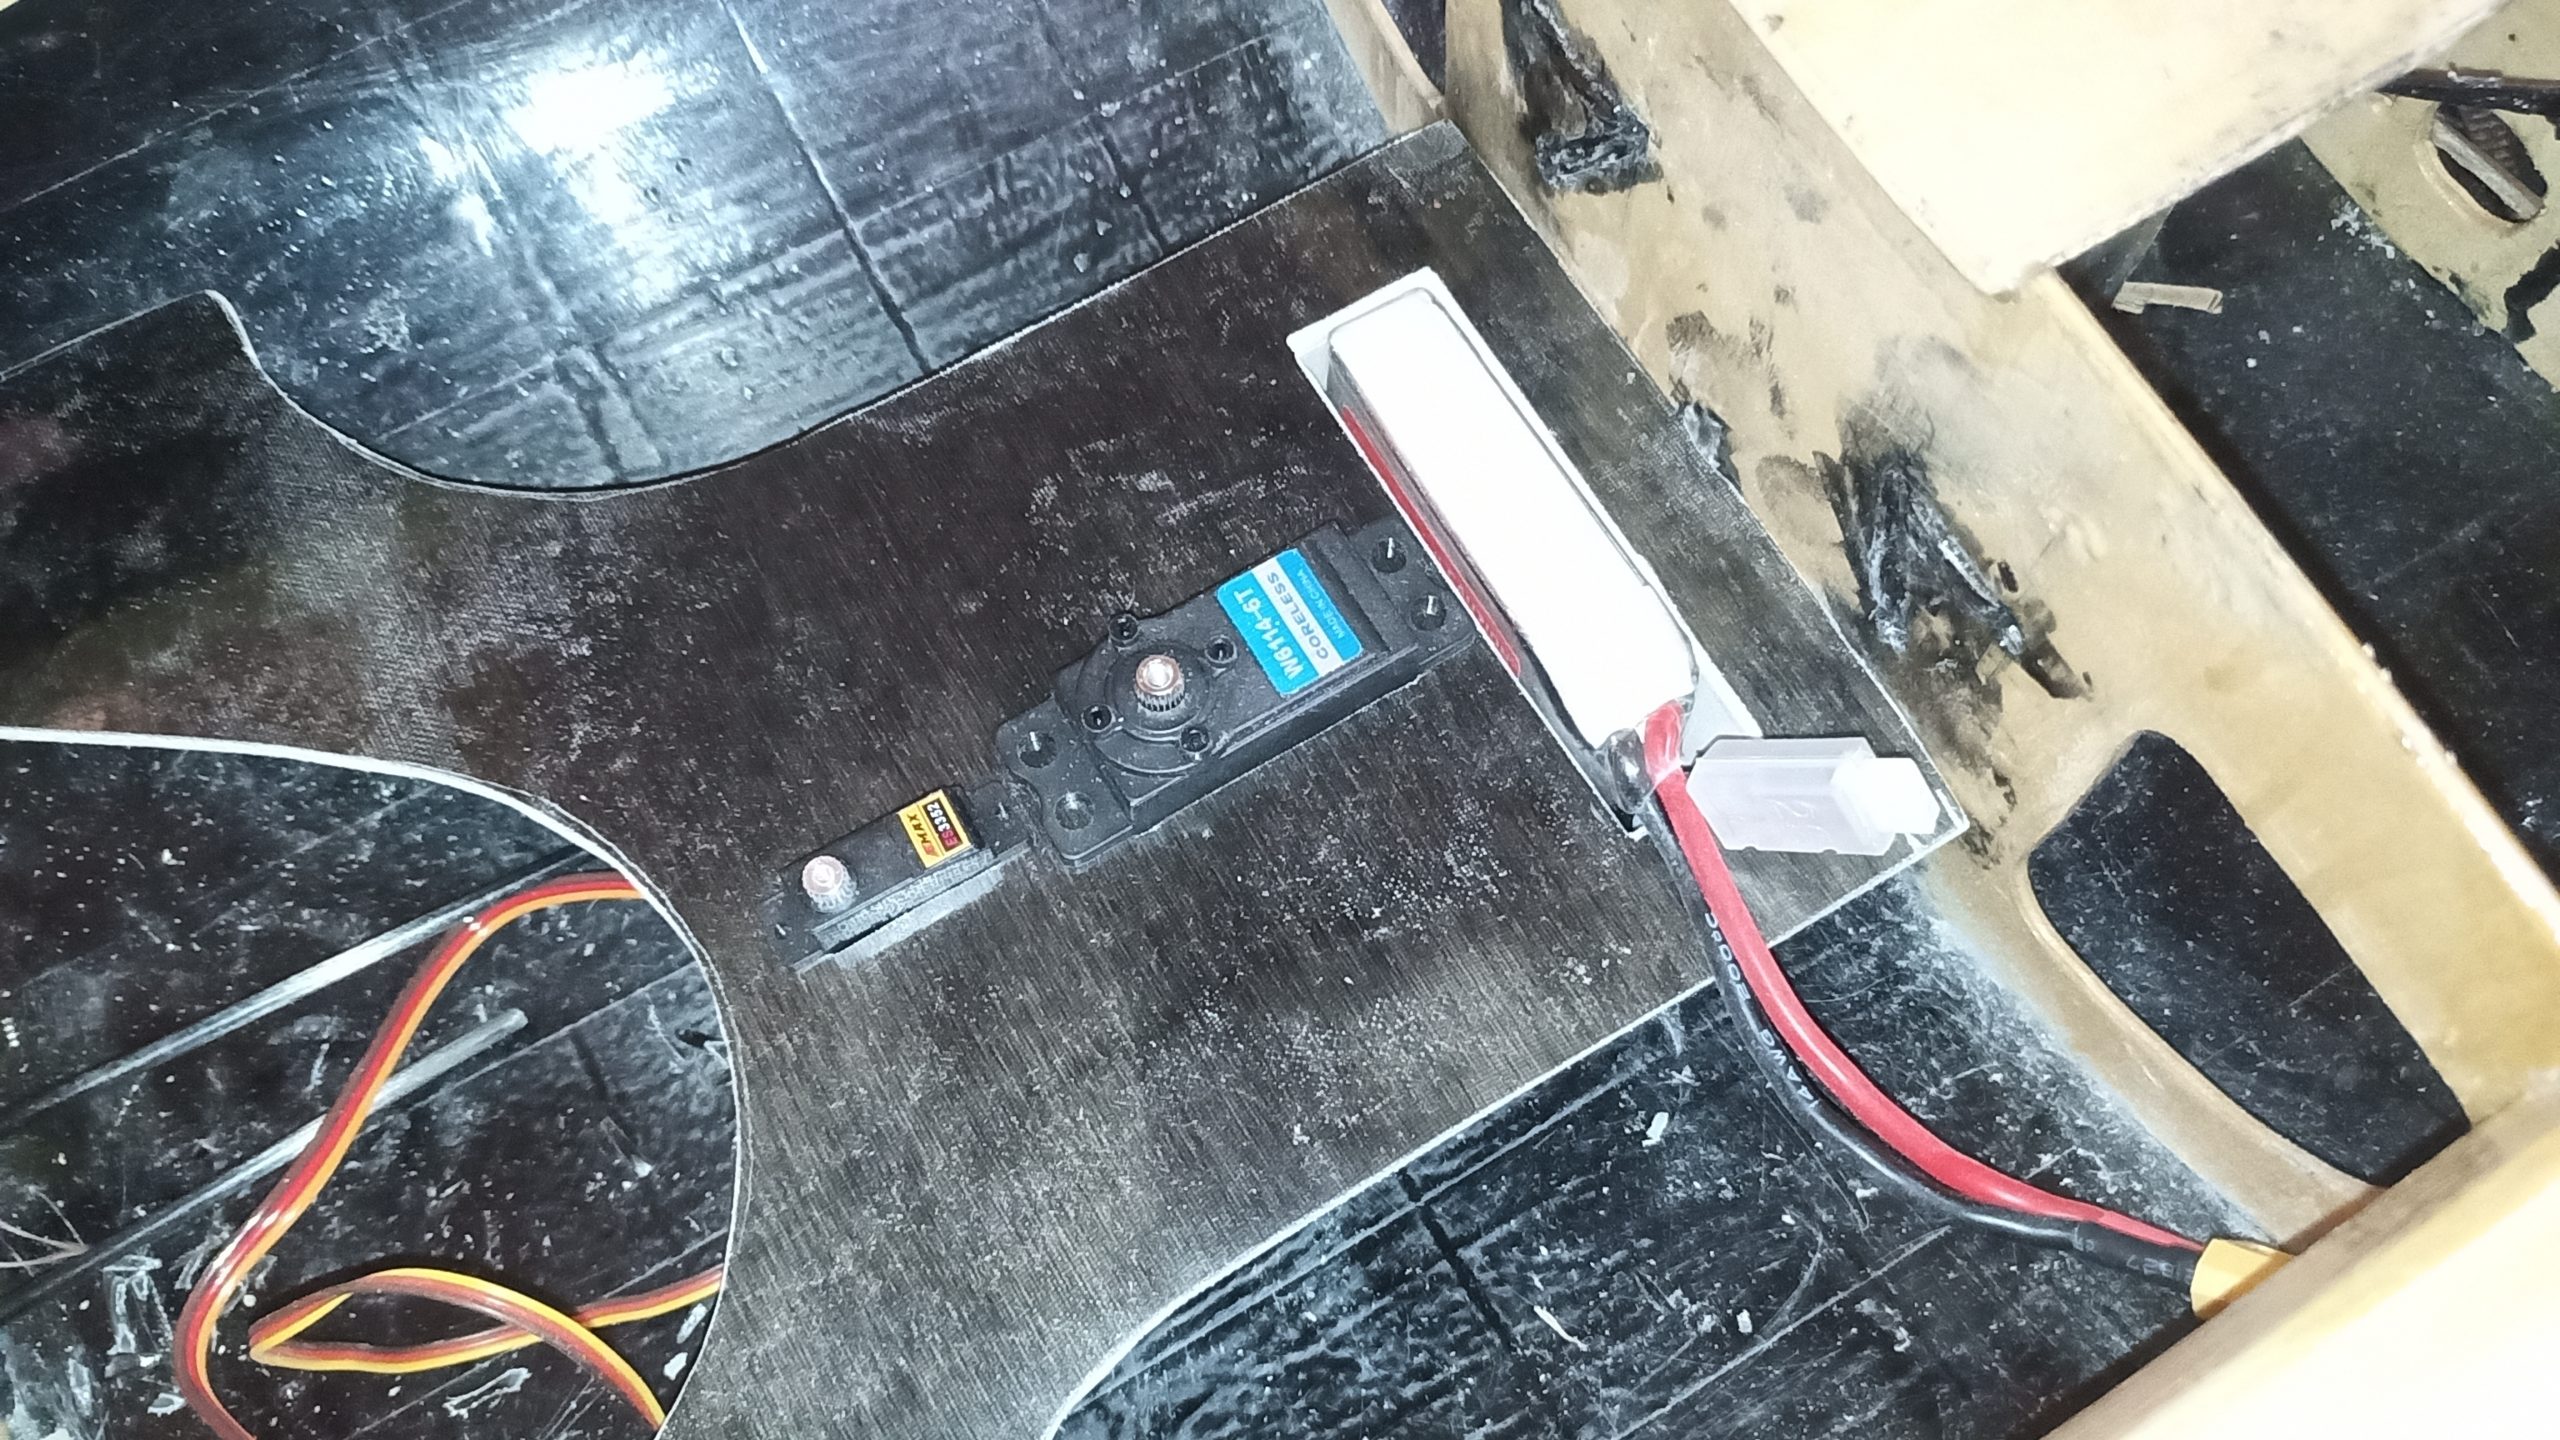
I use a 2.8kg/cm servo in my IOM without any issue, Emax ES3552, the same I use in some gliders aileron. It weights 12gr, metal geared and is far enough for the job (quid of the >10Kg/cm servos for rudders? we hardly use 6kg/cm servos in f3f wings)
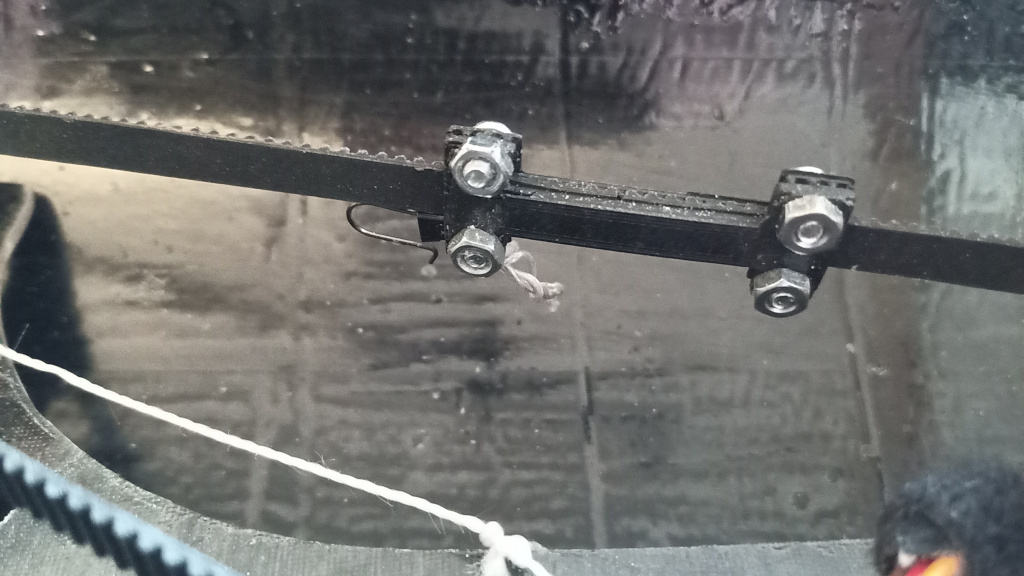
For the winch, I took a W6114-6T. I am still waiting to receive some GT2 pulley to finish. Like my IOM, I am going to use a linear closed GT2 track to pull the sails. Try it!
- working great without any glitch risk with stuck cable
- no direct traction on the servo axis: best durability, can be use with smaller winch
- added weight is really small ~20g compared to the pros
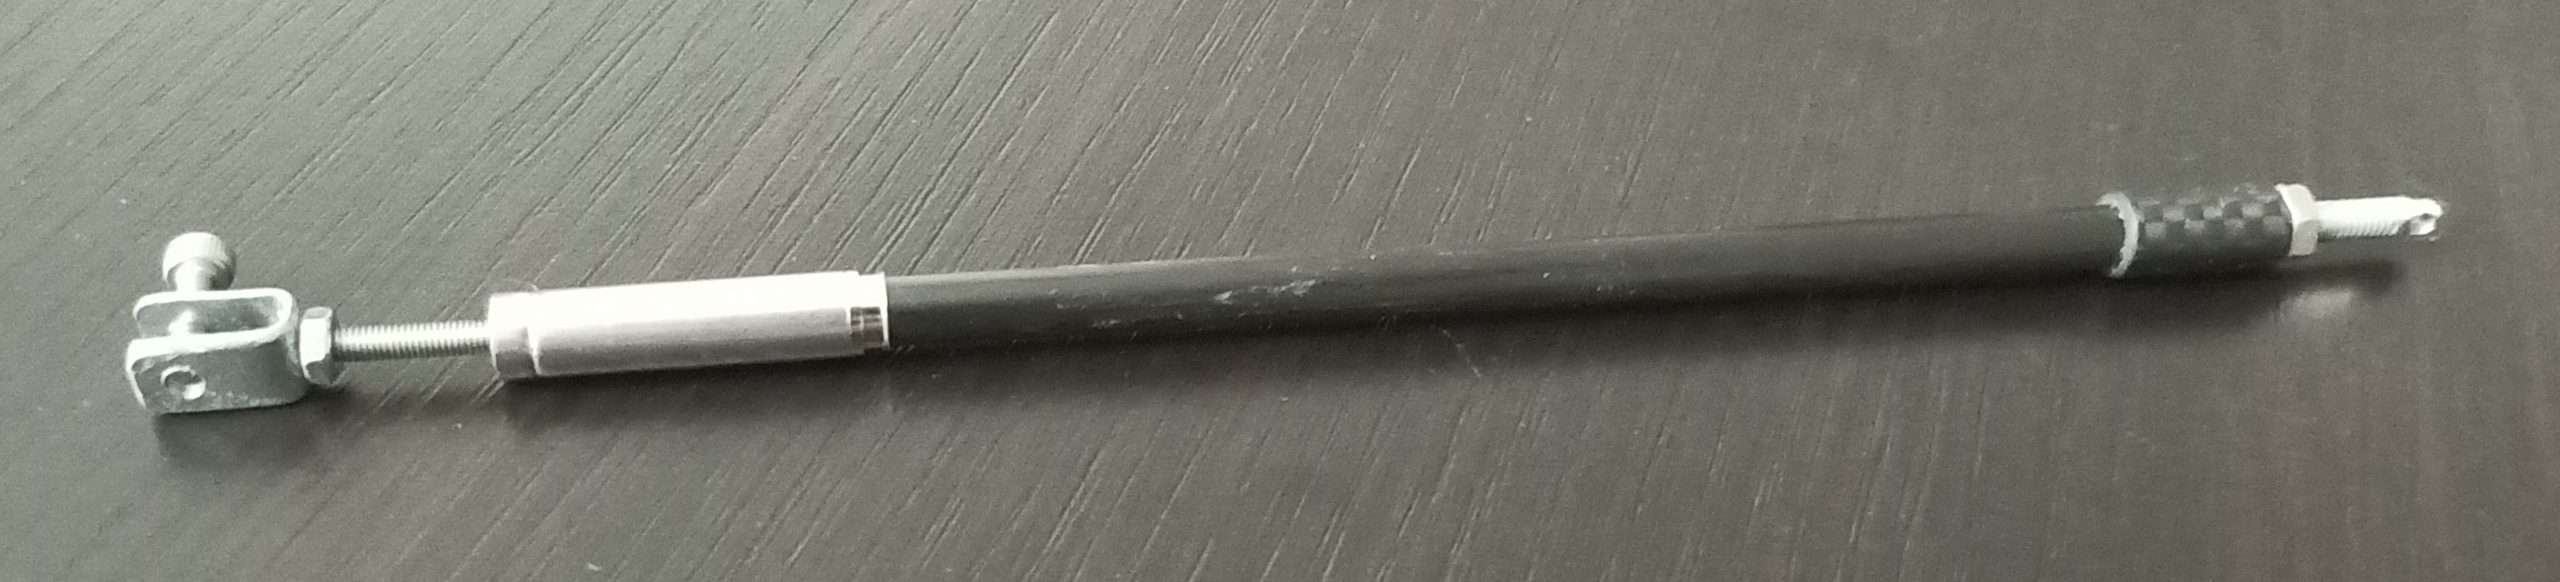
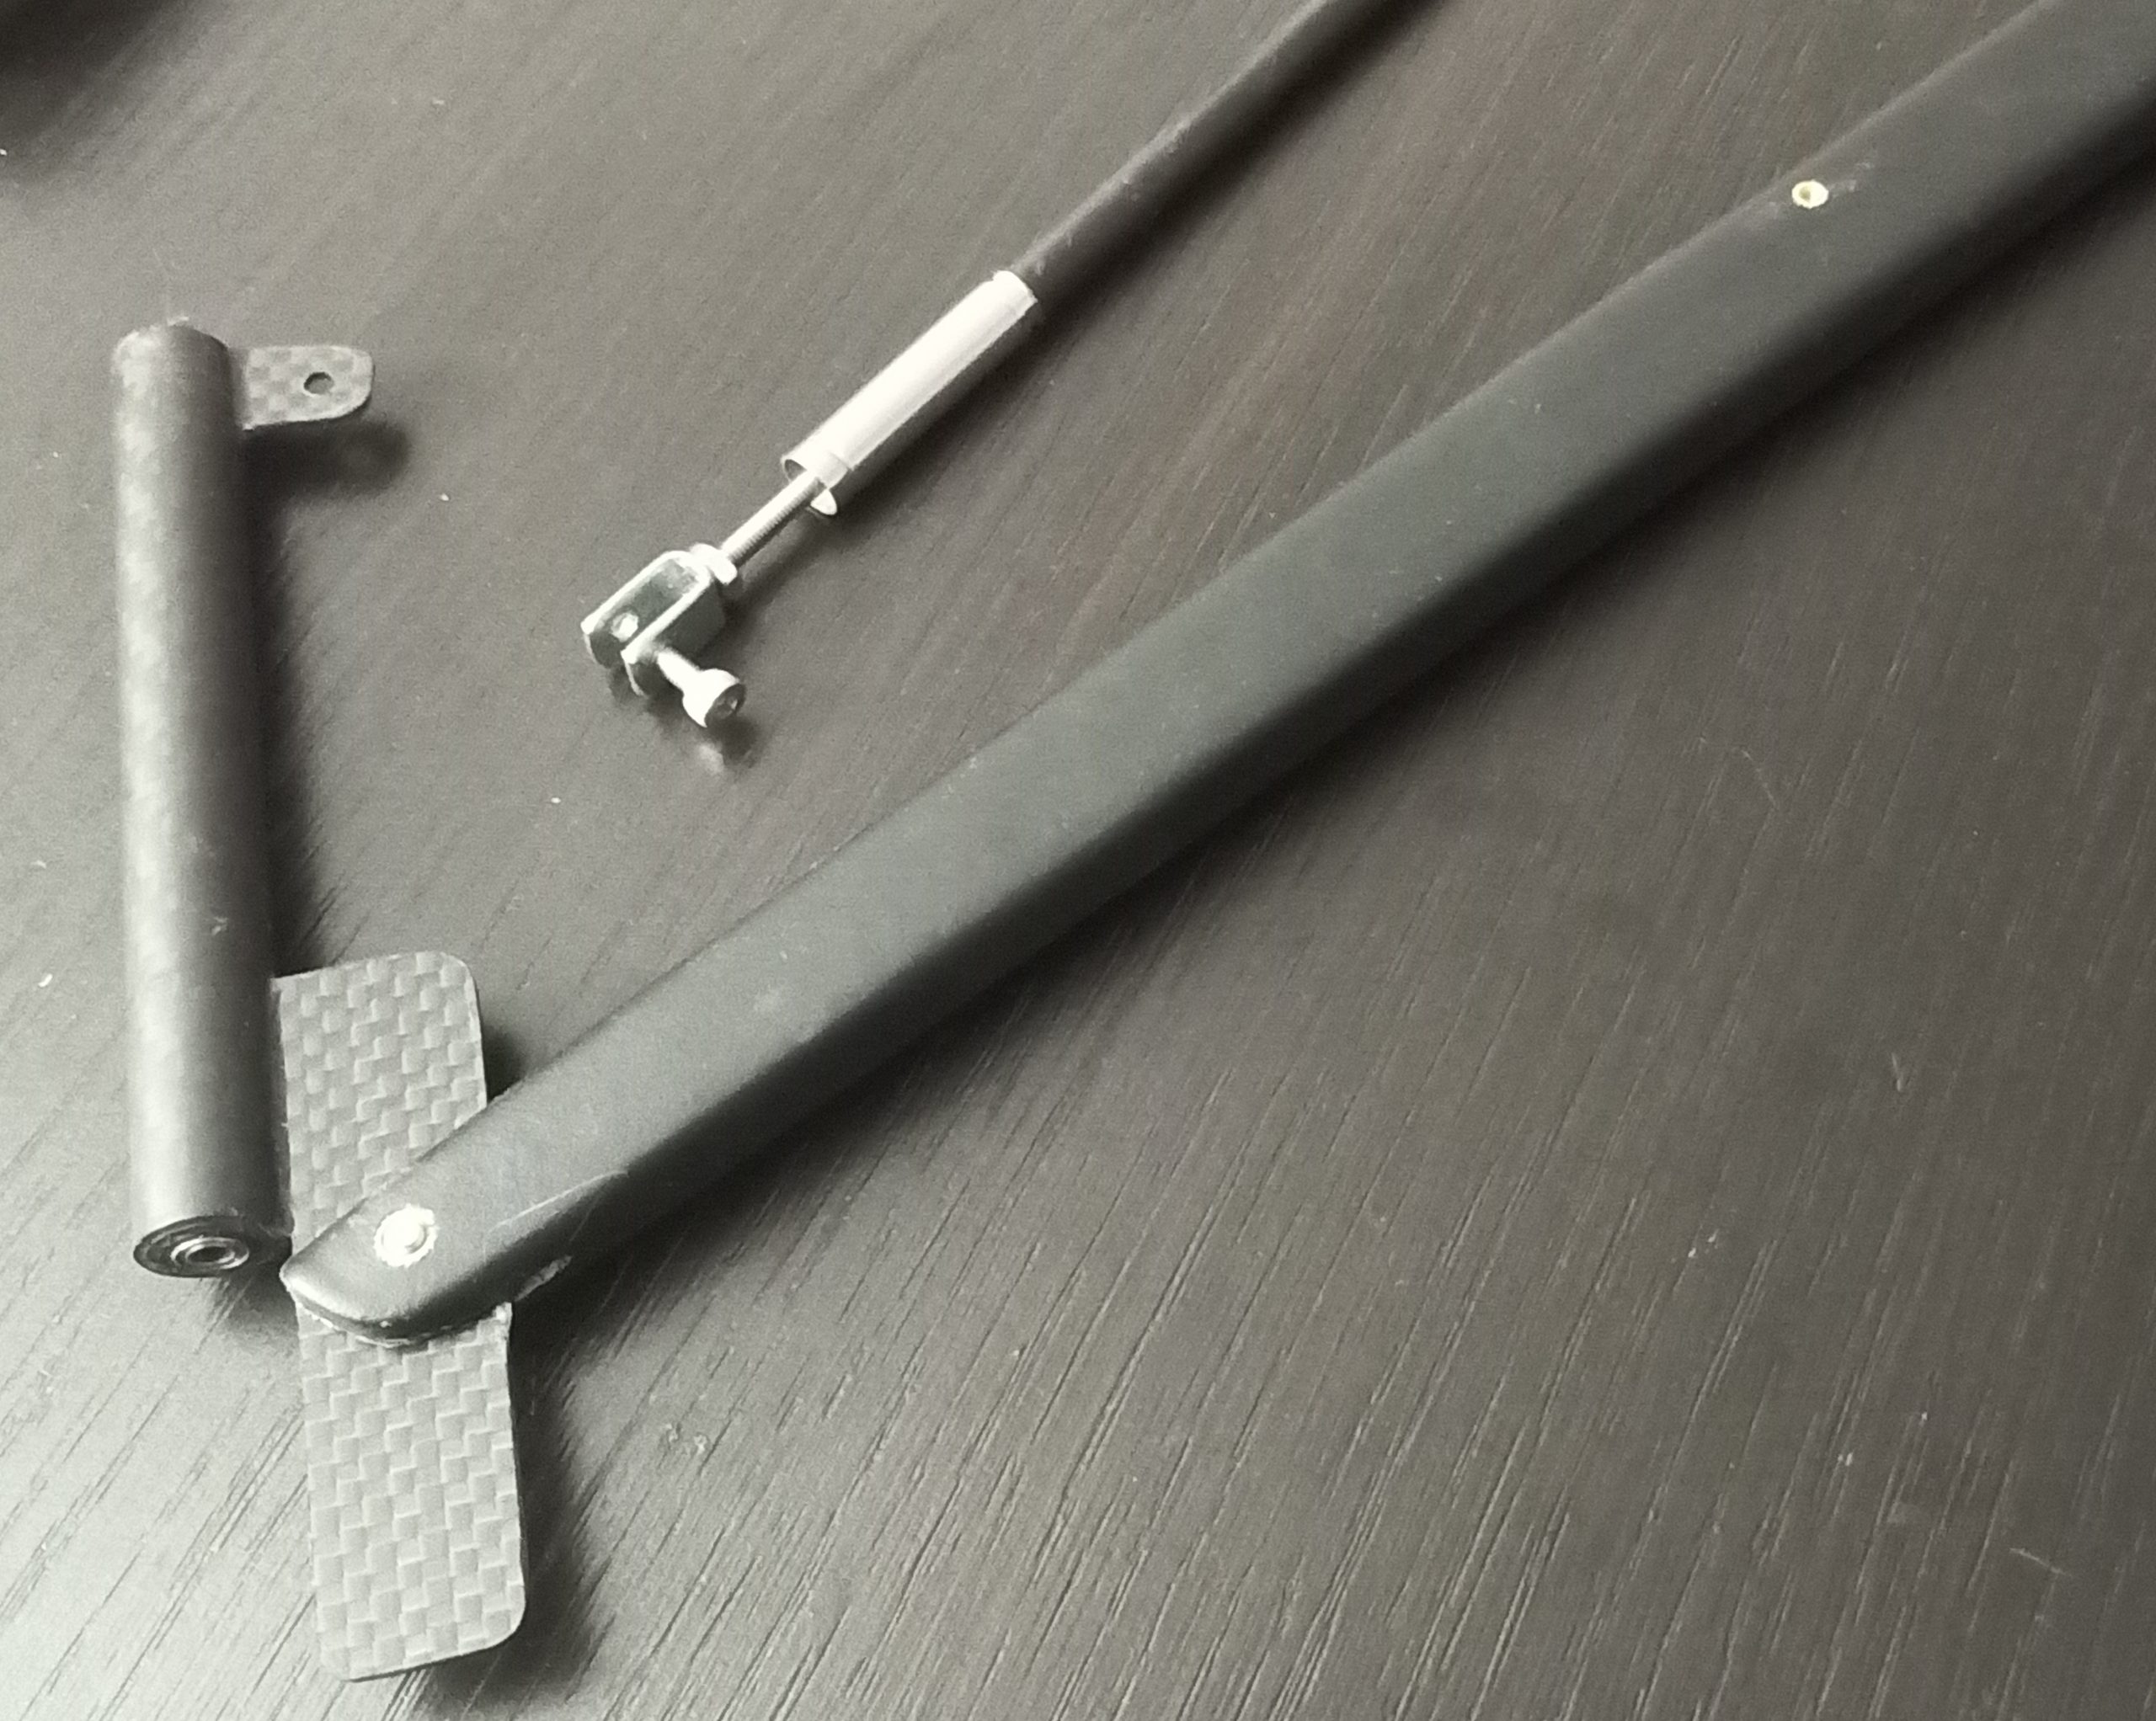
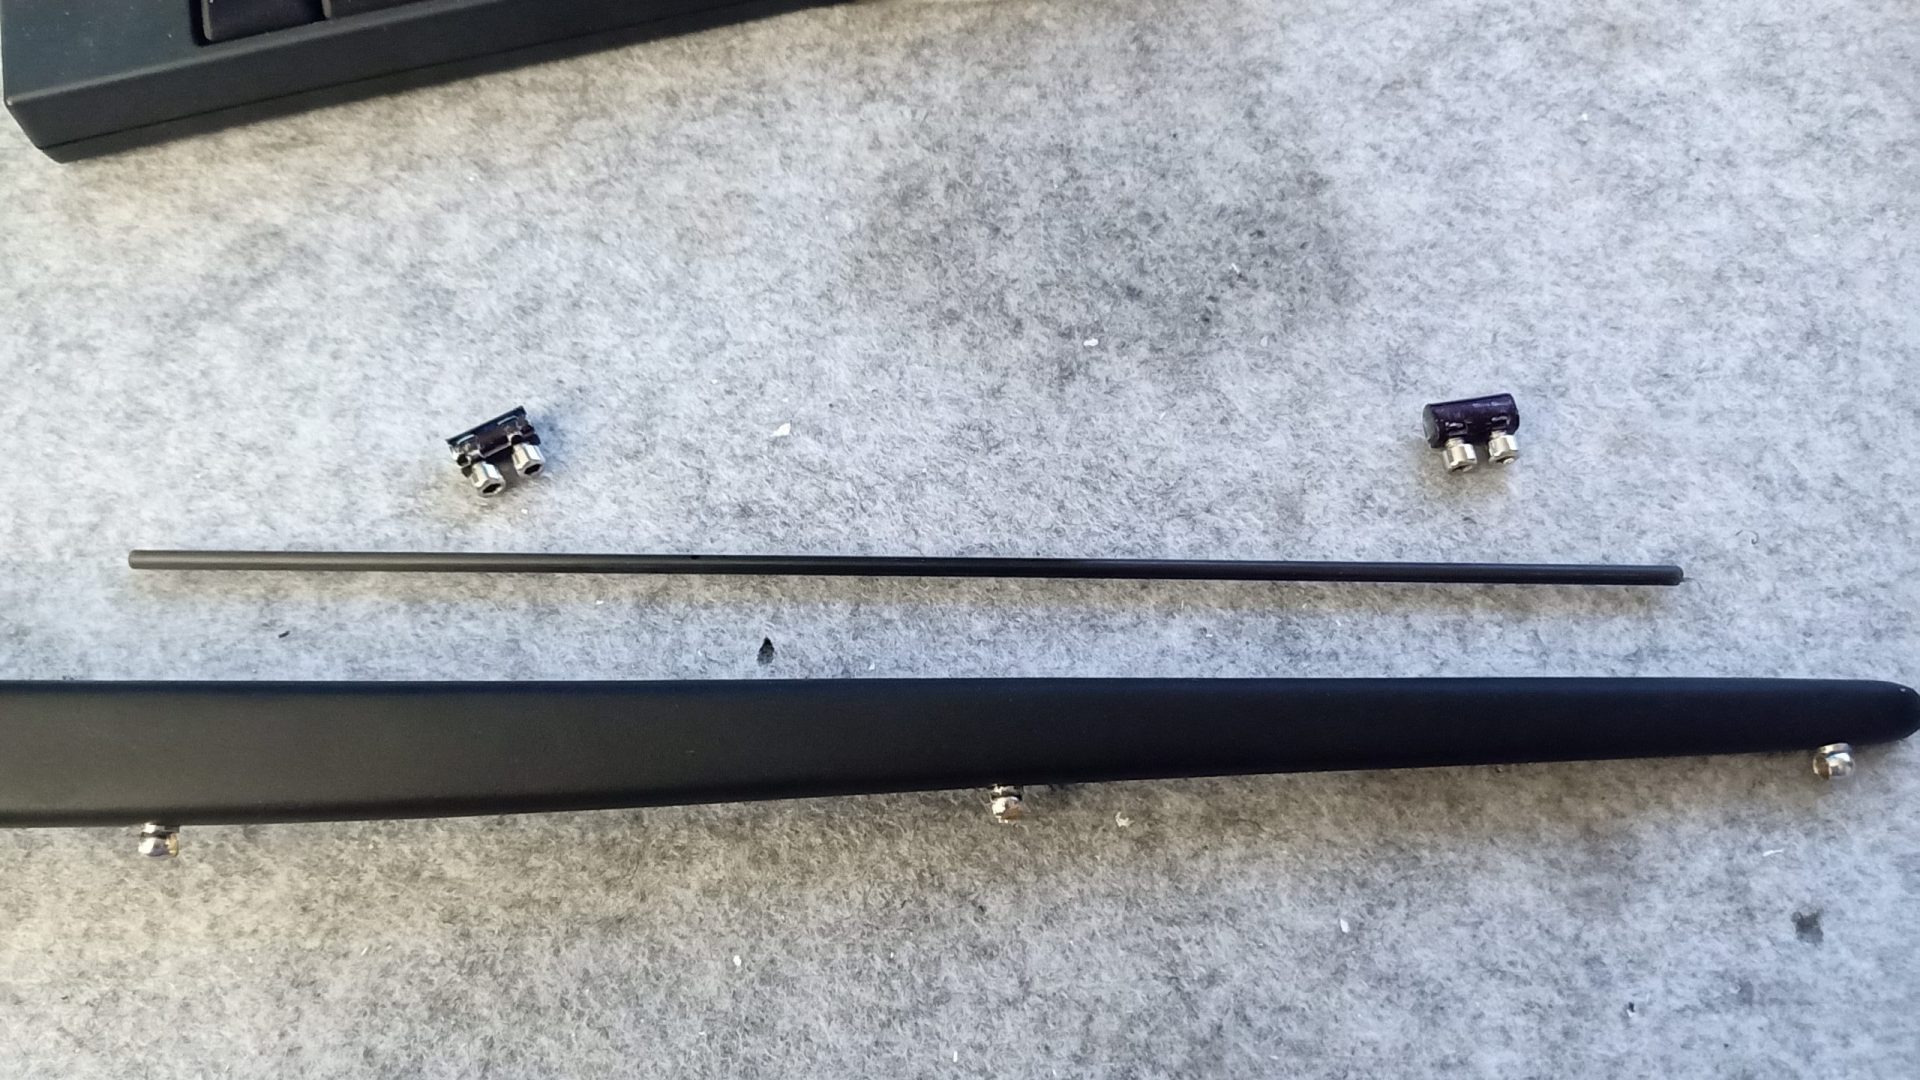
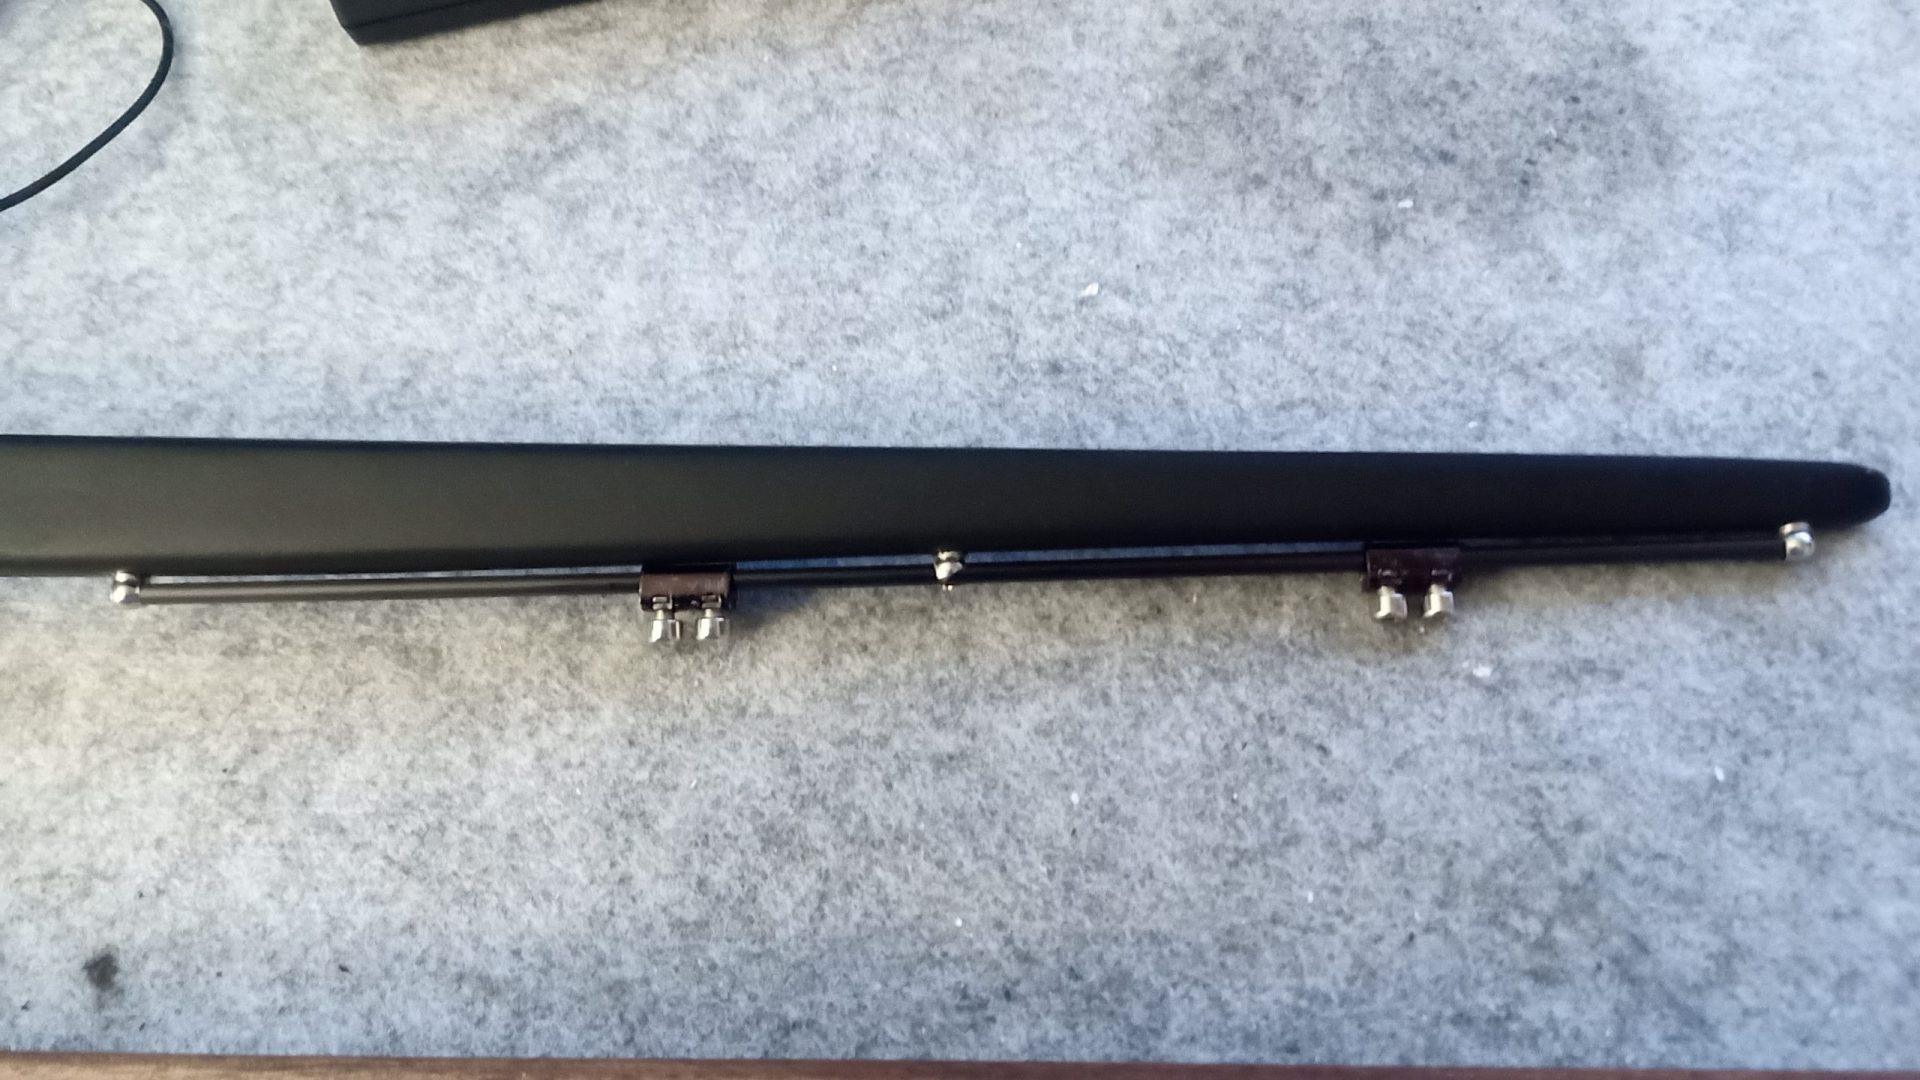
MAST / BOOM
Mast and boom vang. More work than expected…
I wanted a seamless gooseneck, the rotation is integrated in the mast (12mm diameter carbon tube) on ball bearings around a 3mm stainless steel rod (length: 125mm). I am planning to trim the tack plate at the end… just to be sure if I need to upper or lower the boom.
The boom vang is also full carbon with stainless steel inserts/hooks/screws to look like the real one.

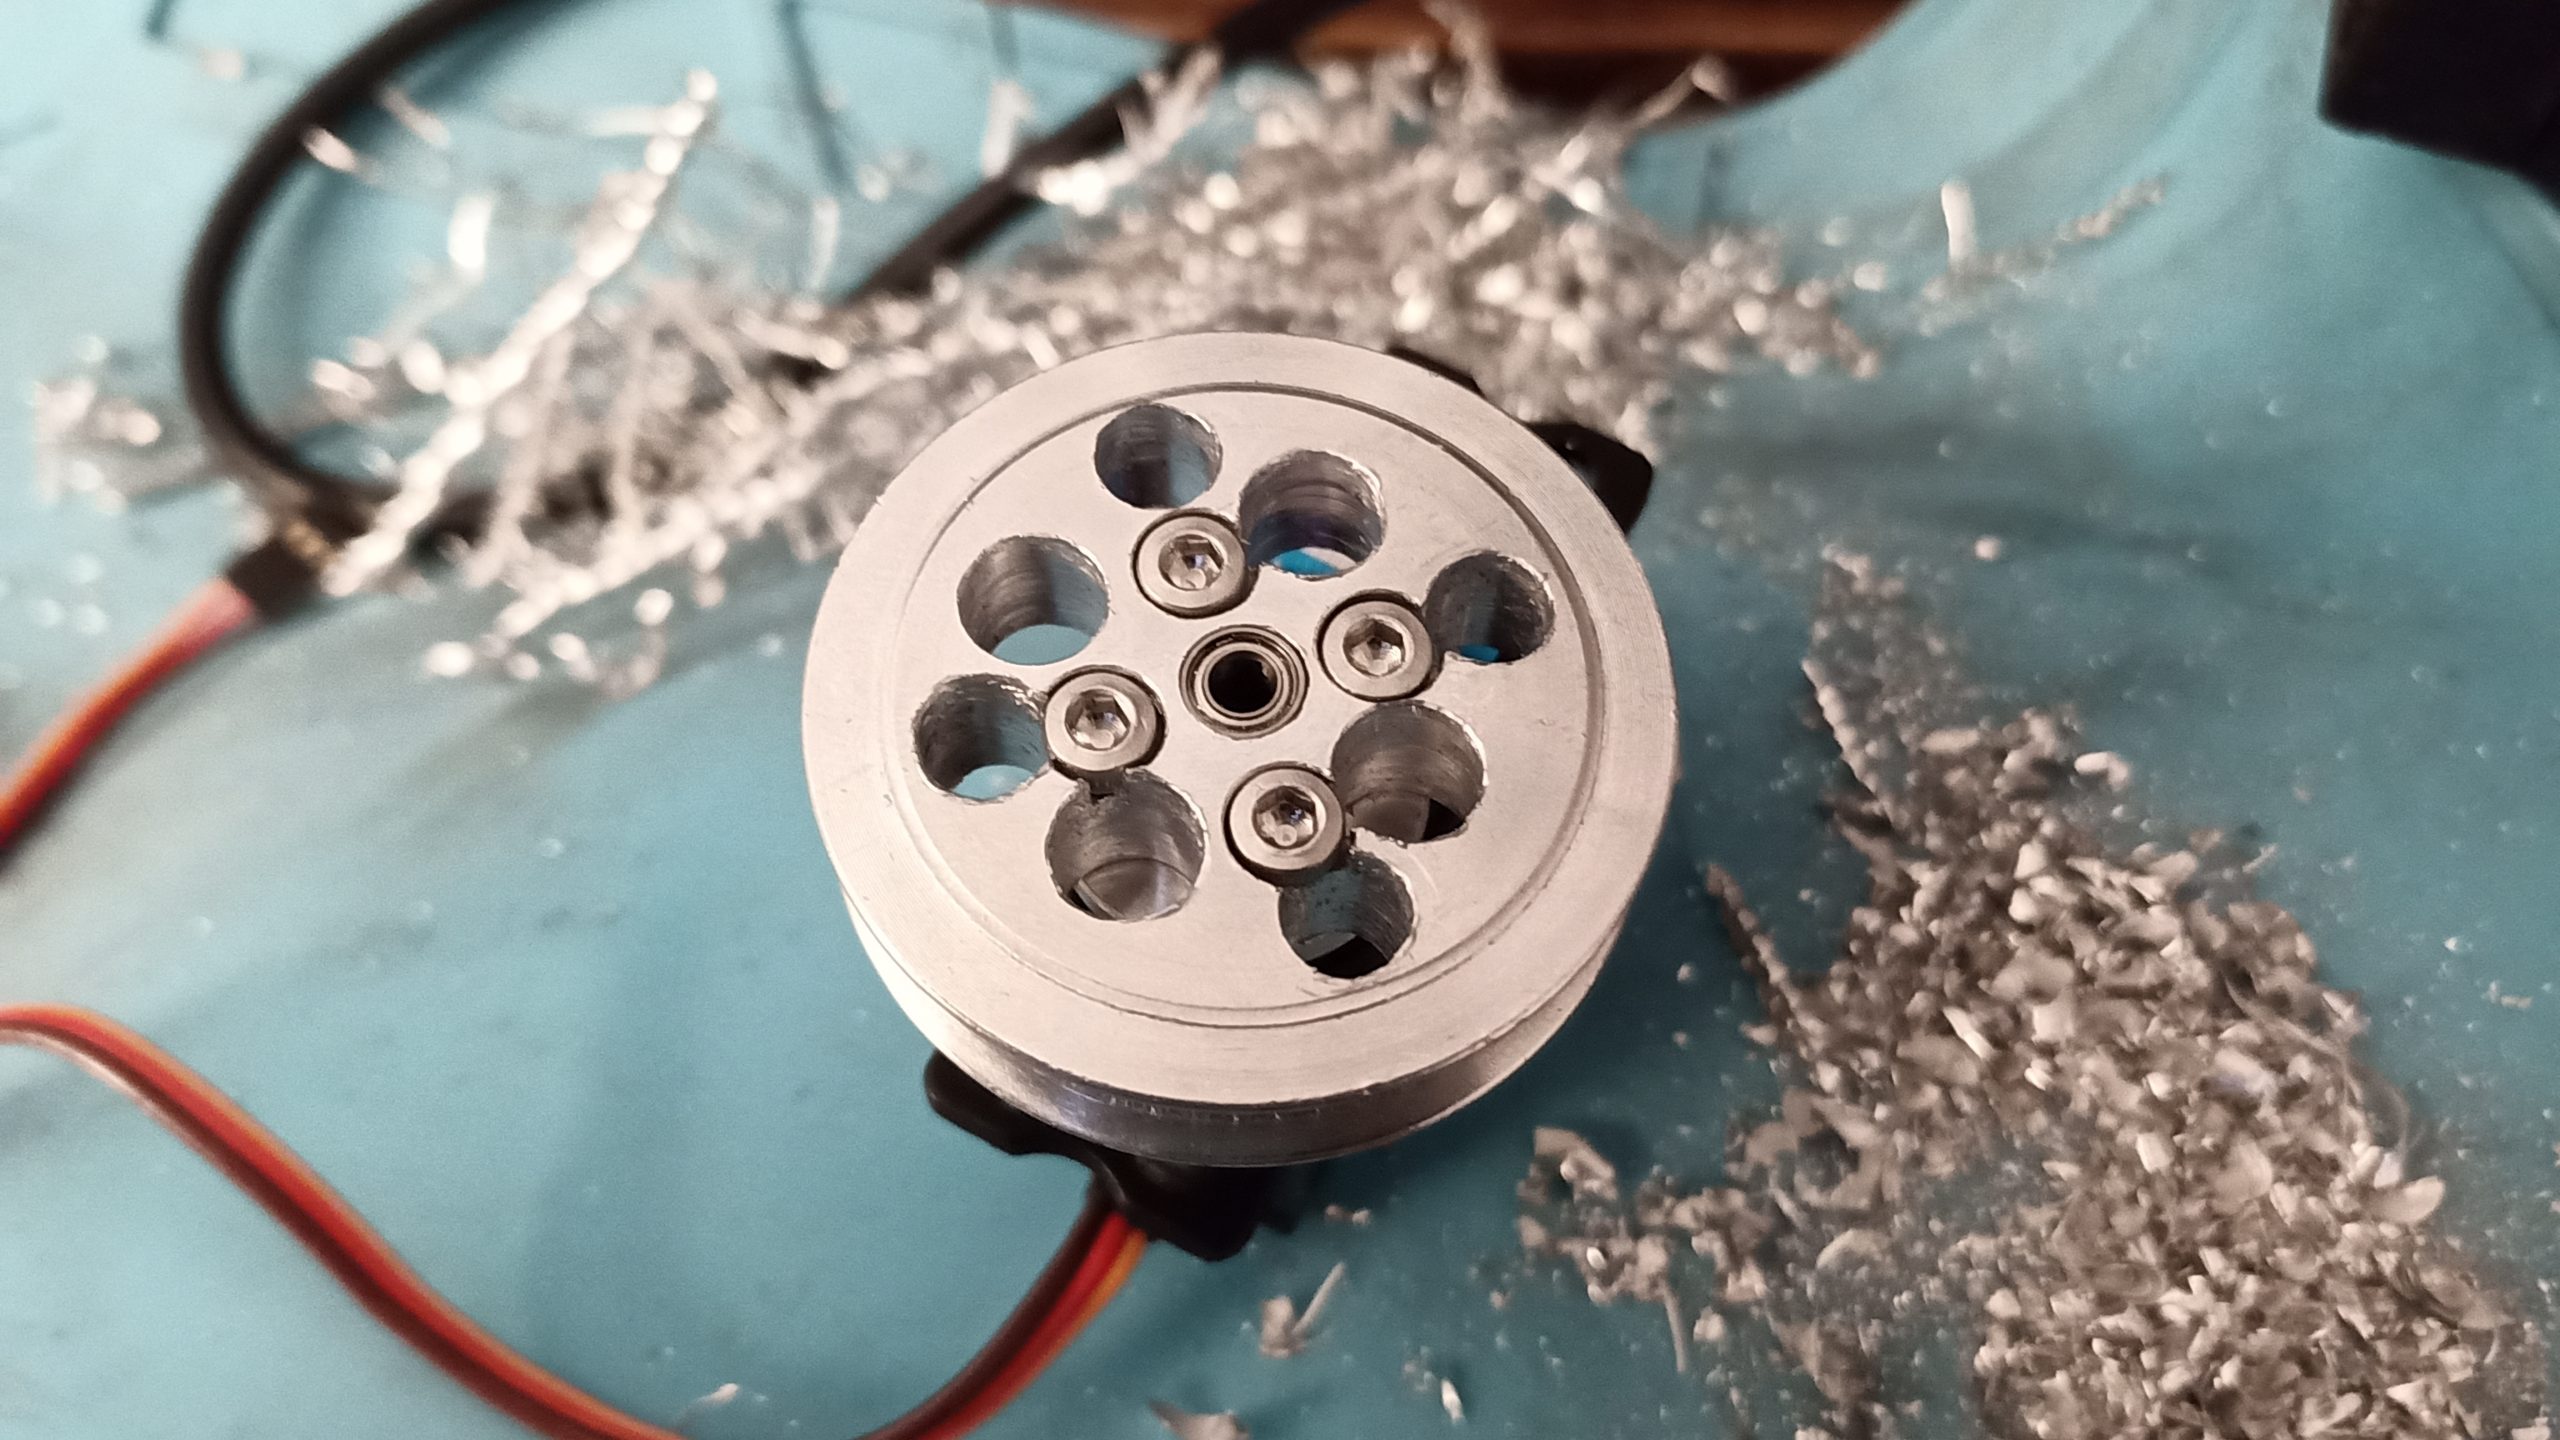
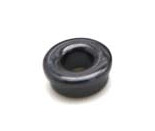
PULLEY BELT
I bought for 10 Euros some GT2 pulleys (a 60Teeth and some 20T w/o teeths) and a rubber/figerglass 5 meters belt.
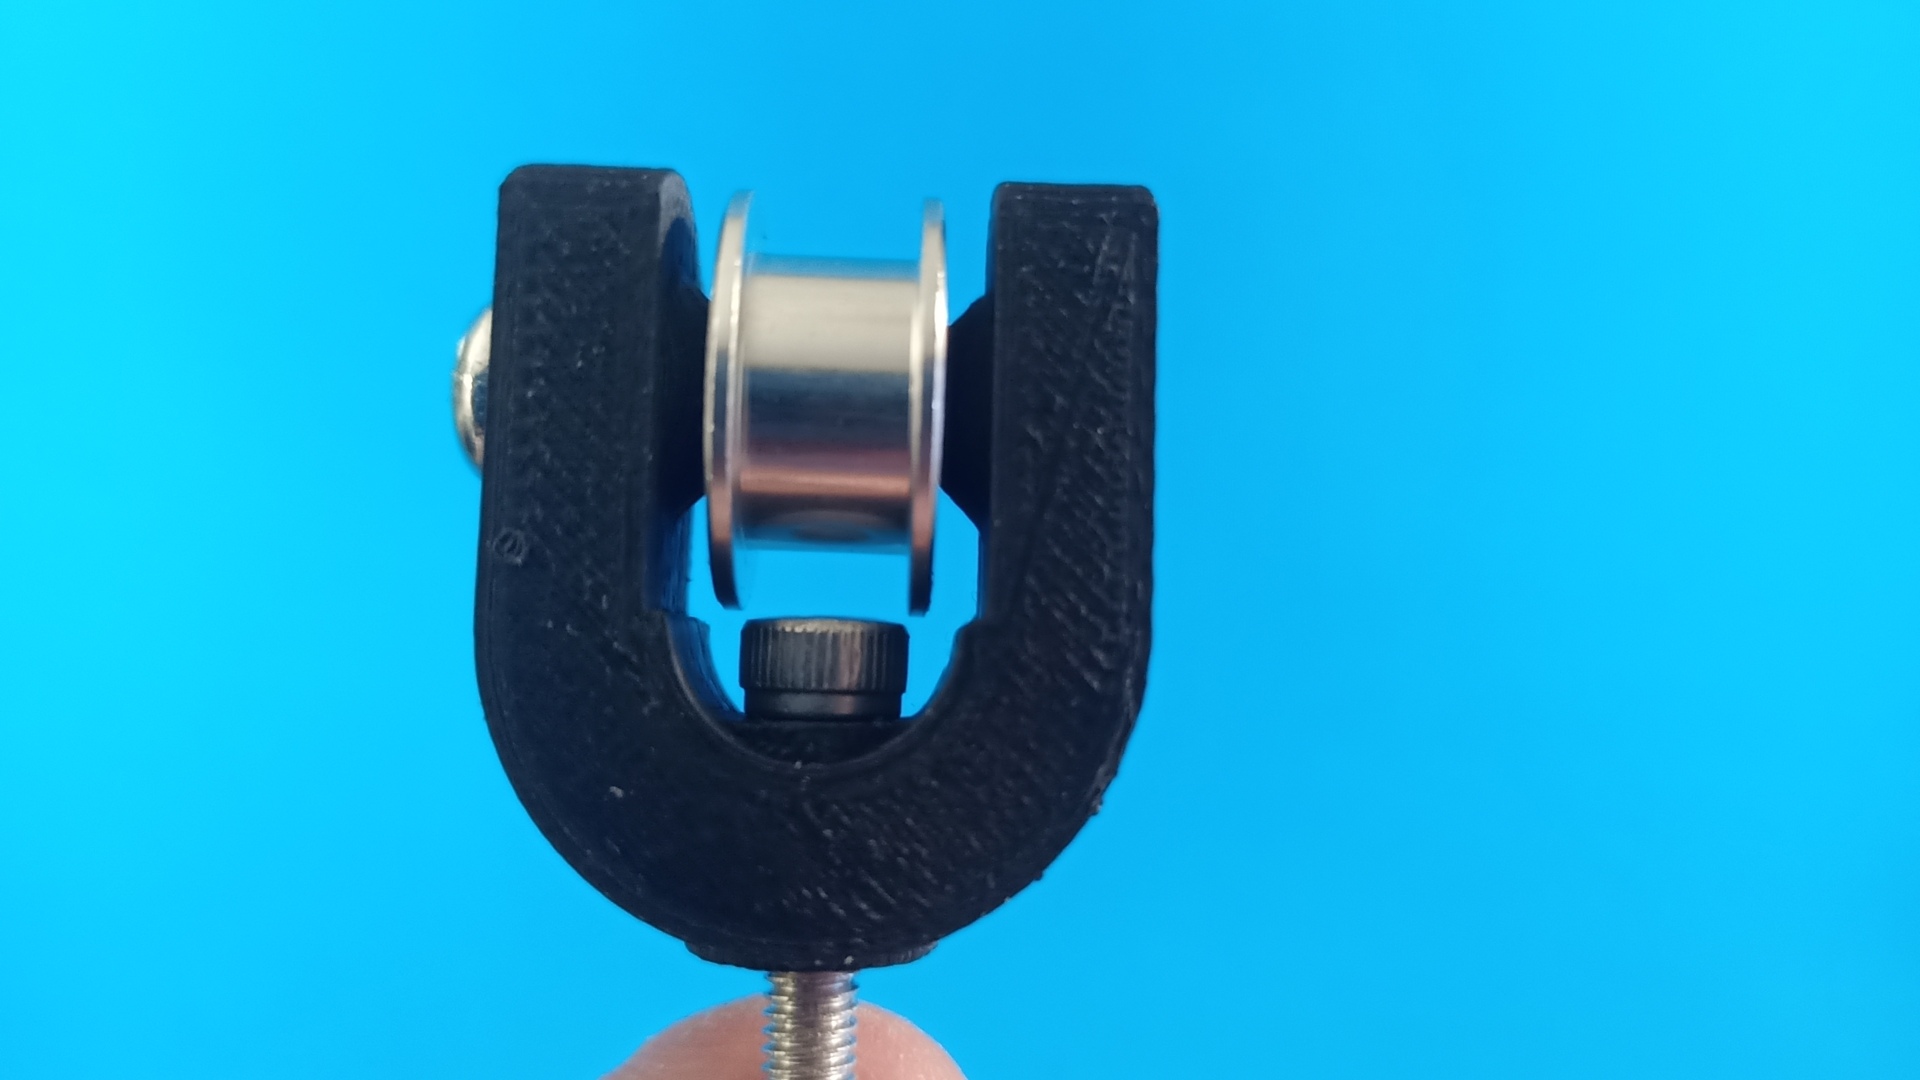
GT2 pulley 60T refactored and trimmed, added a ball bearing upper which will help to balance pulley force outside the servo chassis.

Pulley holder designed for my use: https://www.thingiverse.com/thing:4684485
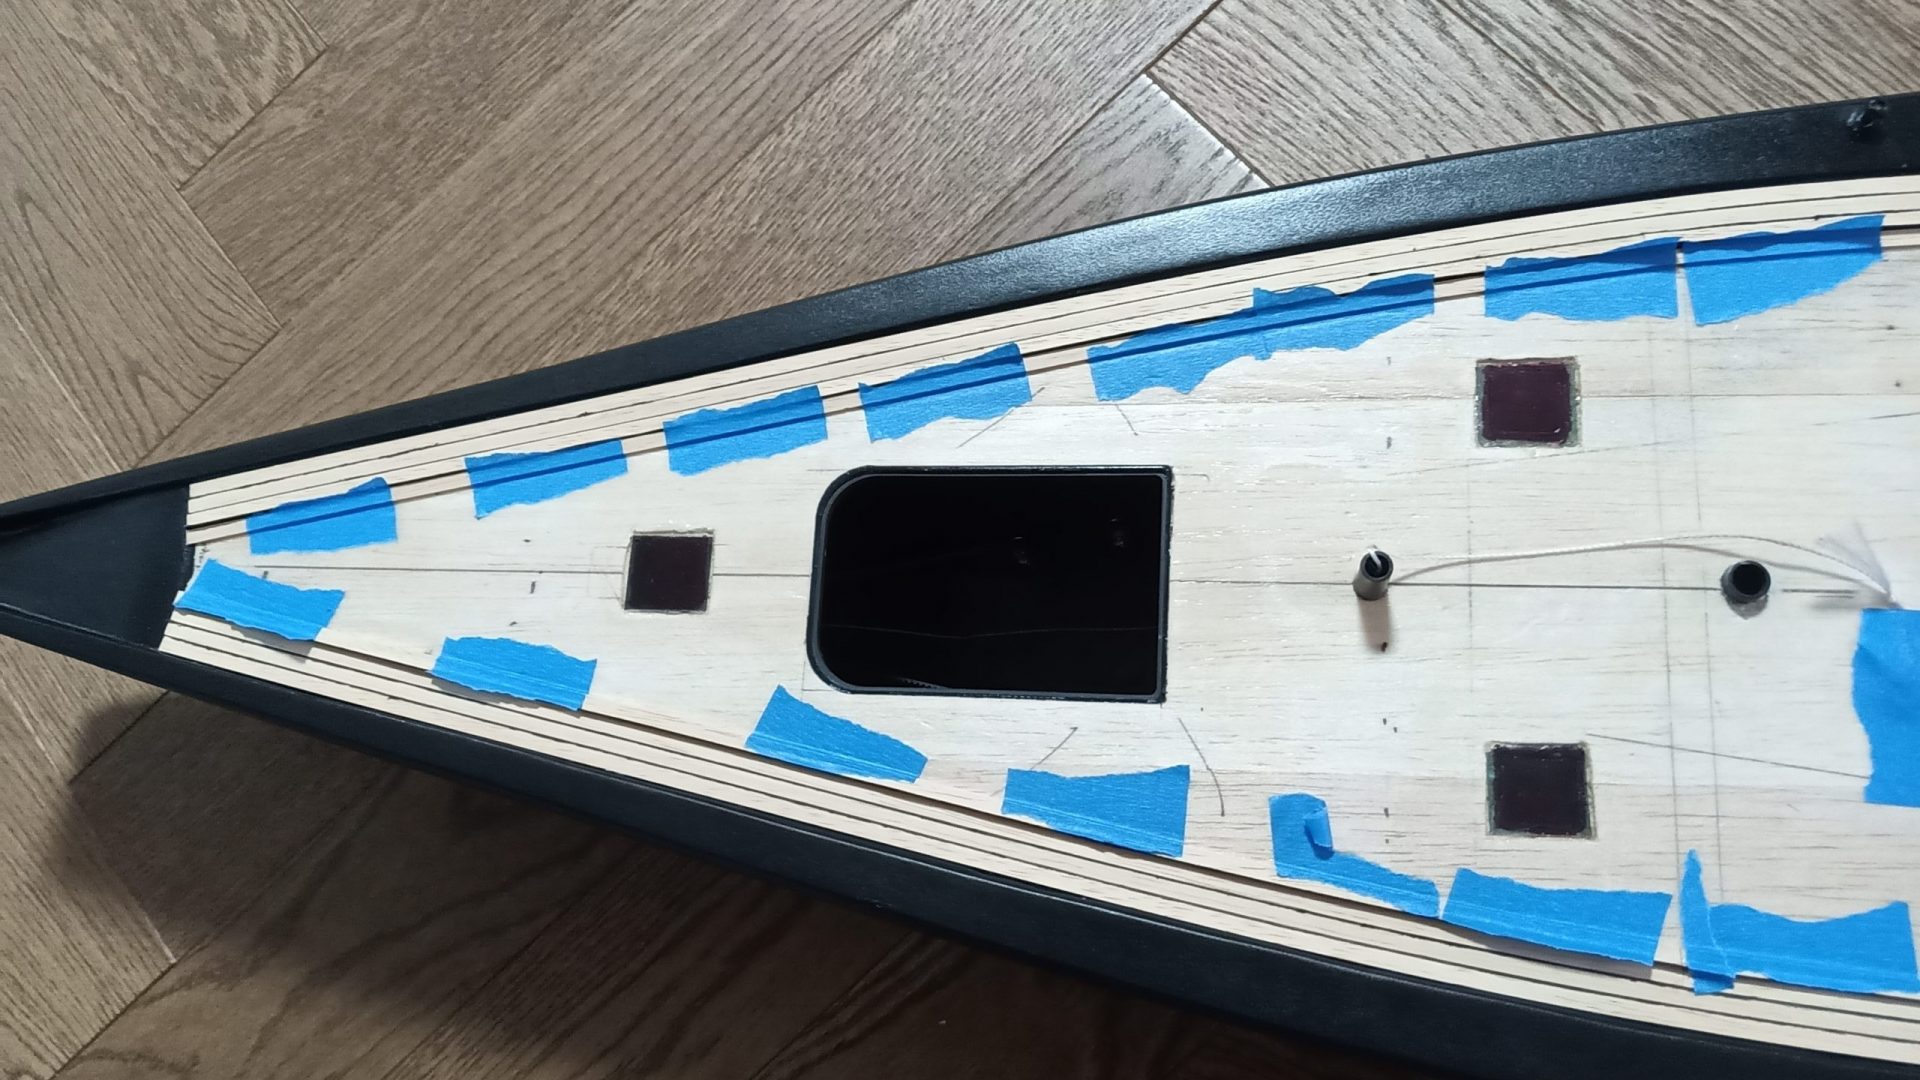
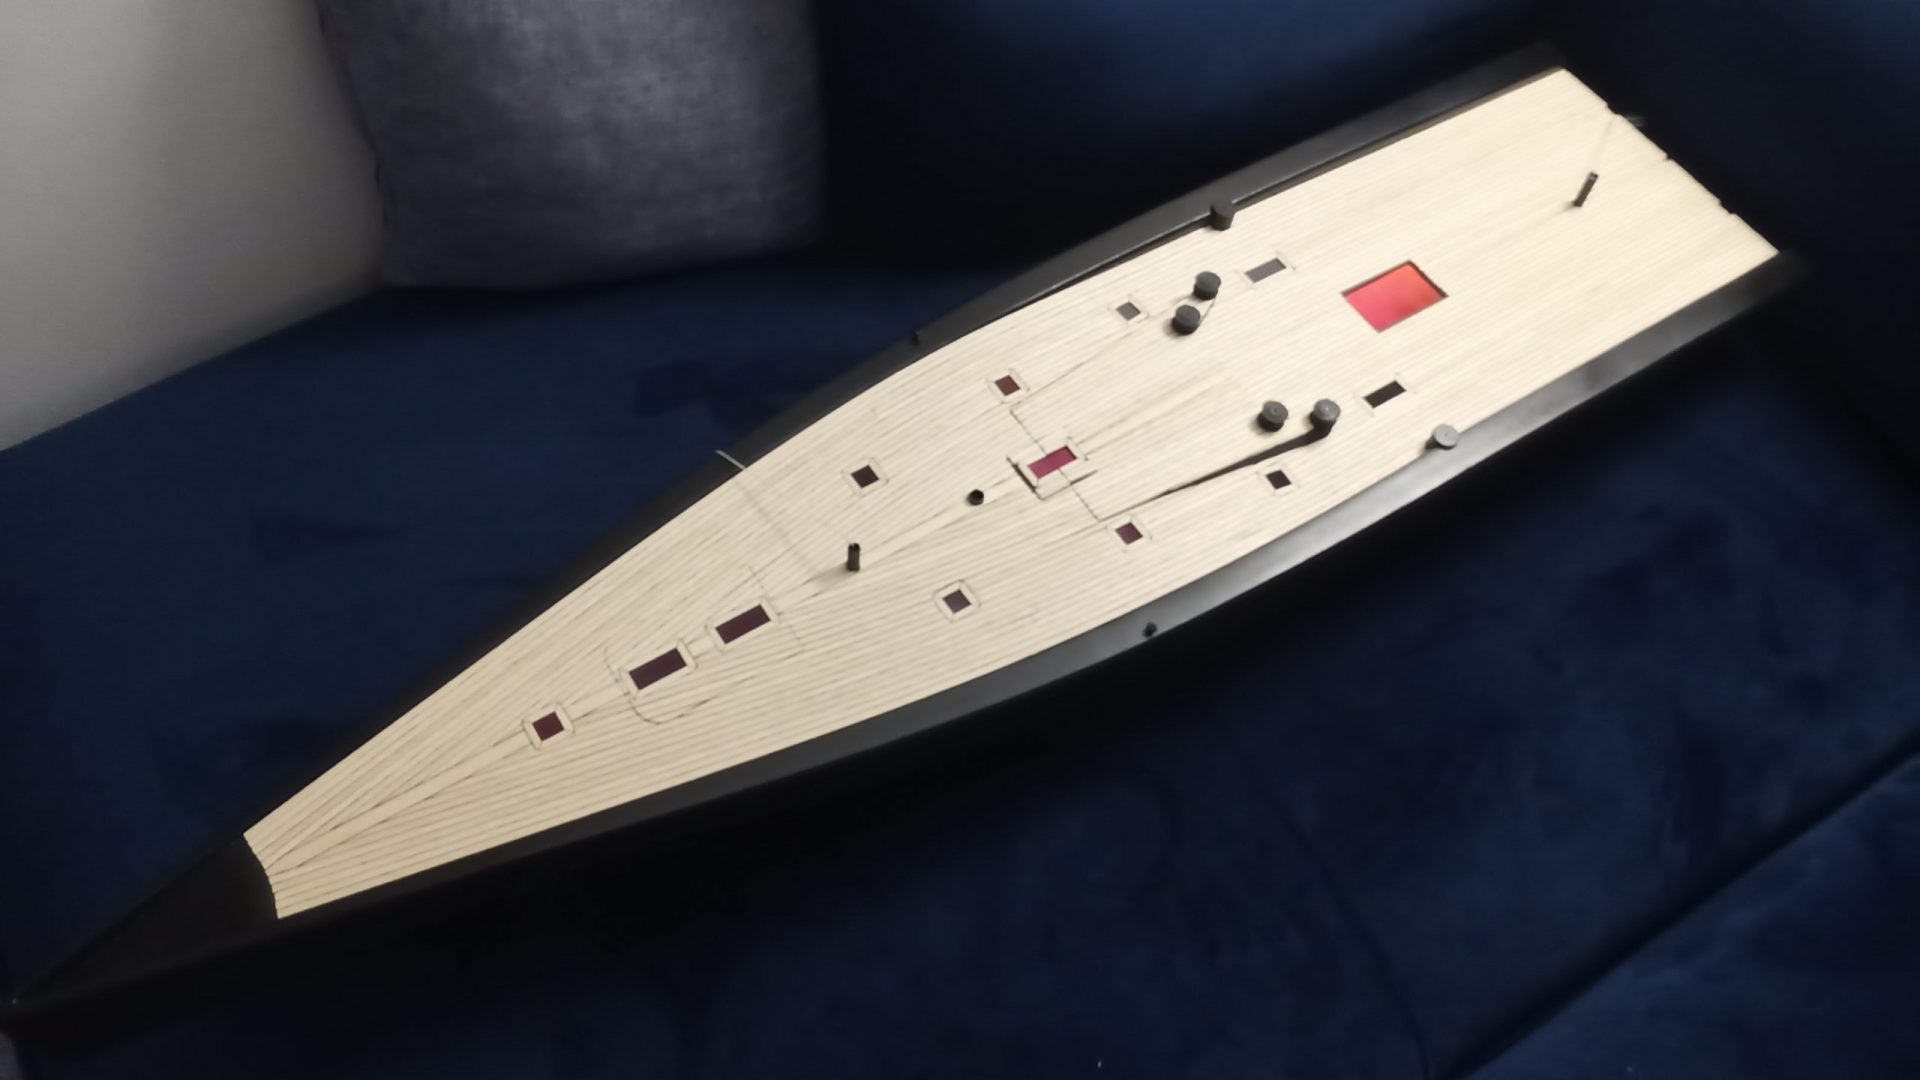
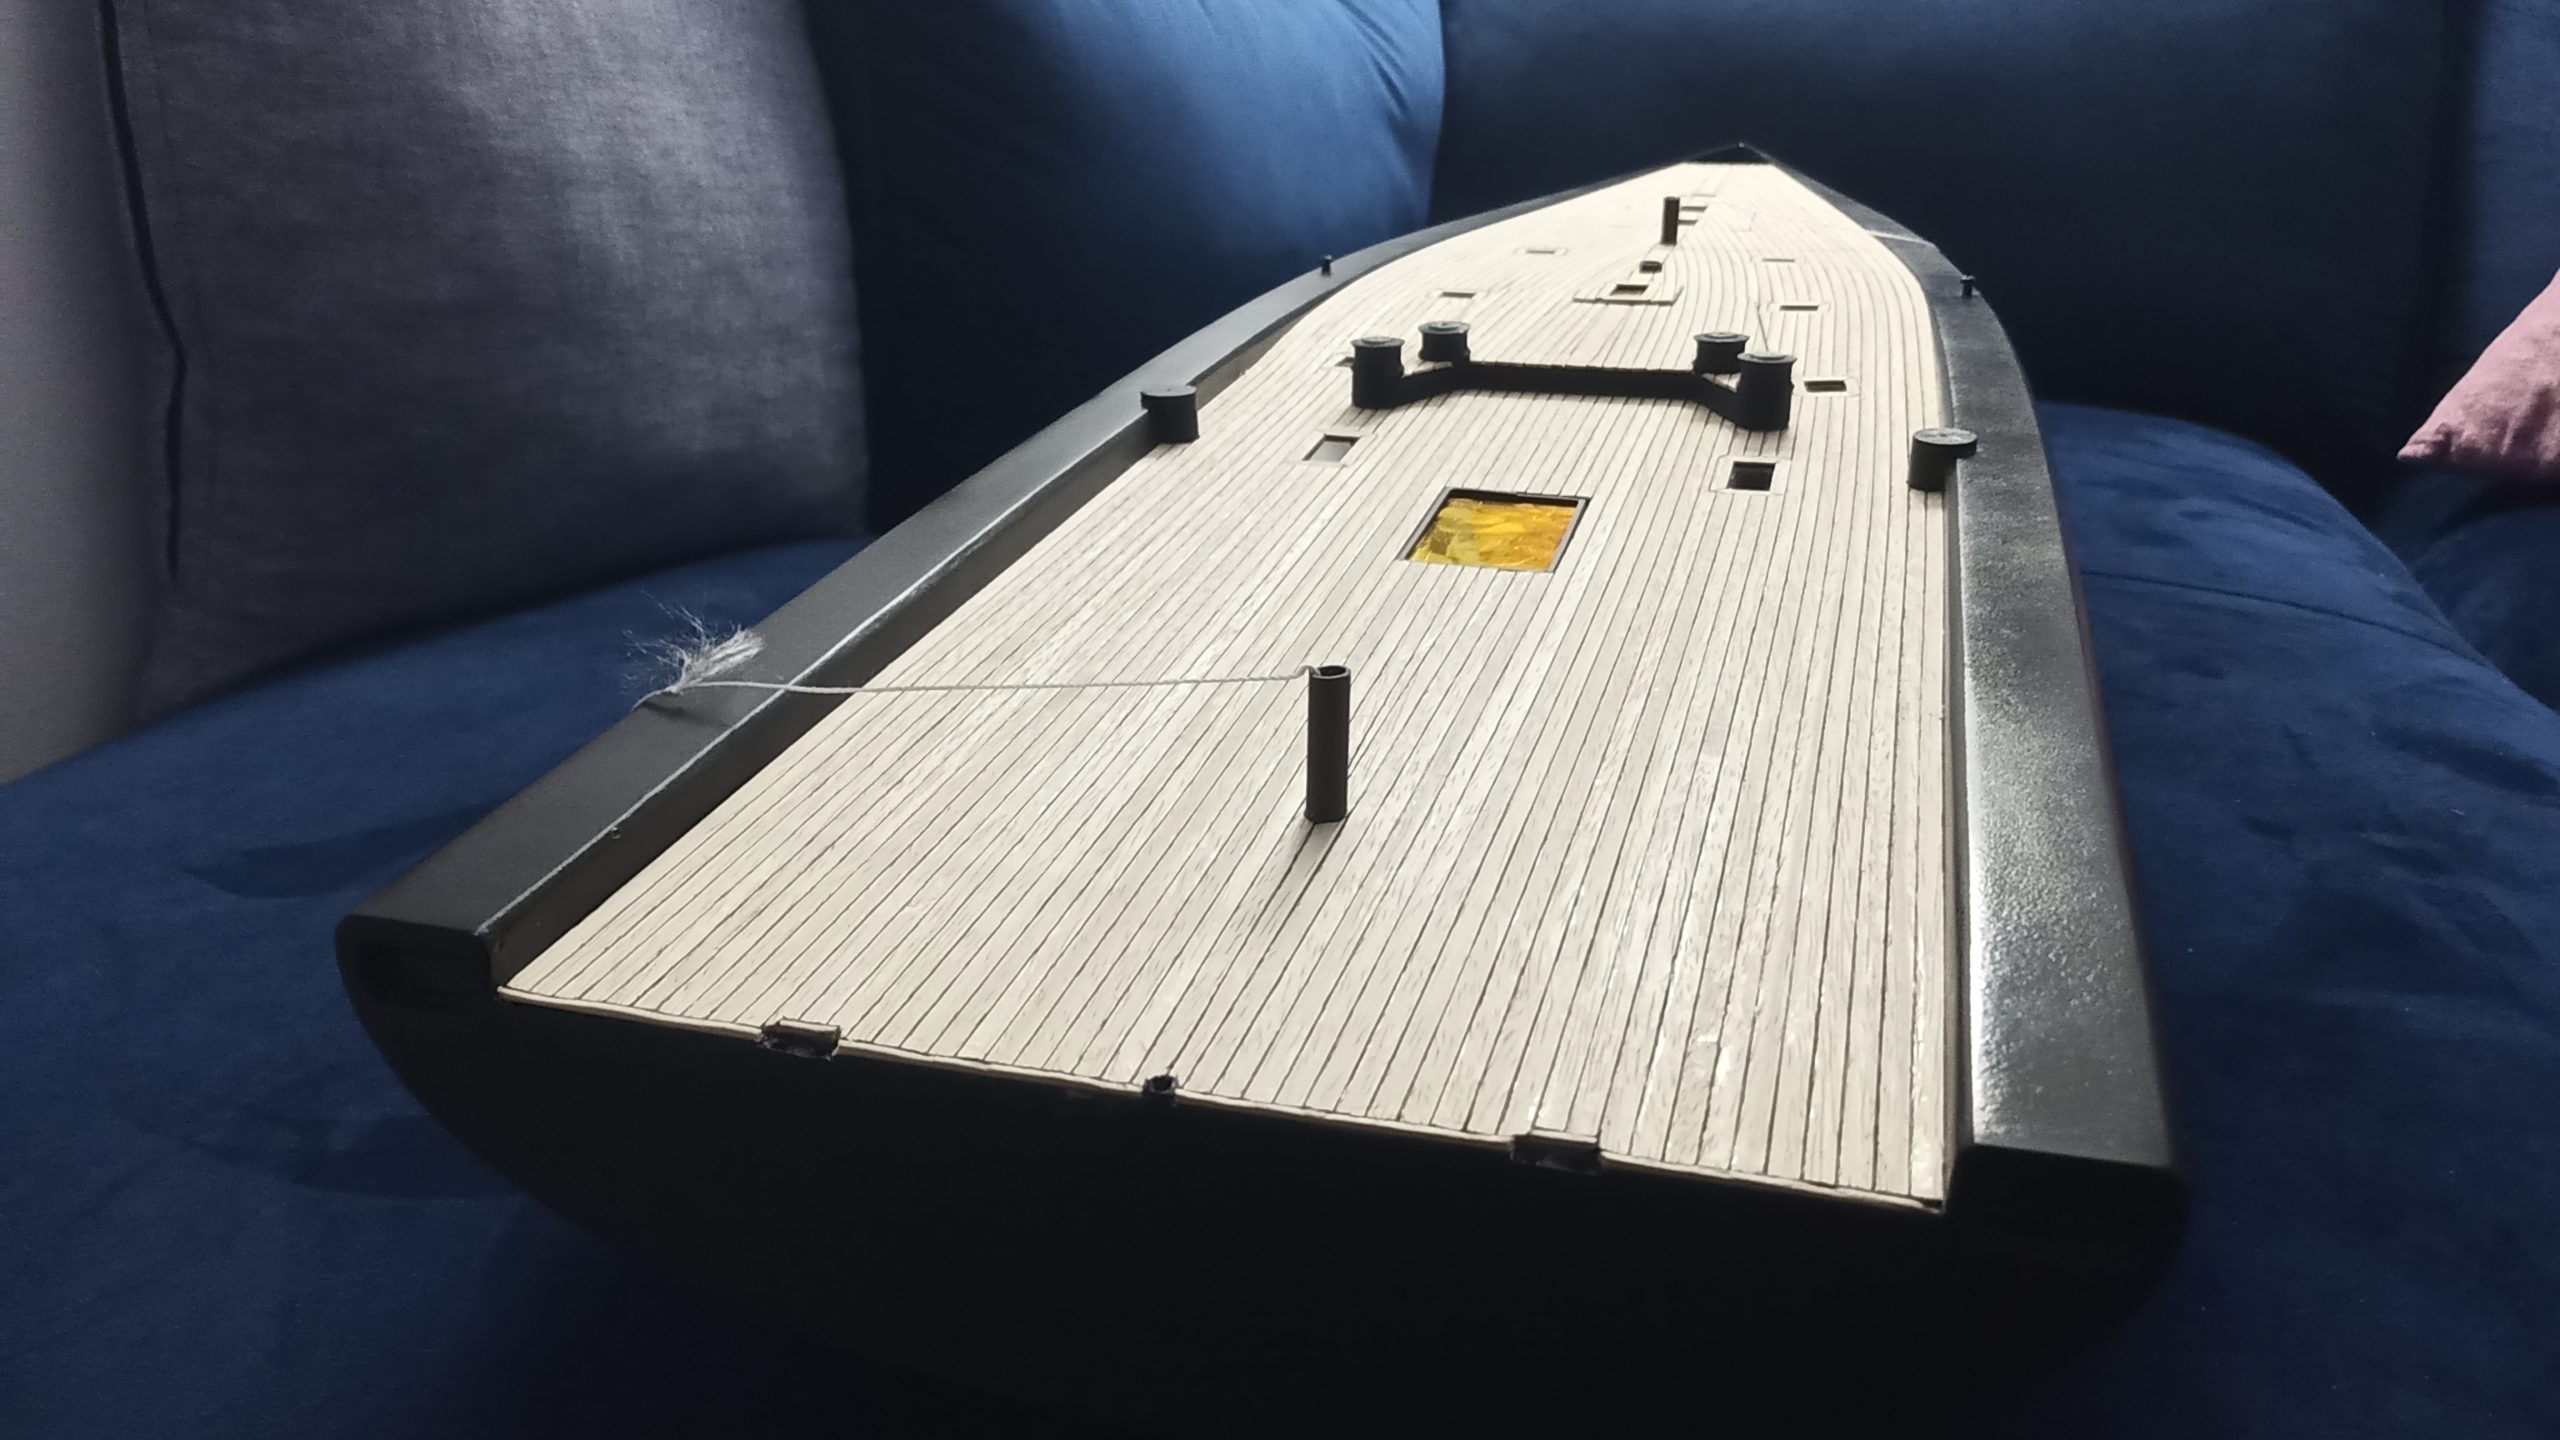
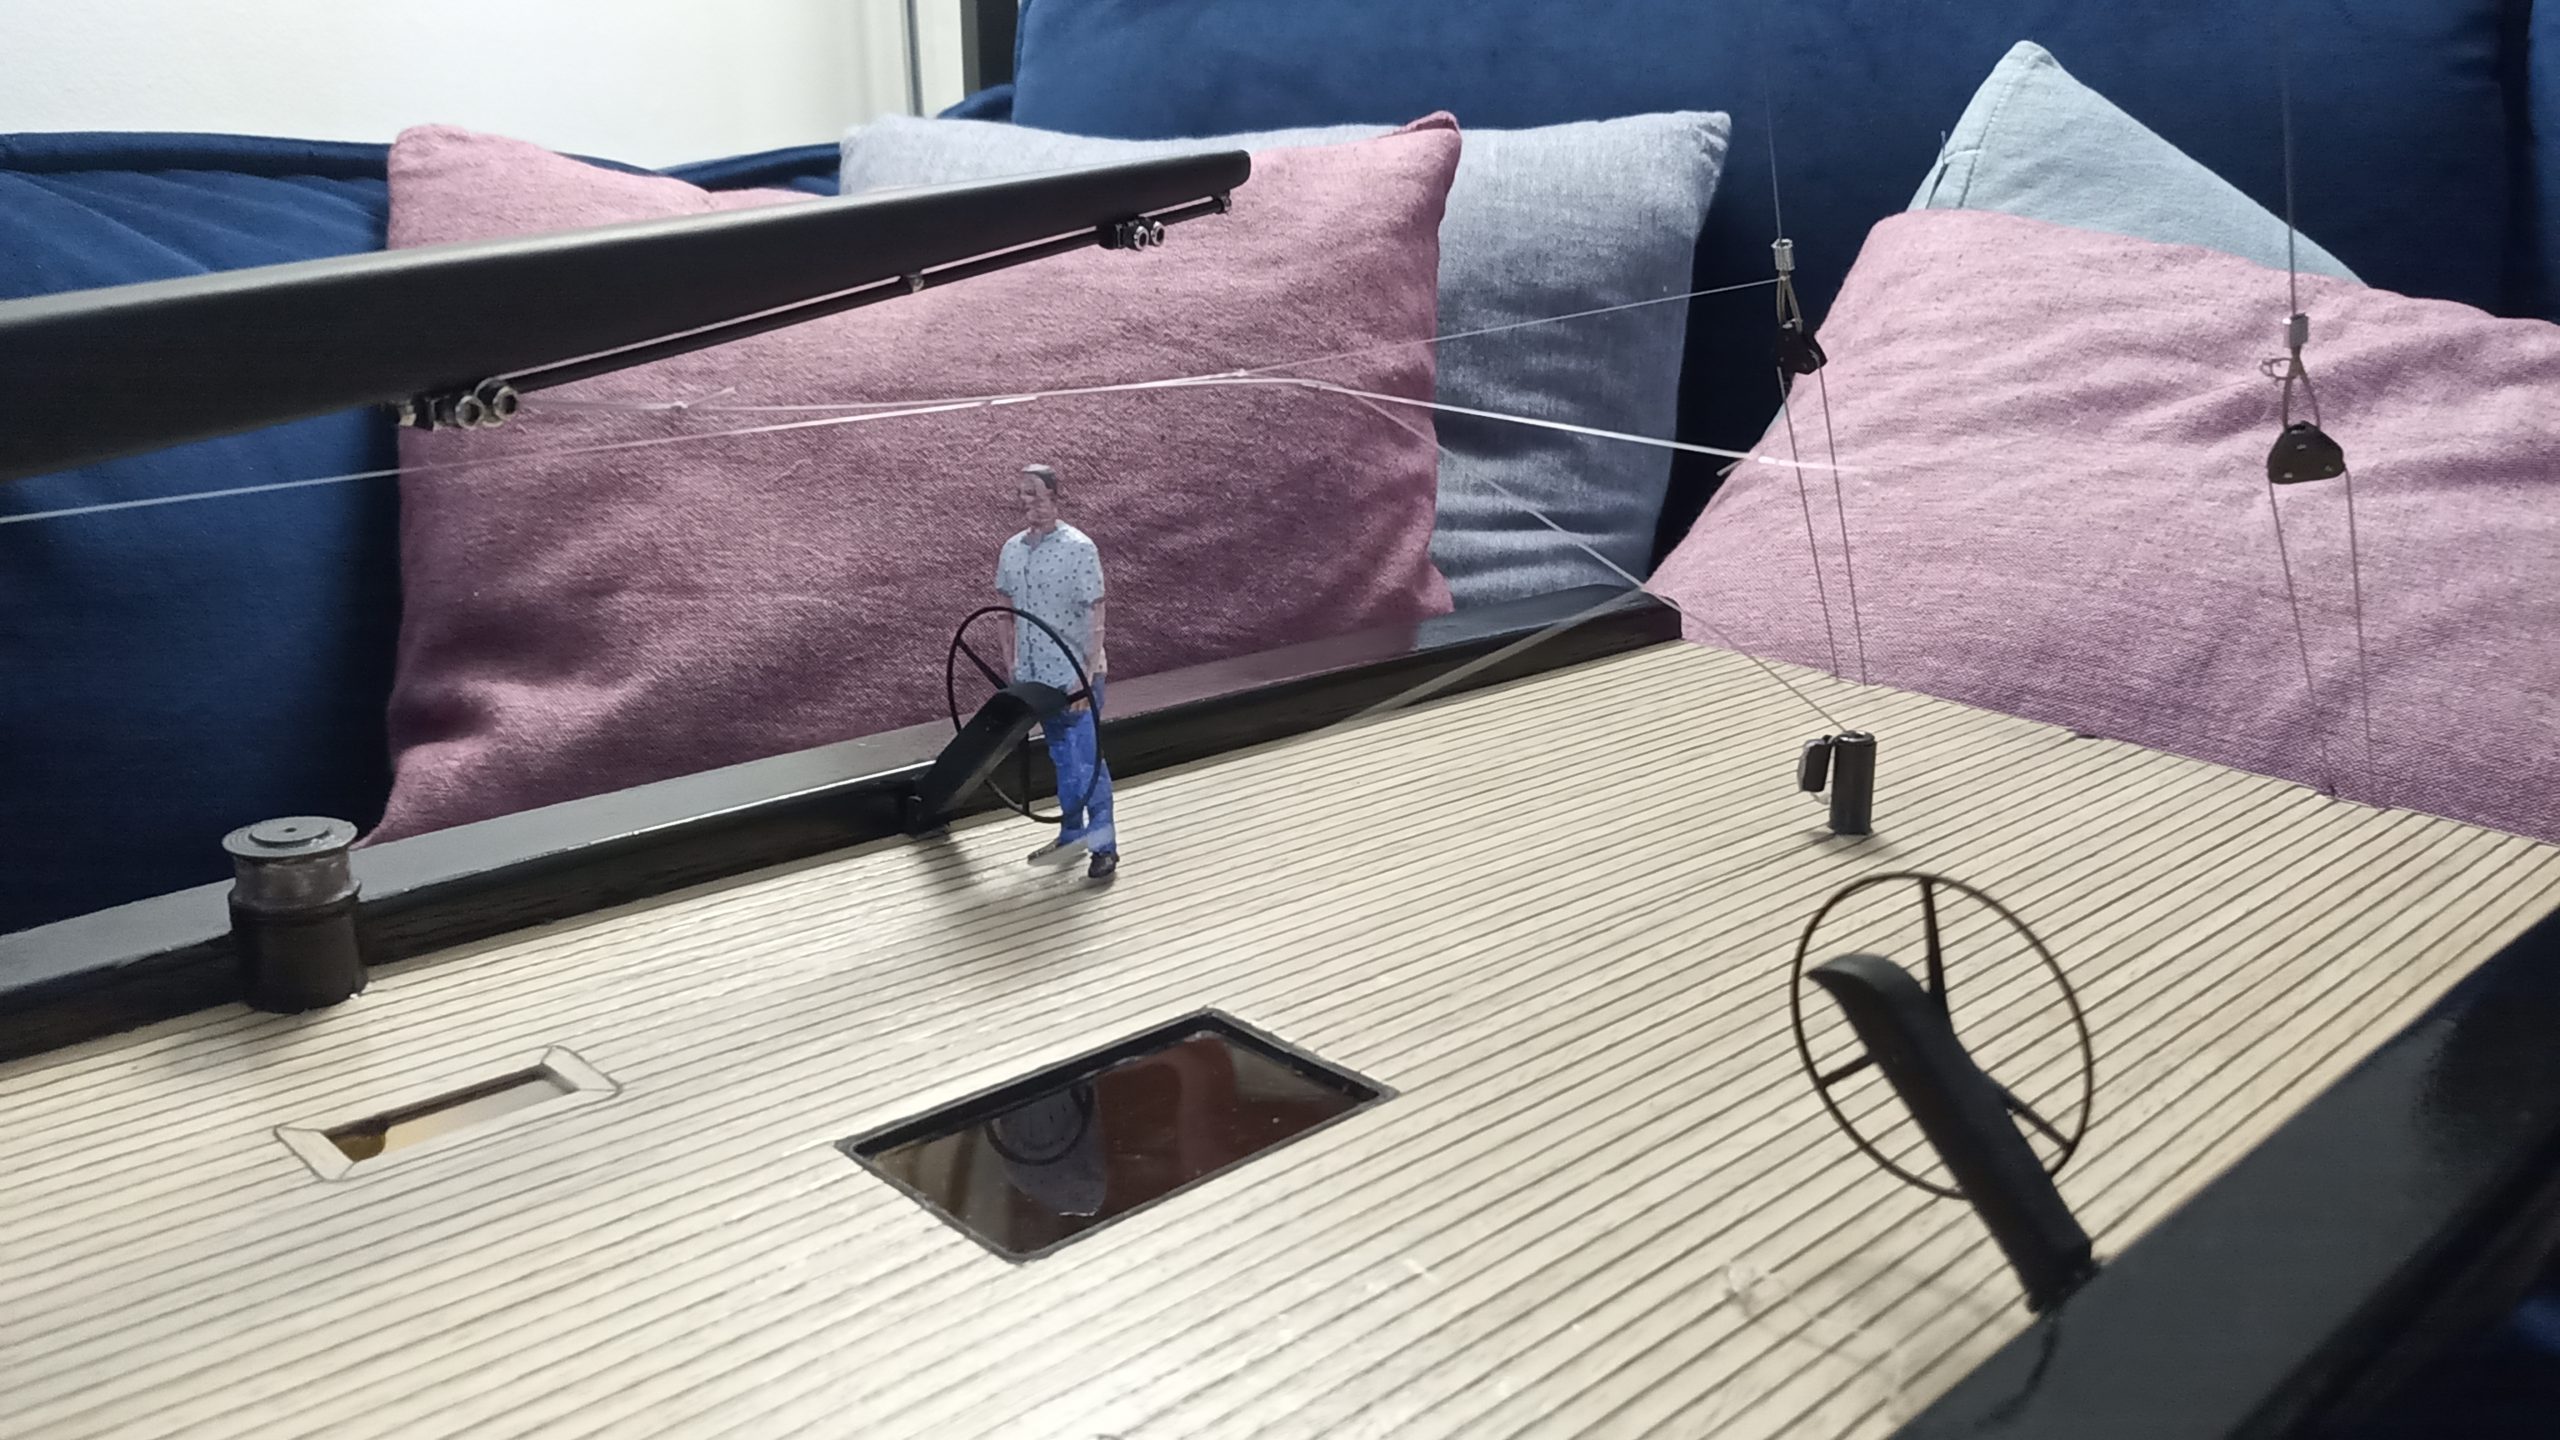
DECK FITTING


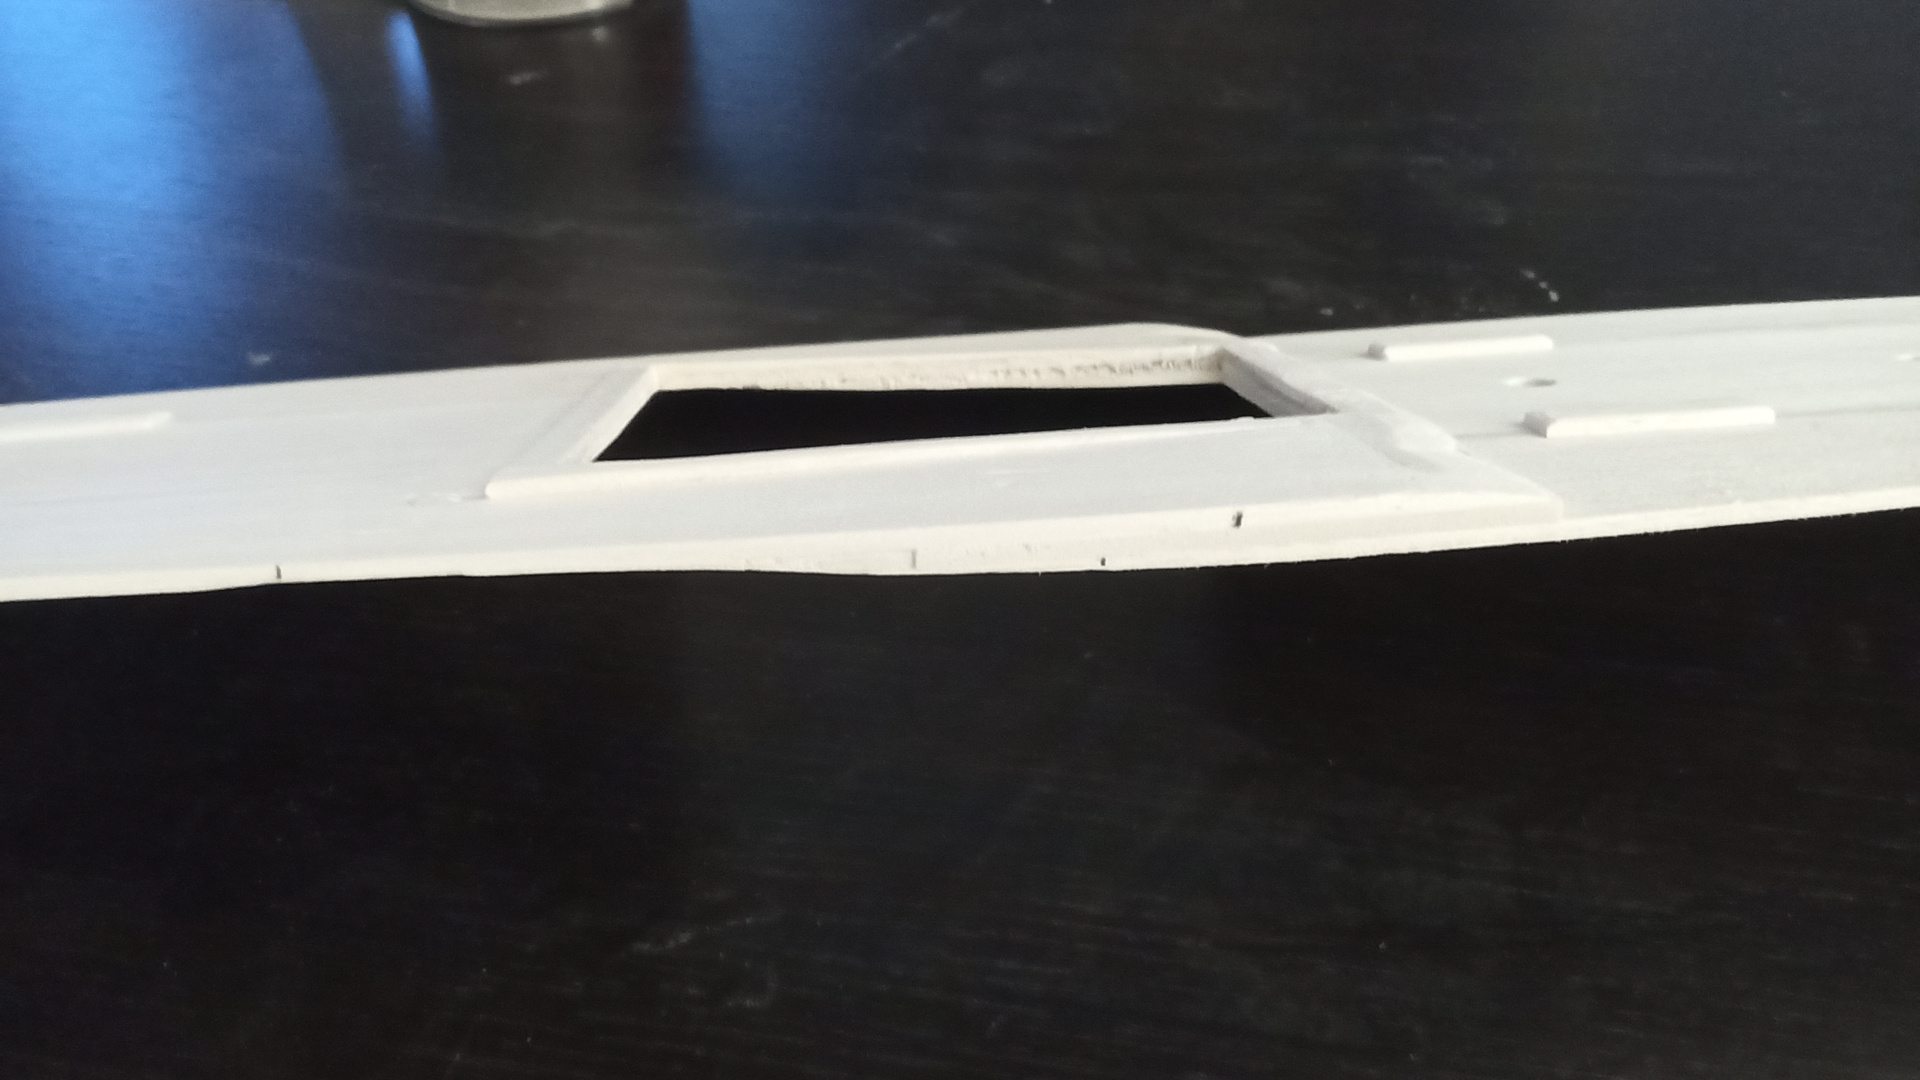
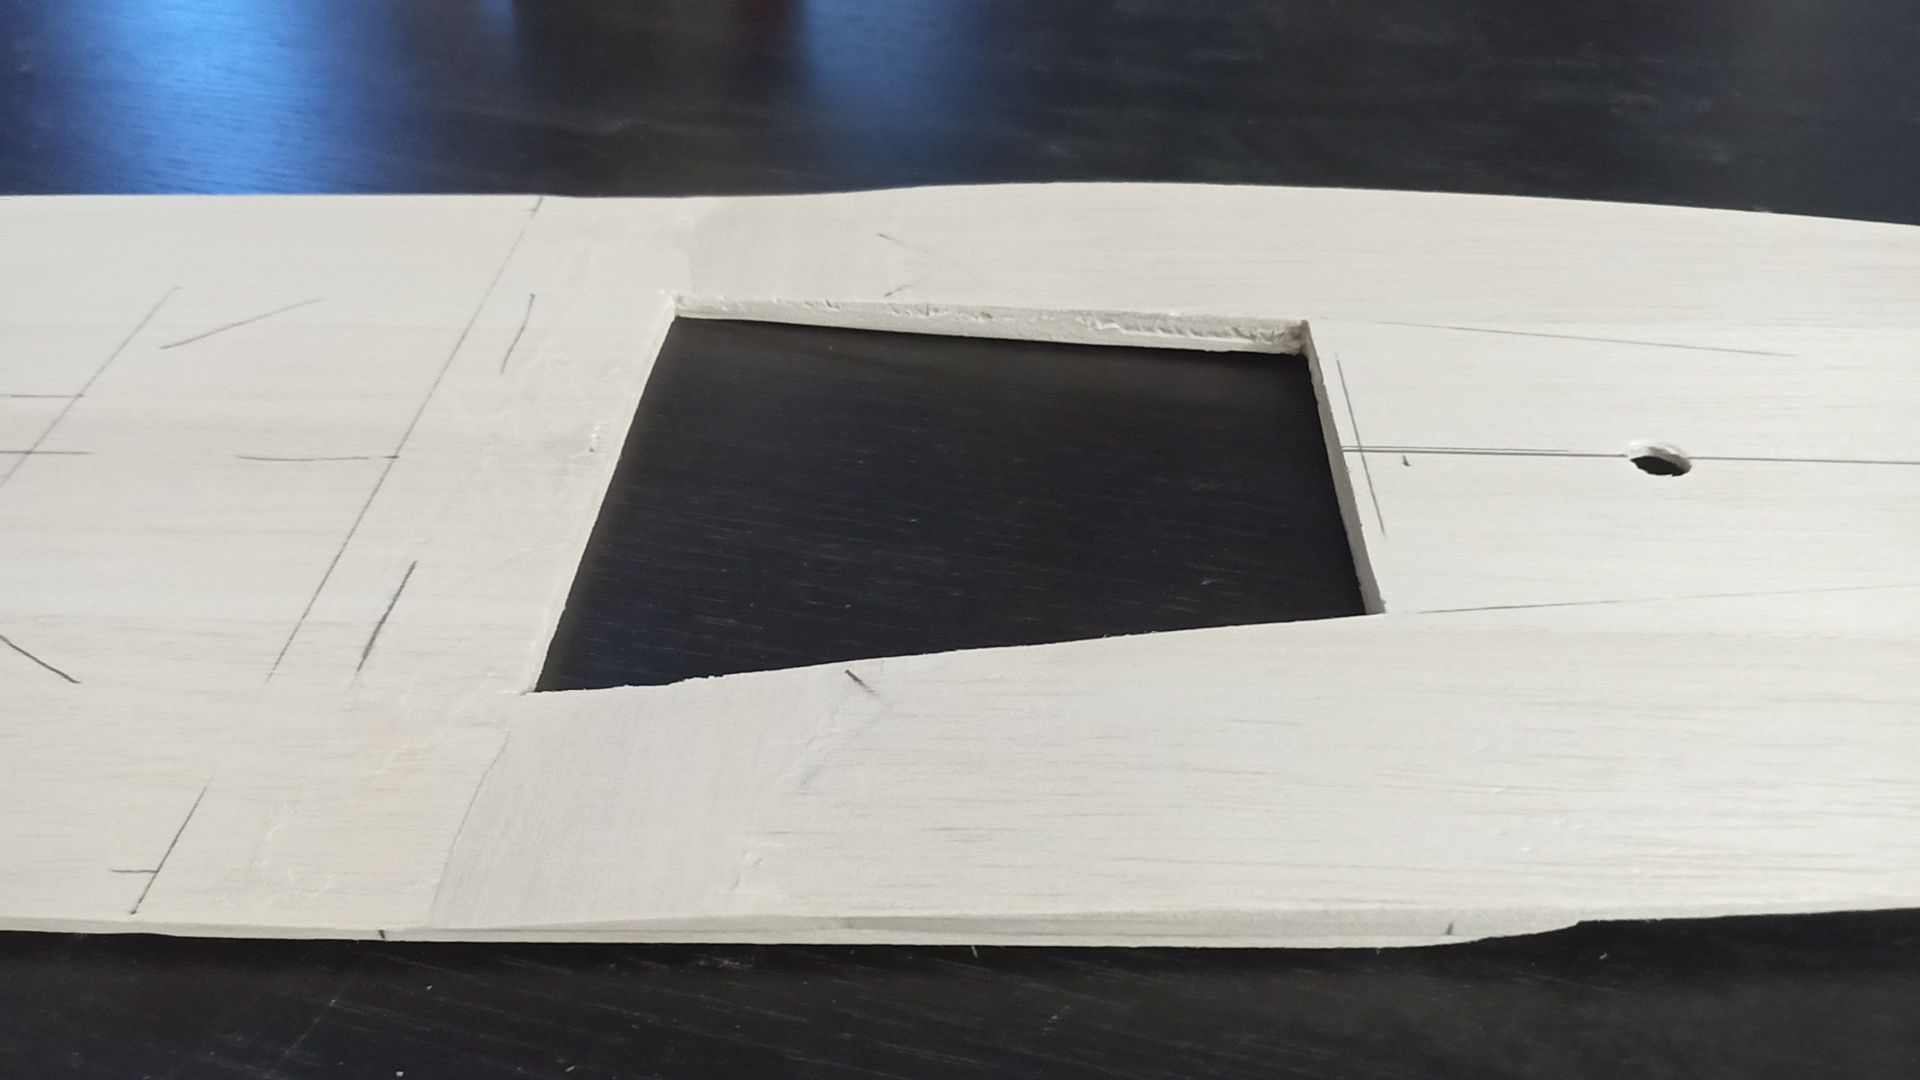
Openscad designed hatch
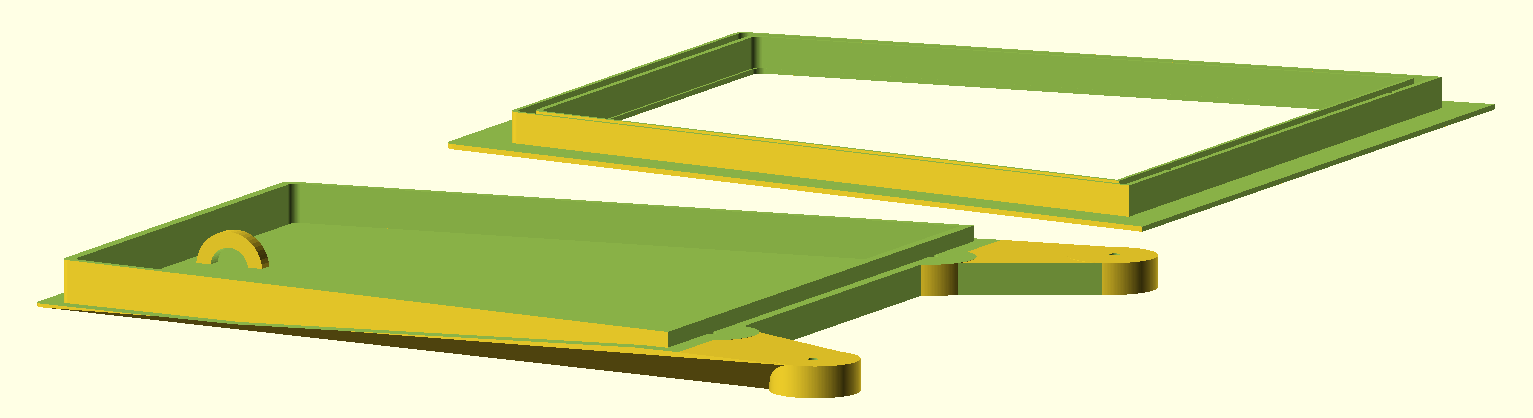
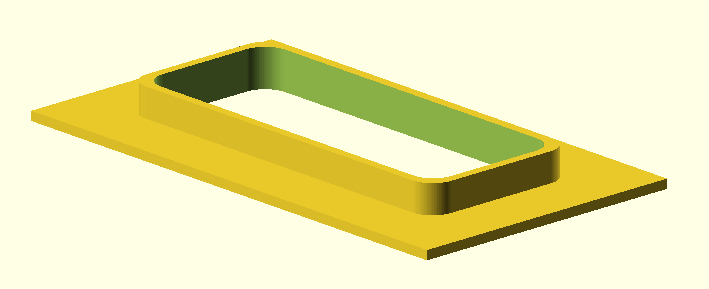
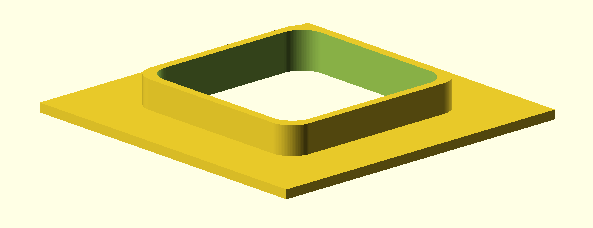
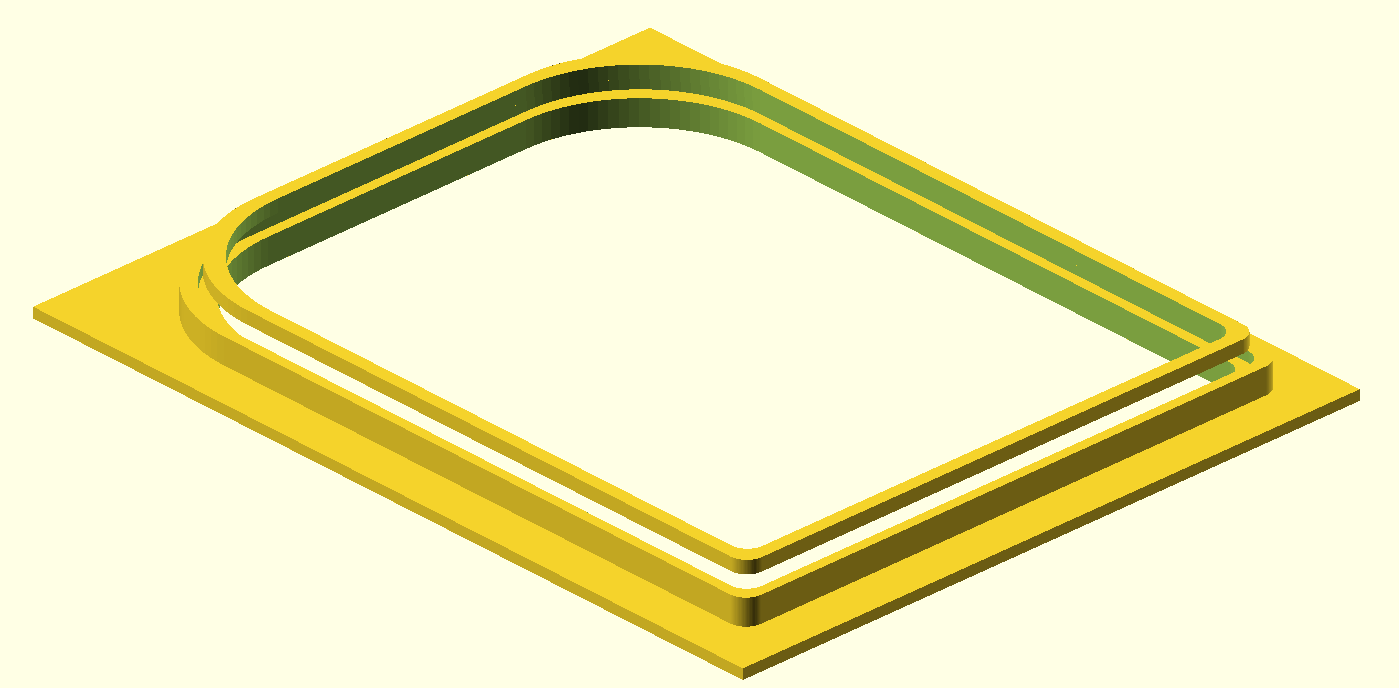
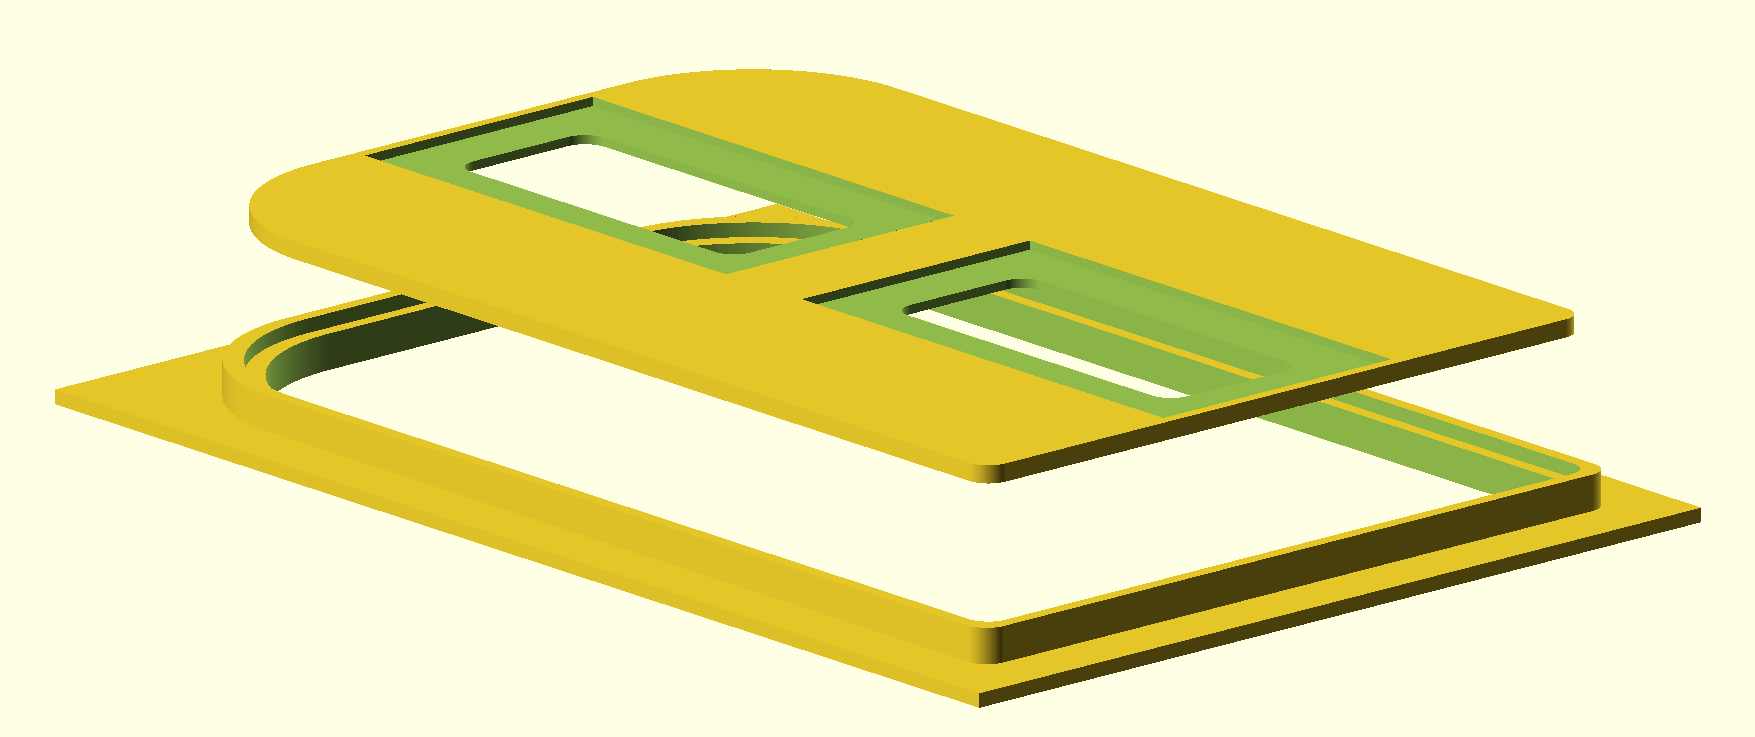

I added a white window frame in hope to enhance the light effect through the tainted acrylic.
One more G4 primer everywhere to seal wood – light sanding…

Finally it is clear the hatch position is a bit backward… it was mandatory to access the electronic properly… and let enough space for the keel box. I kept the proportion somewhat correct.
The windows are going to look normal (smaller) with the planking covering.

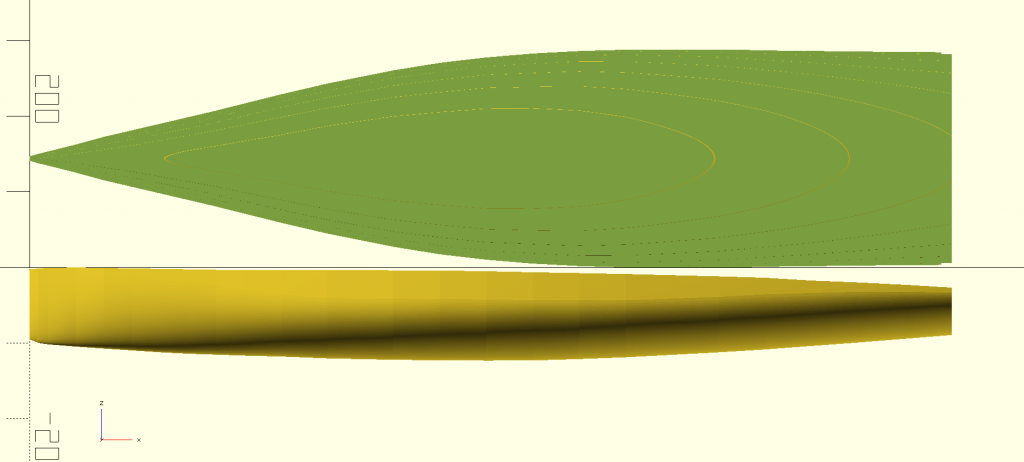
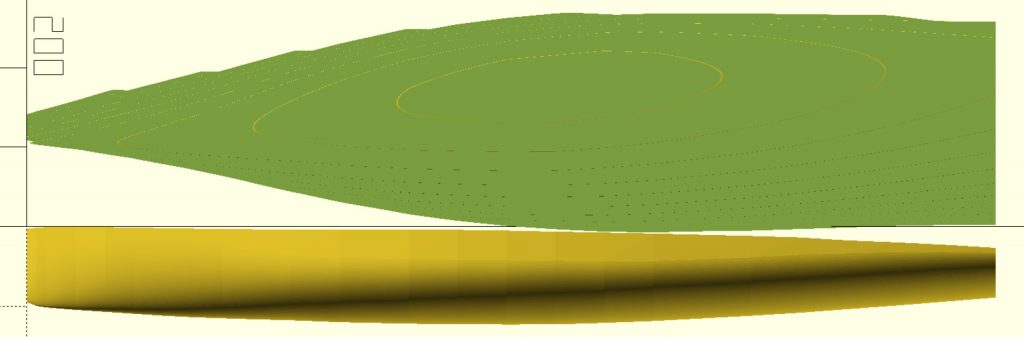
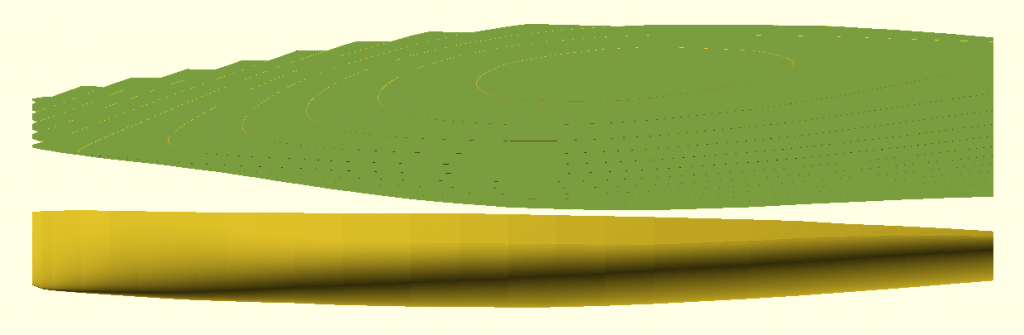
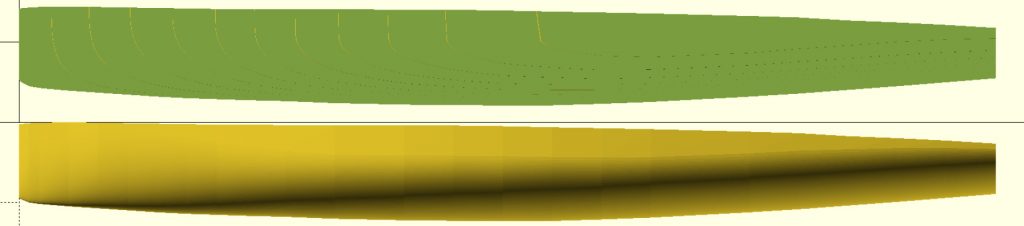
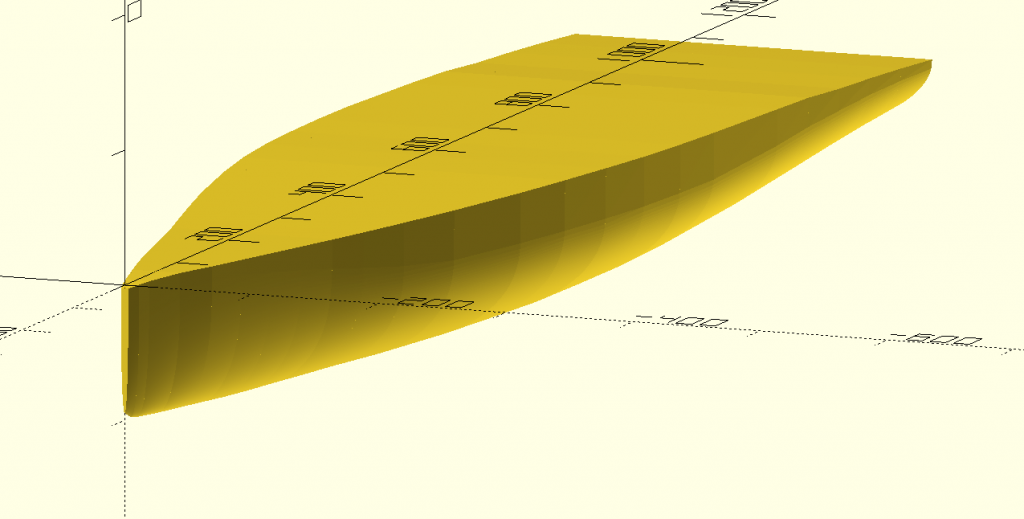
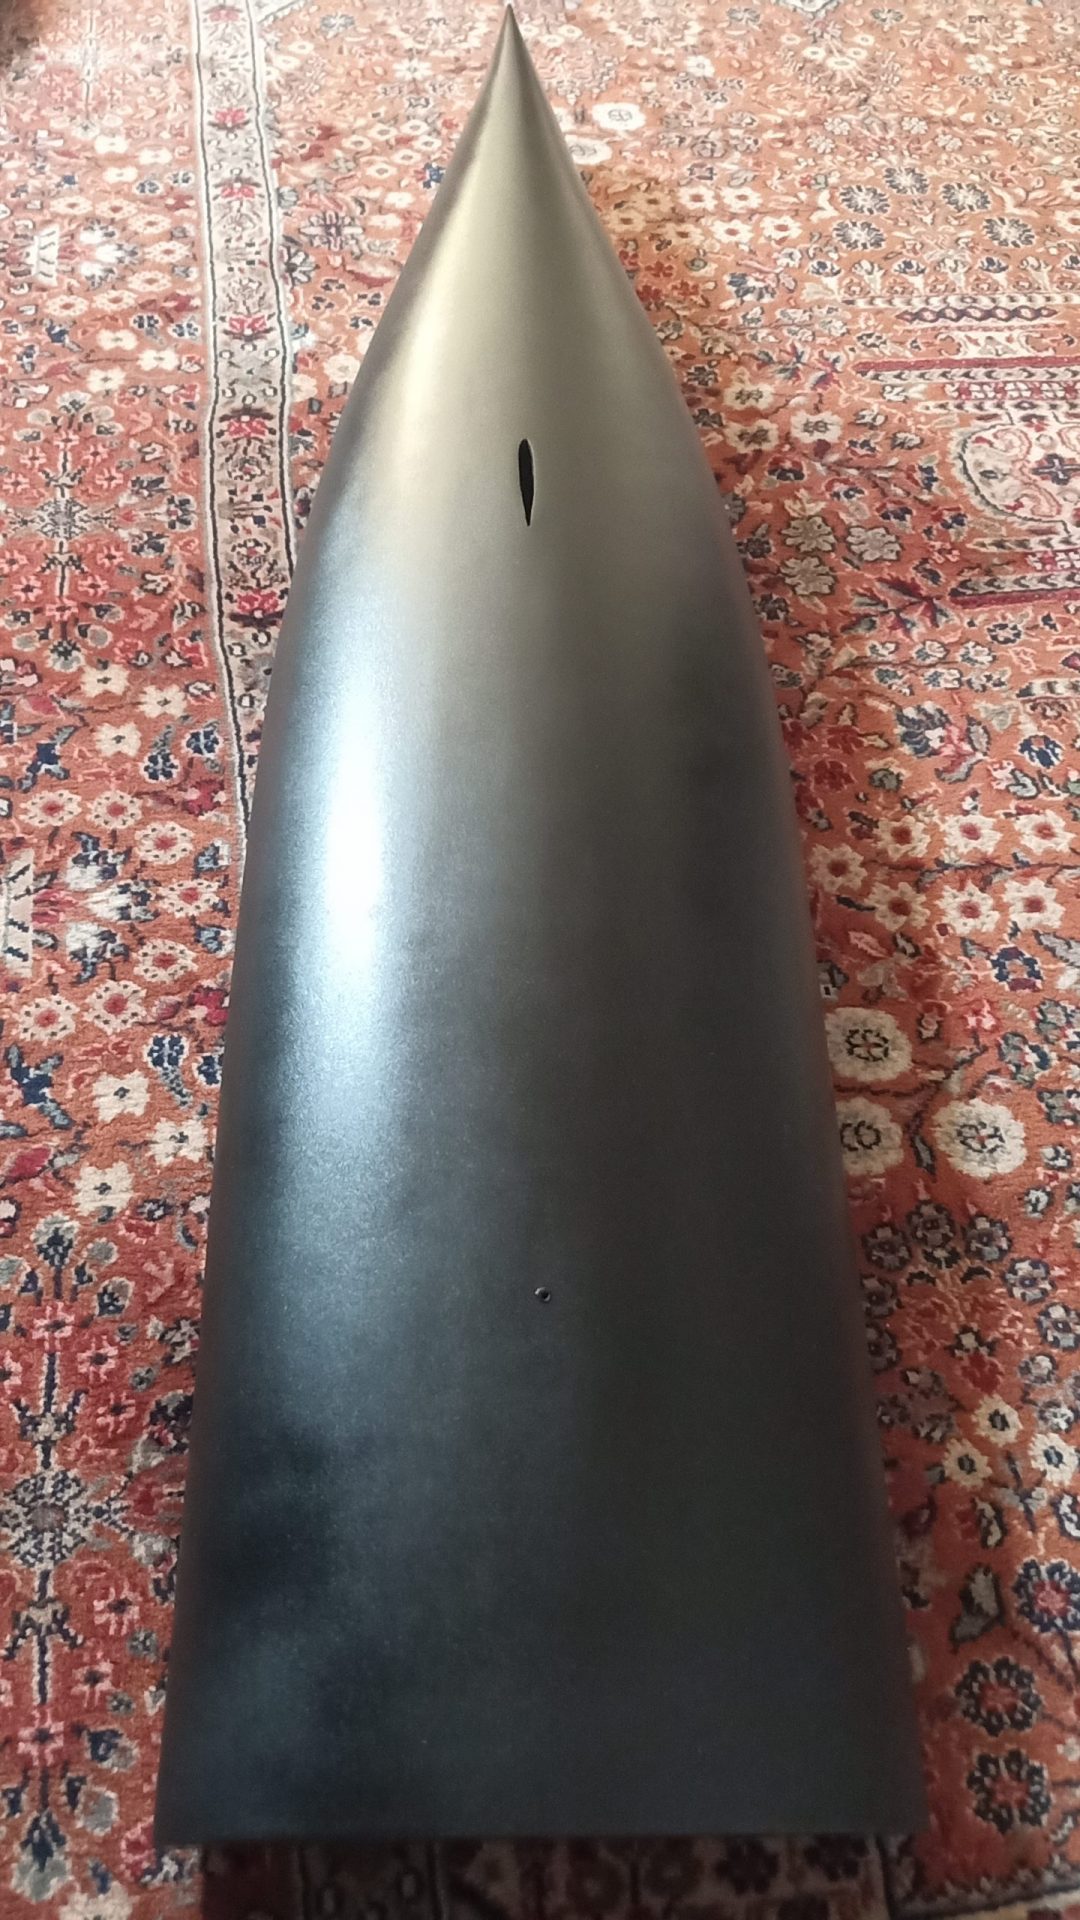
BULB
I prepared a new generic openSCAD module to generate bulb based on a naca (or any) profile.
Code is available here: full code package Github and presentation on Thingiverse.
And more airfoils on my Github airfoil database.
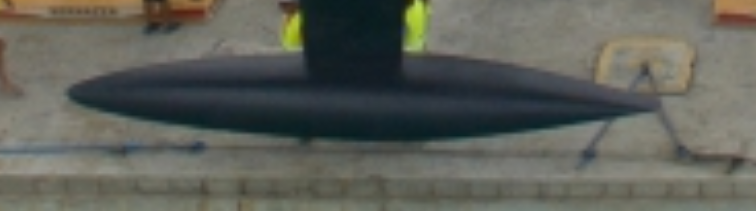
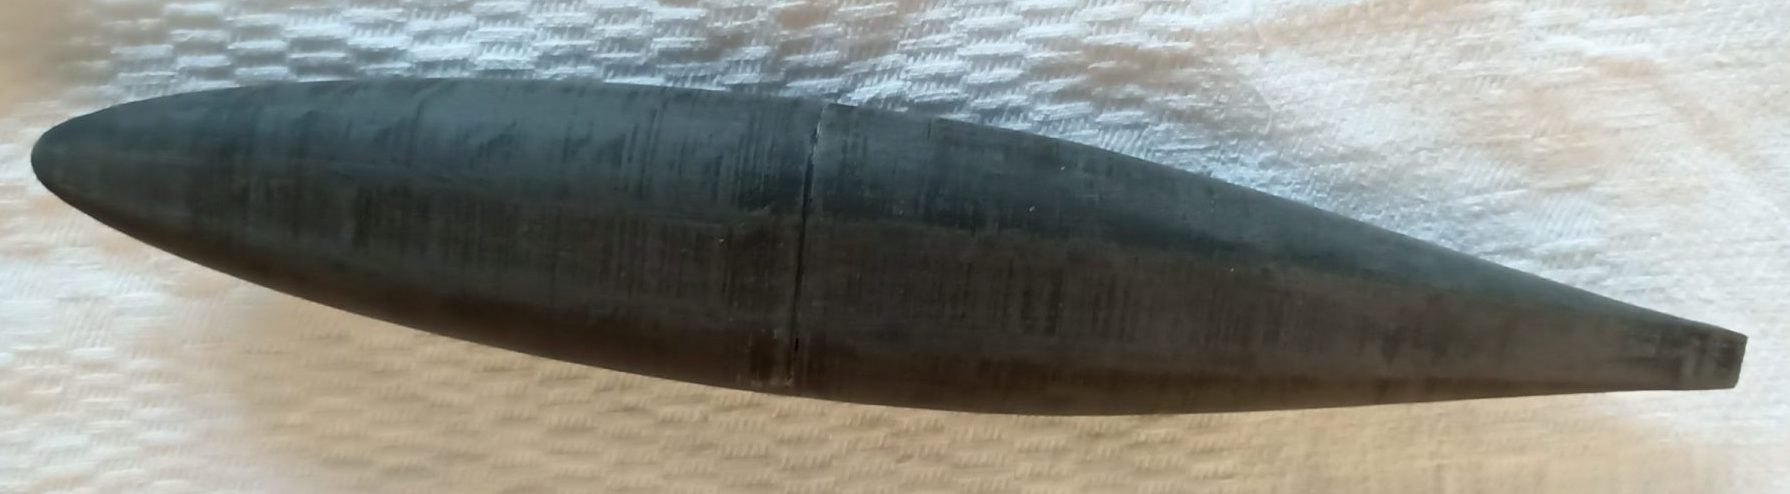
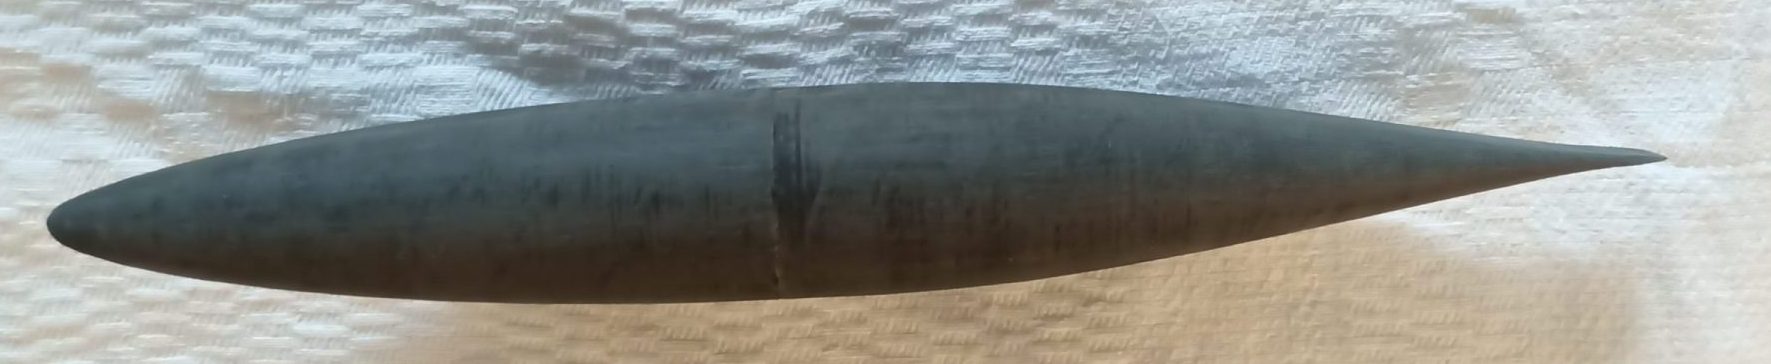
Based on different pictures and profiles informations, I selected the profile naca 66-012 and applied a flatten ellipse section.
Naca 66-012 provides a low drag in straight and level movement.
My STL files: P1 , P2
It happened to look a lot like the original.


HULL PAINT
Always a long, time consuming and painful process to get a good result.
One wet sanding 600, one paint layer to check surface, one sanding 400 + one wet 800… and two paint layers.
Hull: gloss finish (need polishing)
rudder, keel, bulb, mast/boom: mat finish
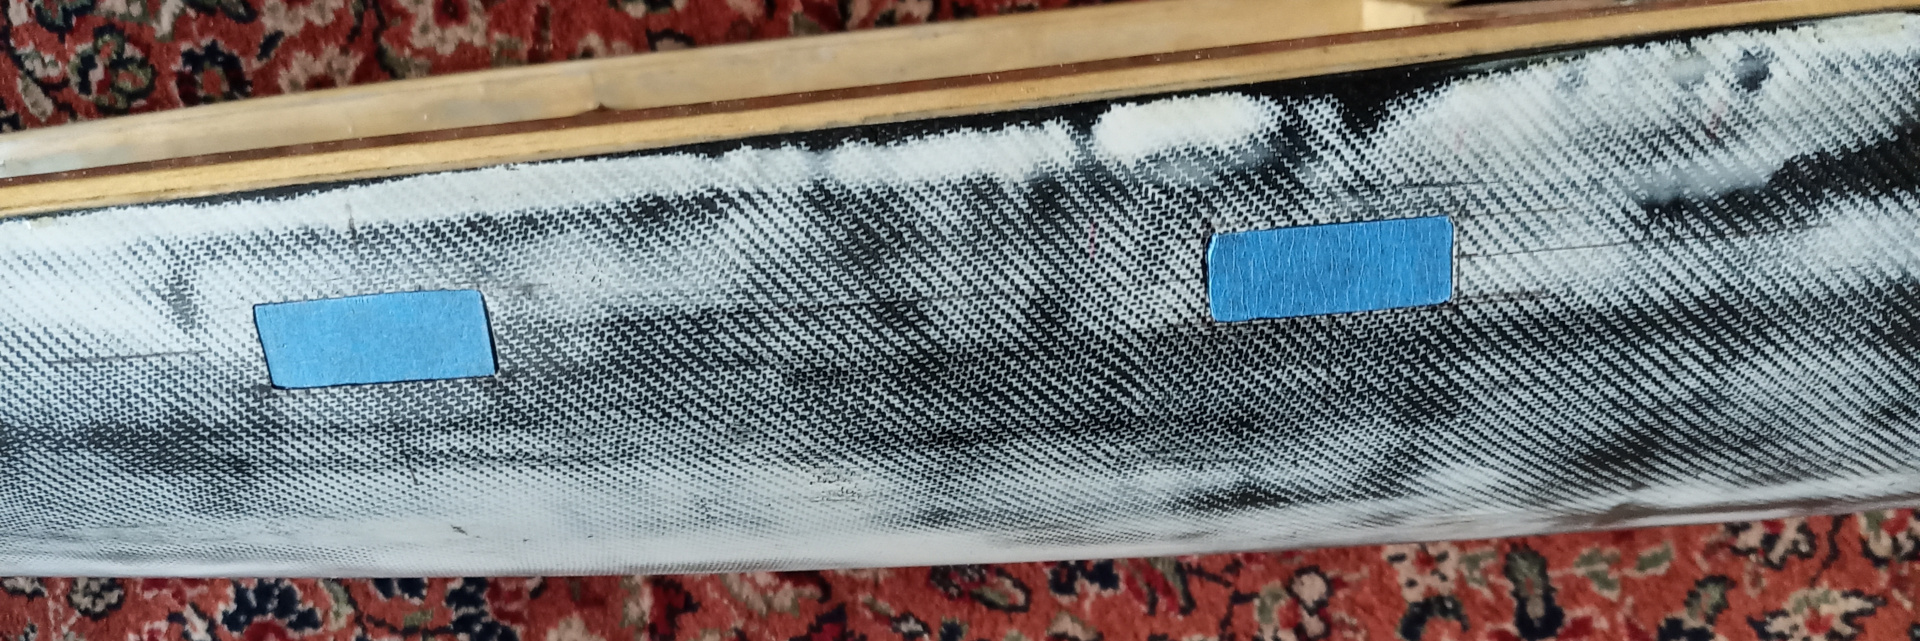
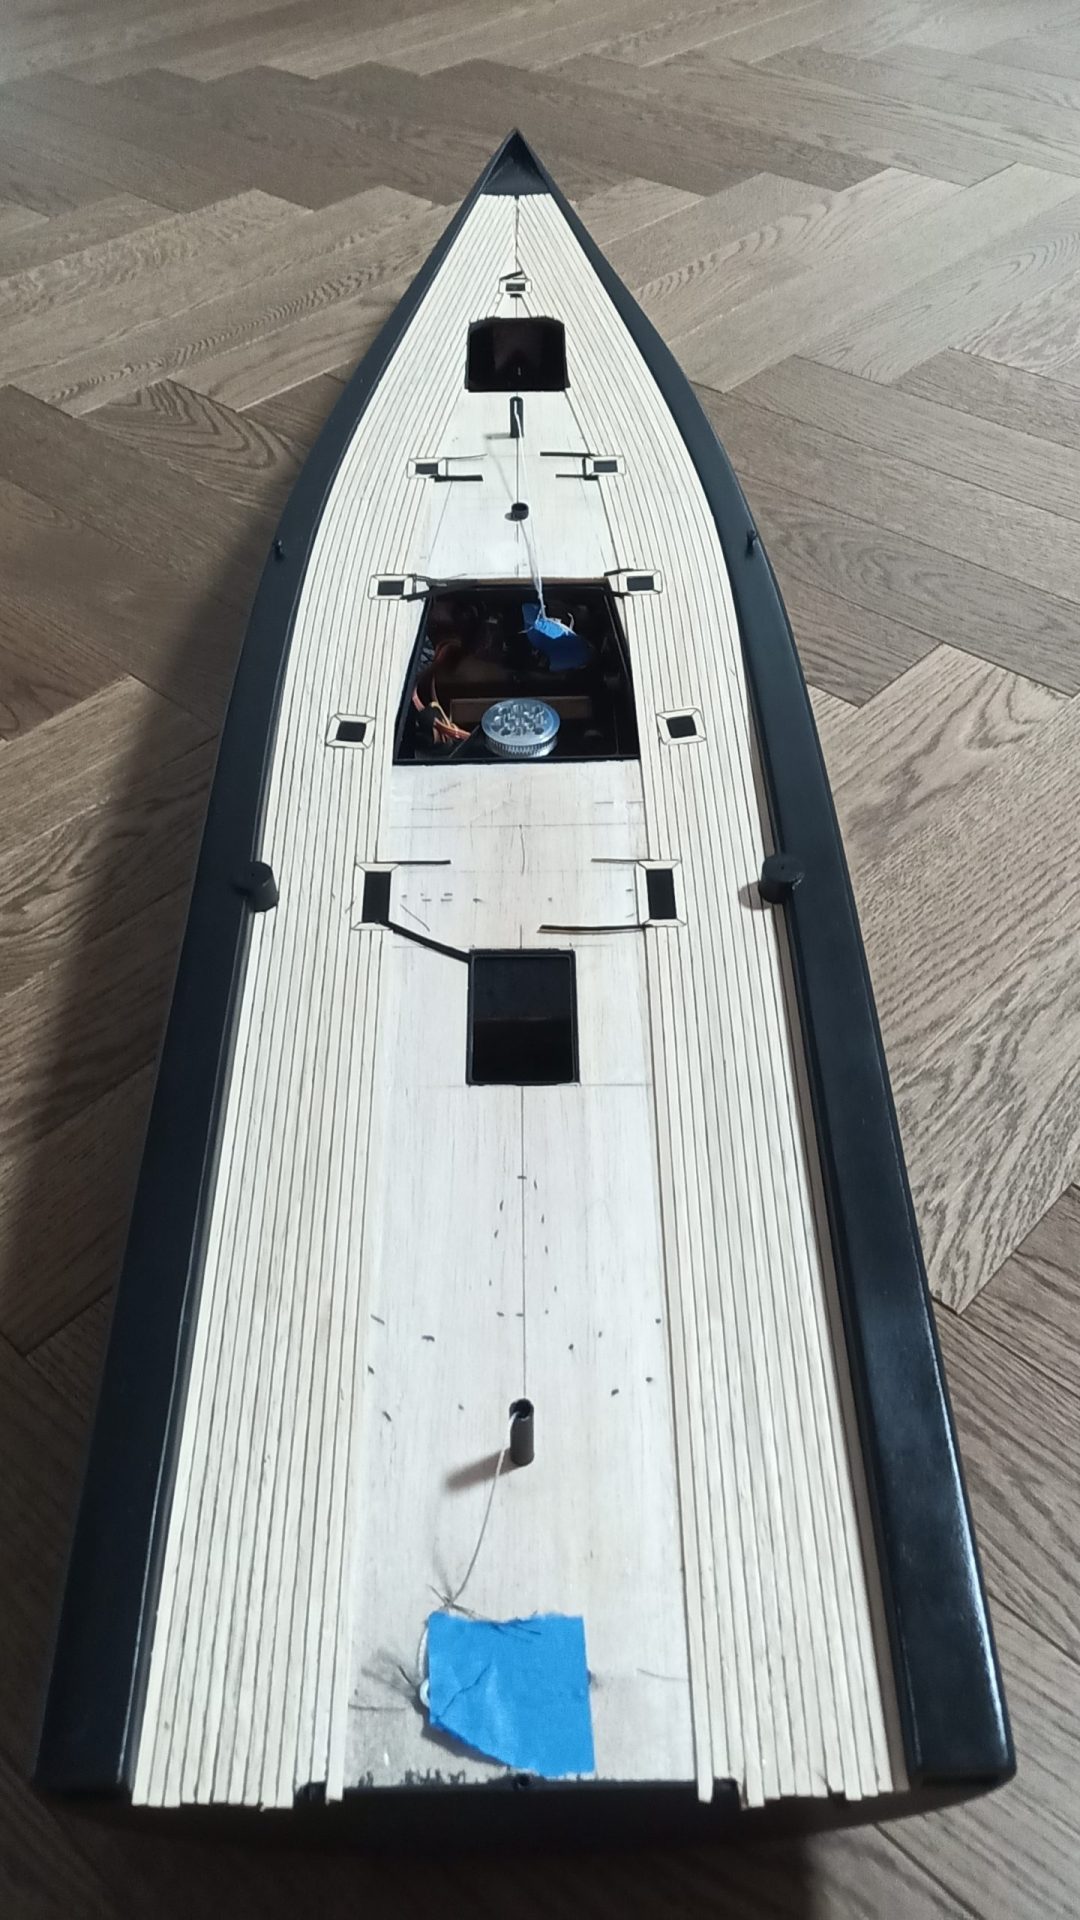
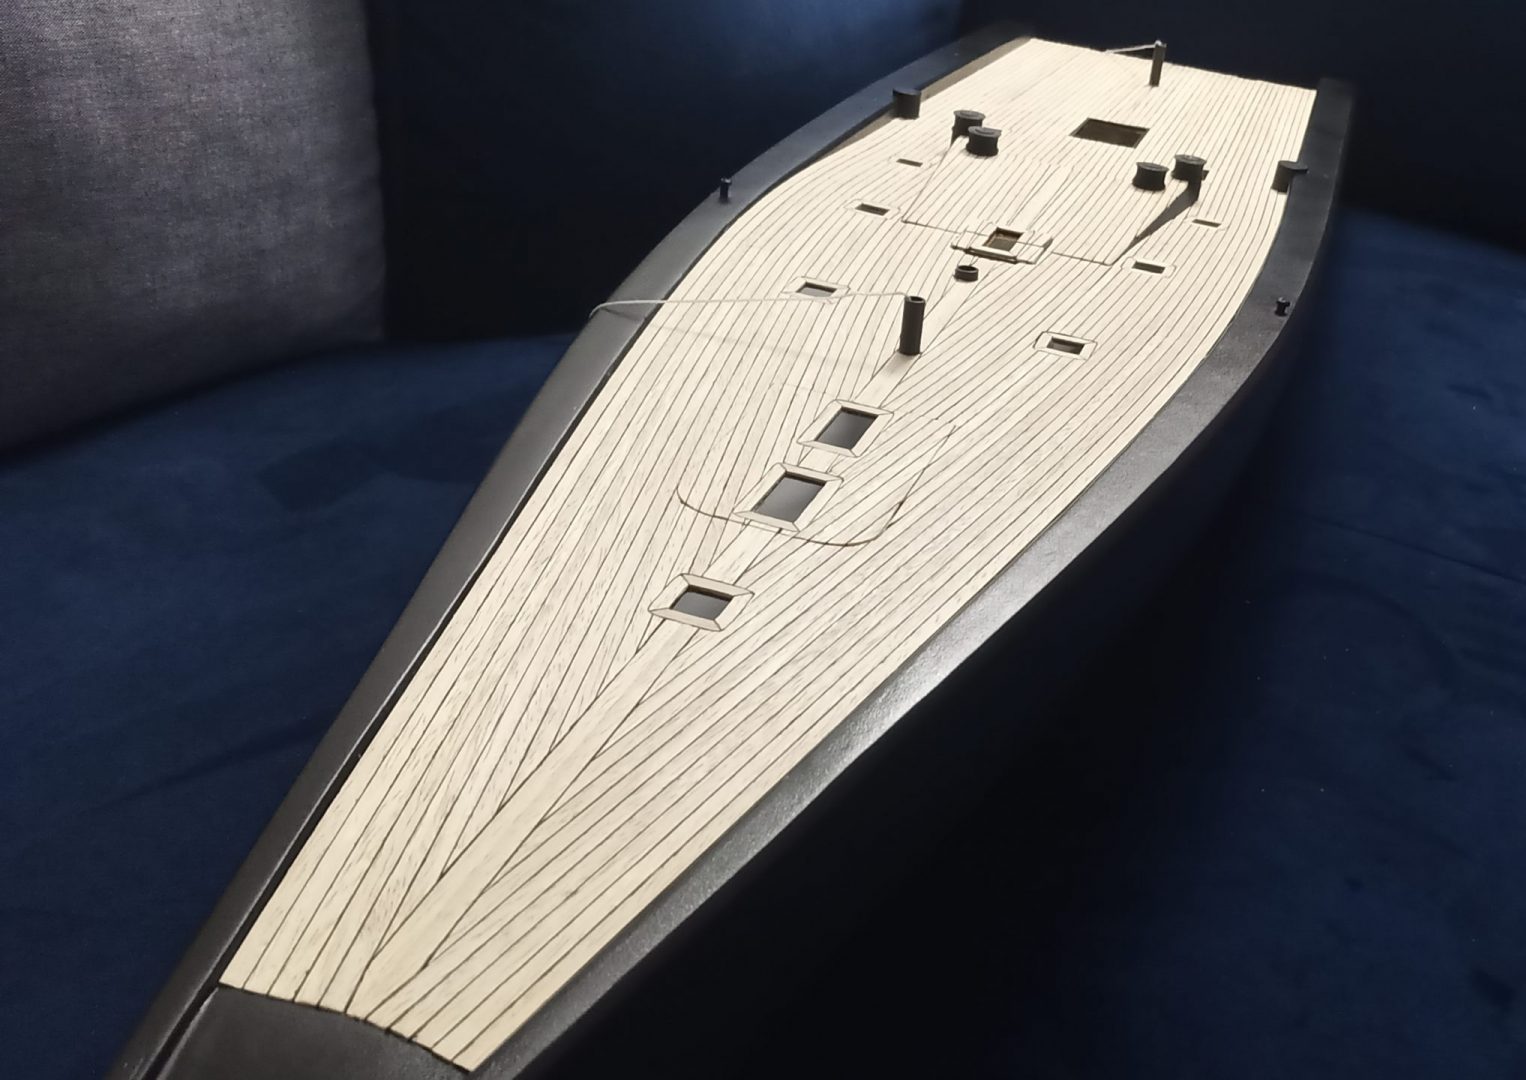
DECK PLANKING
The paper was previously fixed with a single pass G4 and cut in 2mm strips.
The glue is transparent high strength polyurethane.
The paper excess is cut after for a glimpse of result…
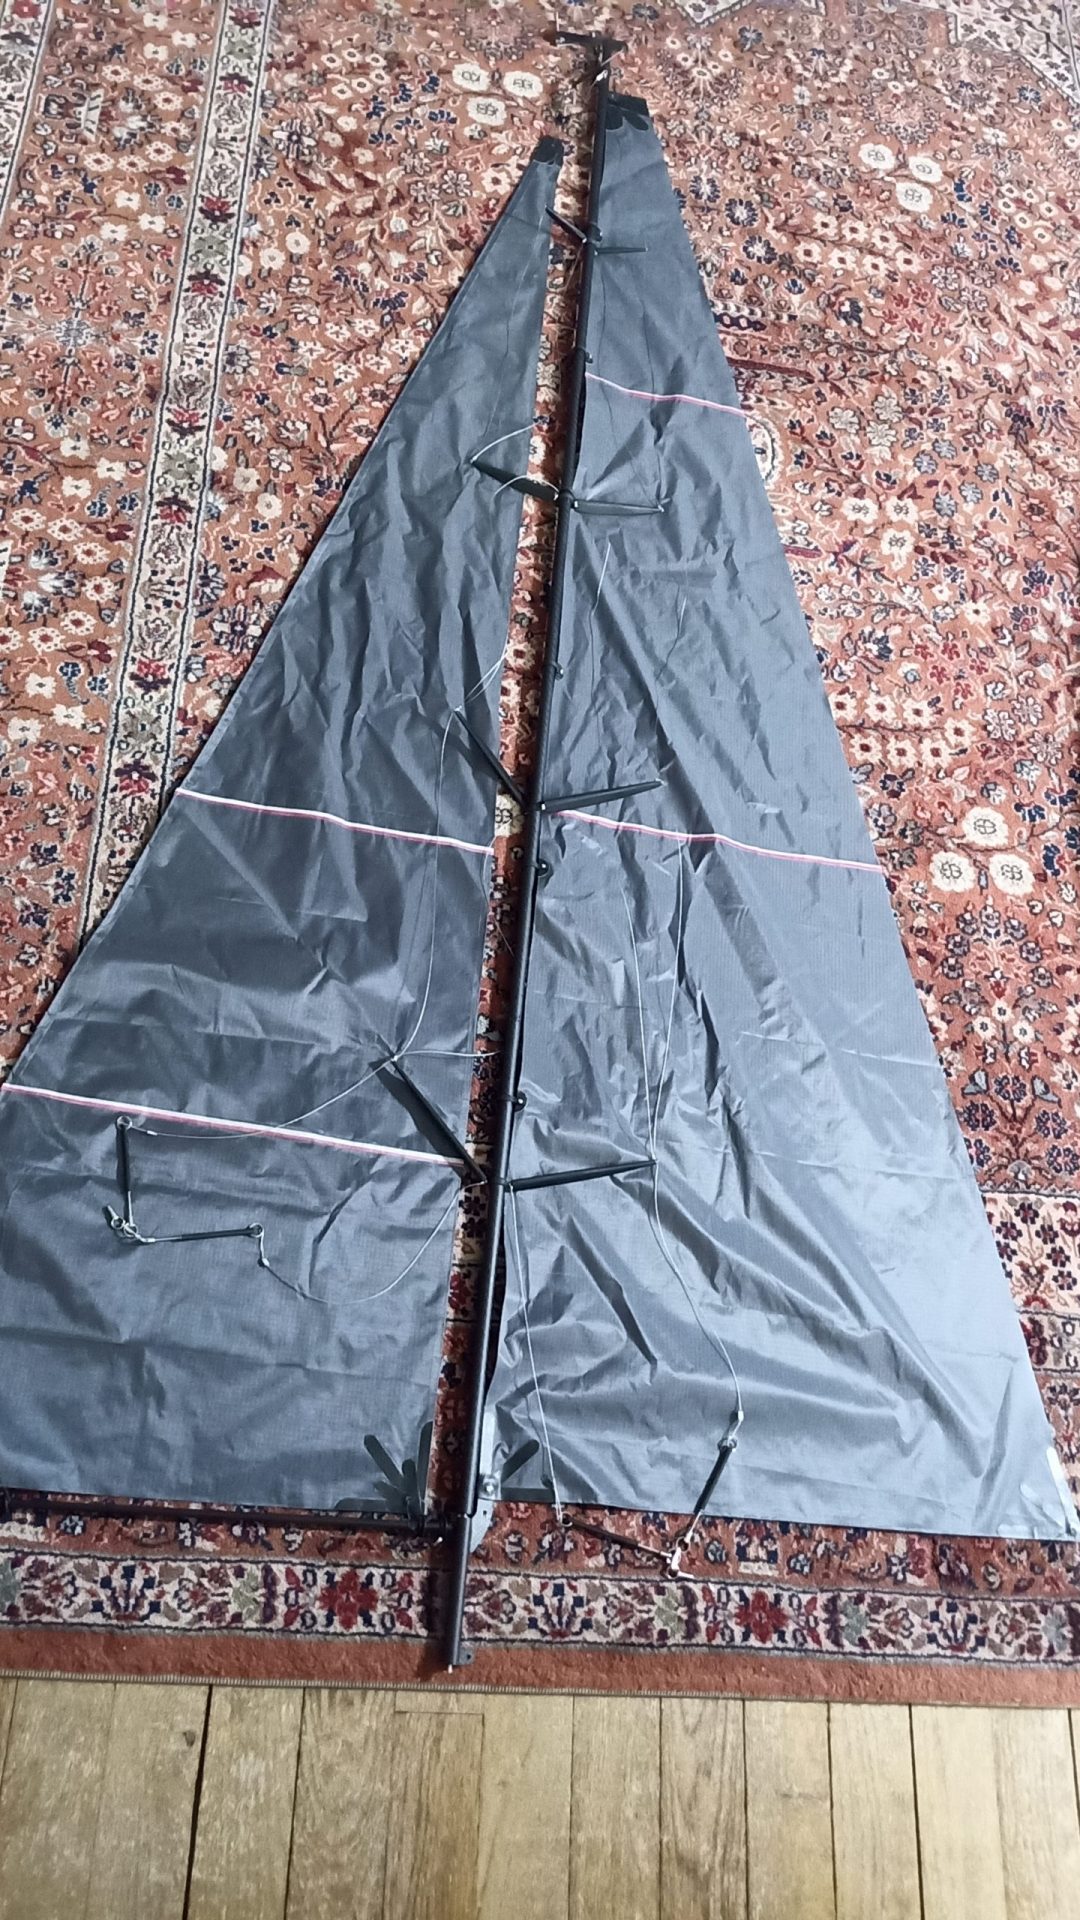
SAILS
Sail making with Claudio gadget.
Icarex / Ripstop 48gr/m2.
8% chord.


SHIP LAUNCHING
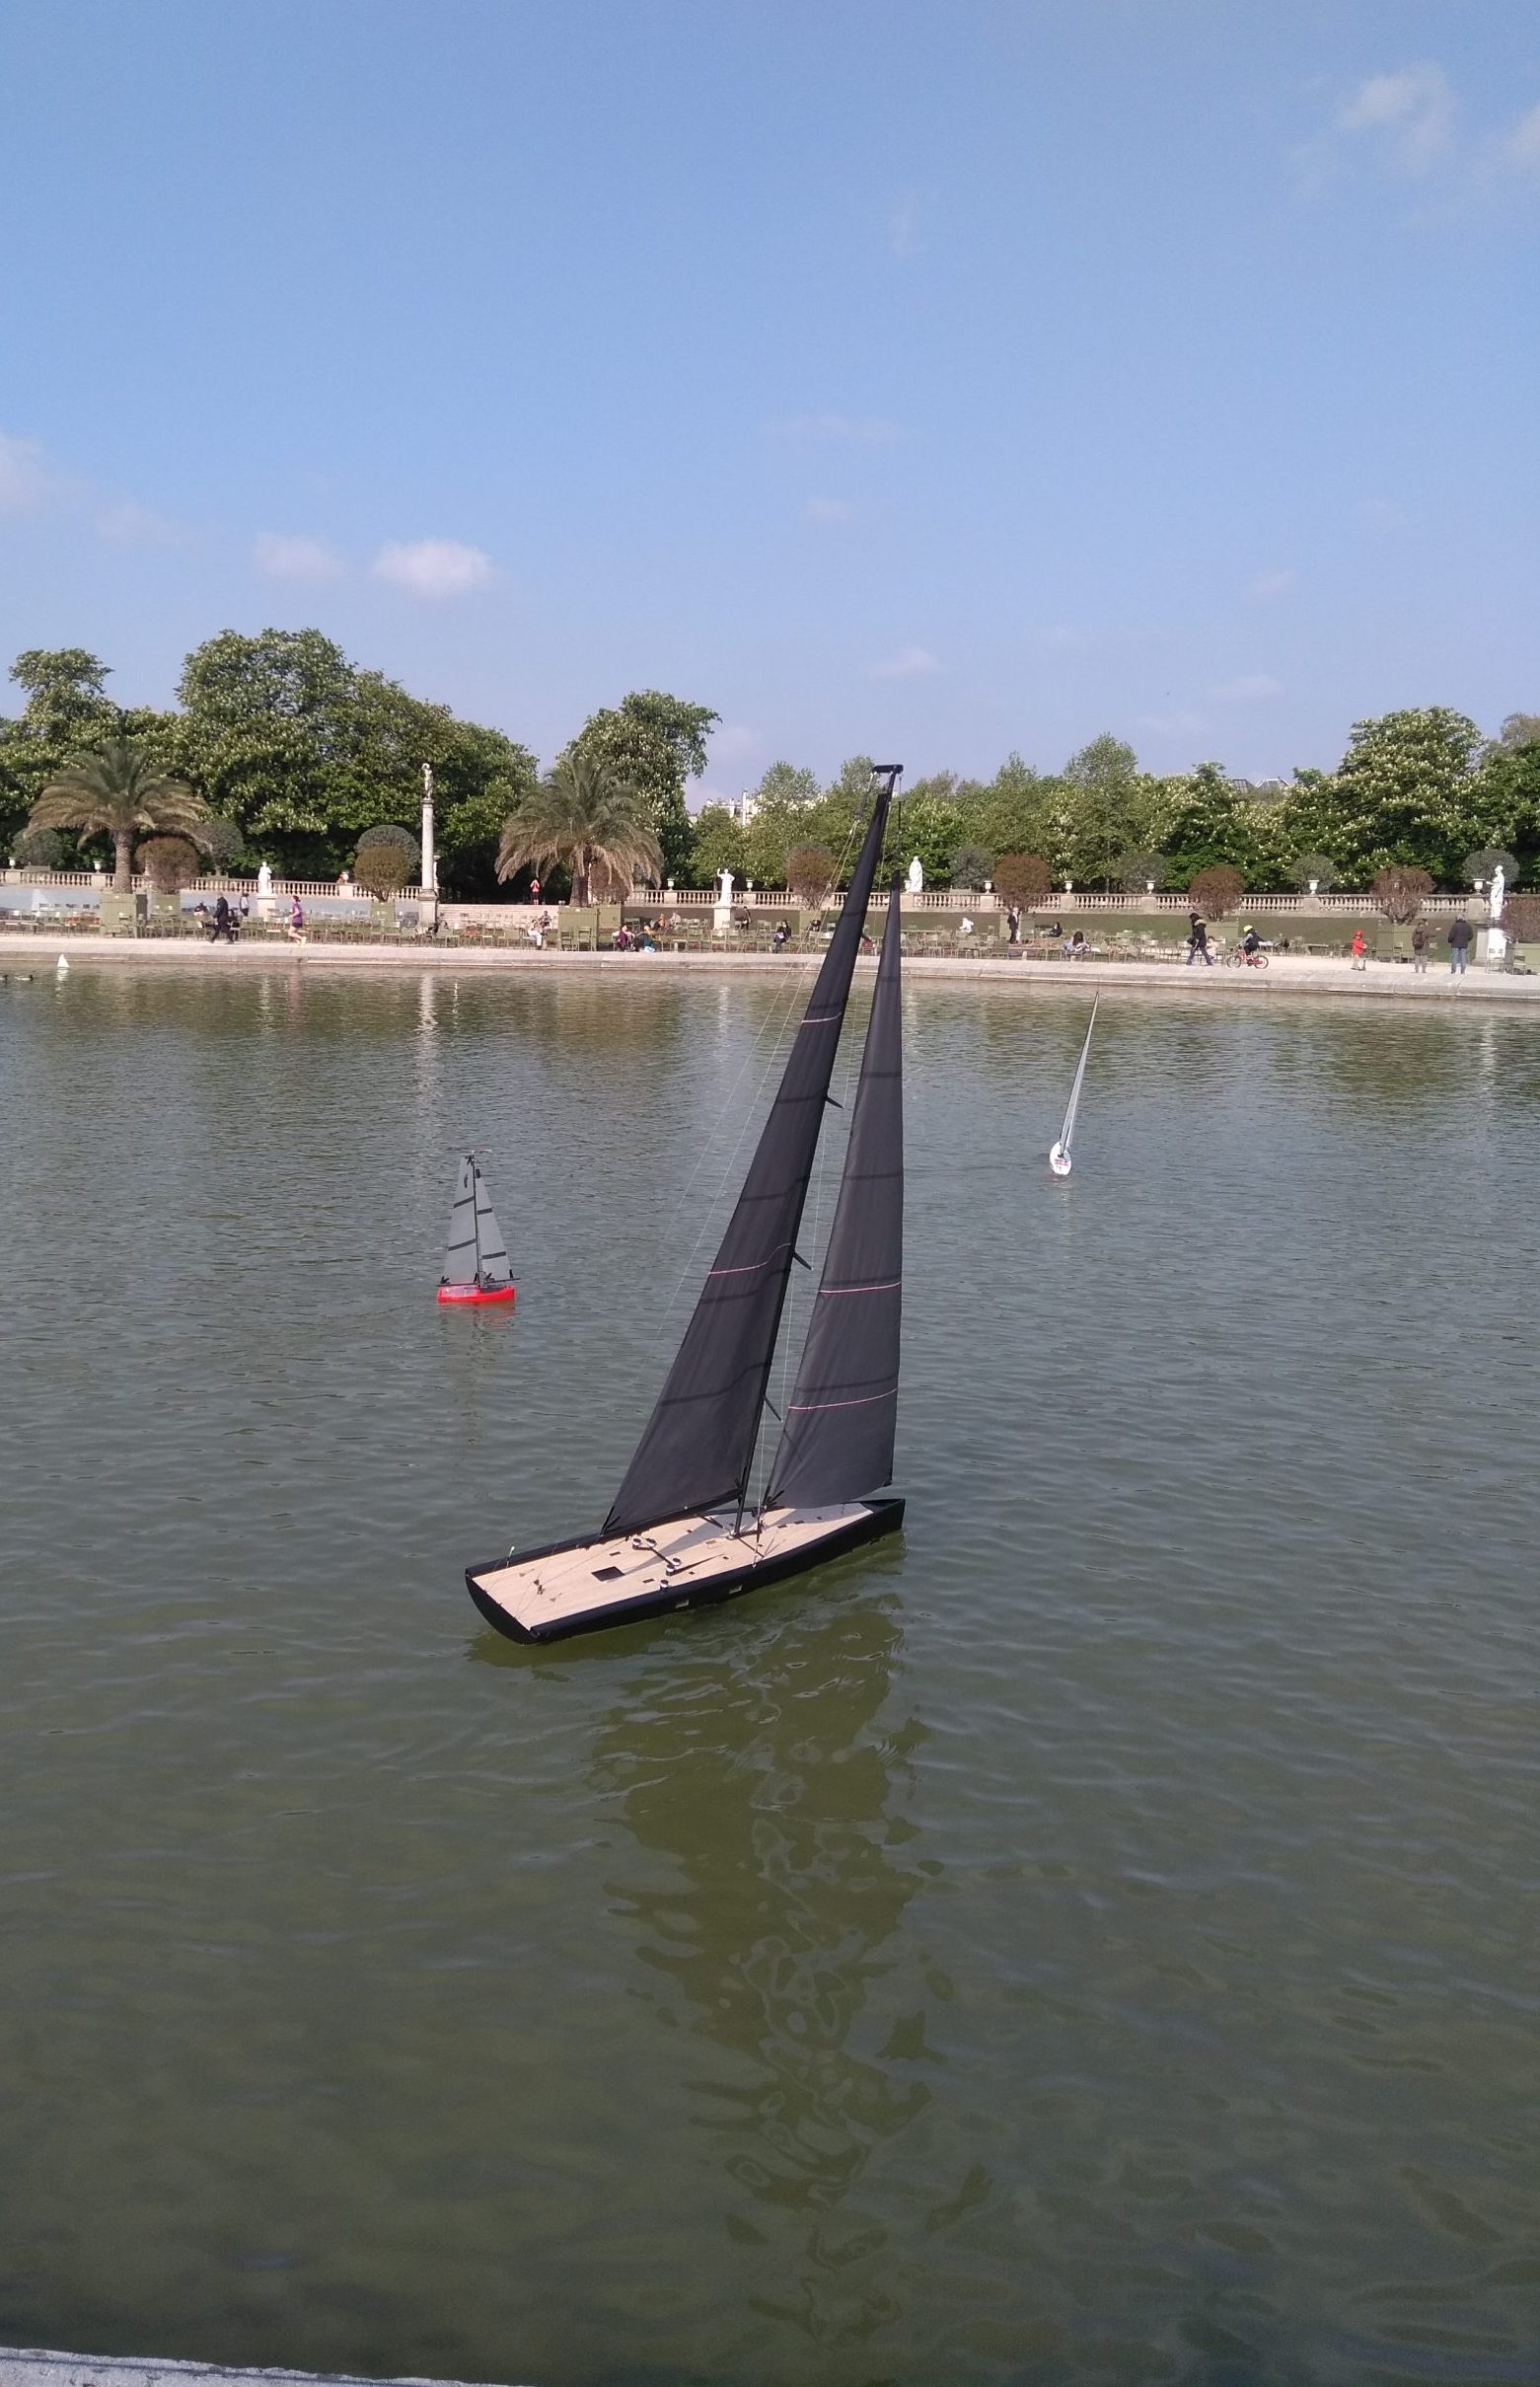
Nice speed. Well balanced. The perfect morning.
I had a great time with my friends at Jardin du Luxembourg in Paris.
Eating the waterline a bit with the 2kg bulb like anticipated. The 1.6kg bulb should be perfect as designed…. but I can not afford to increase the keel size where I am sailing.
The mast is still far from water even with a high angle of list, the next move will be to lower the boom a bit.
Hi there, awesome model! Looking forward to seeing how this progresses.
I am thinking of building a tango modell myself. But I am not a CAD expert.. would you provide the cad file for private use?
Kind regards
Marvin
Hi, the hull is still progressing, but really slowly. The gliders took my spare time during the summer.
I updated this post with the OpenScad source – based on an enhanced version of my module of “3d carving” available on thingiverse.
Let me know if you start its twin !
Hi Guillaume
Where you from? Your Wally is great!!! I built the Esense. Are you on Facebook? Pleas check my Event „bigSail“. You can finde me as FRANCHI VELIERO on Facebook.
Hi, awesome. Thanks a lot! Unfortunately it doesn’t seem to be the correct file?! If you could check that would be great.
I will let you know how the twin goes. Will try to modify the model so it works for 3d printing.
Looking forward to seeing your progress.
Marvin
Hi,
It is the correct file. Unzip it.
Take openSCAD (opensource: https://www.openscad.org/downloads.html).
Open the file “wally-tango.scad” with openSCAD.
It is a fully parametric design. You can edit the .scad file with your notepad or text editor.
The documentation is inside.
For example, change the value of variable ‘processing’ to ‘2’. You get the full rounded empty hull.
At any time, you can generate the STL file for 3d printing with OpenSCAD (F6 for rendering and menu: File>Export>STL)
Now I got it, thank you for the explanation.
Hello, nice build and very detailed build log! Three questions: what is the width of the keel fin, what are the dimensions of the rudder and how did you cast the bulb? By “lost wax” or you just filled the 3d print with small lead pellets? Many thanks, Eduard.
Hello, my keel is 32cm long (external part). The rudder is 19cm long.
To cast the bulb, it is a fast and reliable process with basic tools since I don’t make bulbs every week.
I don’t even need casting sand:
You get the result displayed on this post: /wp-content/uploads/2021/02/IMG_20210209_211717_0-scaled-e1612953460678.jpg